
Pro tip: Remote Desktop on Mac: What you need to know

Image: Apple
yosemiterdc.jpg

Today's technology has come a long way in closing the divide between Windows and Mac applications, especially in the enterprise. However, a gap still exists for some and requires a bridge to move between computing environments.
For Mac users, the stalwart tool has been the Microsoft Remote Desktop connection. Available now through the Mac App store, it allows users to remotely connect to a Windows desktop to access local files, applications, and network resources.
In order to get started with Microsoft Remote Desktop, you must begin by downloading it from the Mac App Store. Click the blue "App Store" icon in your dock.
rdc1.jpg

Once you've accessed the Mac App Store, use the search bar at the top right of the screen to search for "Microsoft Remote Desktop." The first search result should be what you're looking for. To begin the download, click the blue "Get" button. This app is free, so no price will be listed.

rdc2.jpg

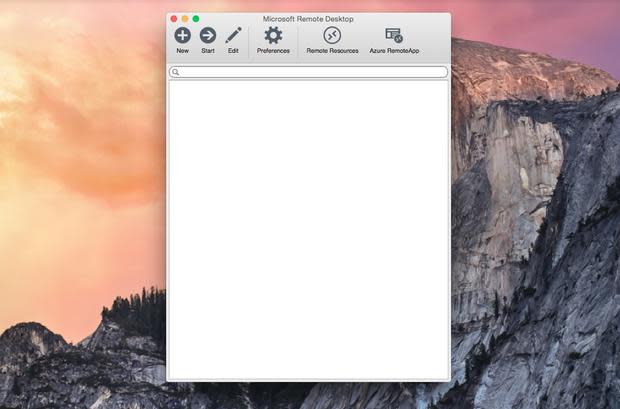
Next, open the application by clicking through the grey "Launchpad" icon and clicking on the Remote Desktop app icon. Or, you can use the searchlight feature by clicking the looking glass at the top right of your home screen, or by using the shortcut Command + Space Bar, and searching for "Microsoft Remote Desktop." Opening the app should look like this:
rdc3.jpg

If you think you'll be frequently using this remote desktop connection, now would be a good time to set it in your dock. Right click (control + click) on the icon, mouse over "Options," and click "Keep in Dock." This will keep you from having to look for the icon every time you need to use it.

rdc4.jpg

At this point you'll need to enable remote access on your target PC. For a Windows 8 machine, the fastest way to get this done is to search for "Allow remote access to your computer" and click on that when it comes up. You may need an administrator password to complete this step. Under the "System Properties" box you should see "Remote Desktop" and the button labeled "Allow remote connections to this computer" should be selected.
Next, you'll need to select the users who will be able to be accessed through the remote desktop connection. Now, search for "System" and click it when it appears. Turn off hibernation and sleep settings for the target PC, as you won't be able to access it remotely if it falls asleep.
While still in "System," it's a good time to go ahead and get your full PC name if you don't already have it, as you'll need it to set up the connection. Click on "Computer name, domain, and workgroup settings" to find the full PC name and write it down. Enabling a Windows 7 computer is a little different, but you can find out how to do that here.
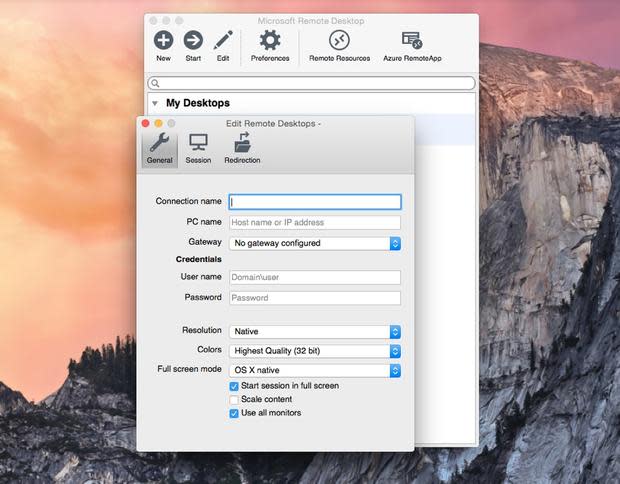
Head back to your Mac and click the "New" button at the top left of the Microsoft Remote Desktop screen. You'll be prompted to fill in quite a few fields.
rdc5.jpg

The first thing you'll need to input is the connection name. This is simply what you want to call the connection and it has no real bearing on the connection itself. For example, you could call it "John's work computer," or "Jennifer's PC."
Next, you'll need to input the PC name (the one you wrote down from earlier), or the IP address so your Mac knows where to find your PC. The next line down allows you to configure a Gateway, which would let you connect to virtual desktops or session-based desktops that are on your company's network. Check with your network administrator to see if there is a gateway you are to use.
Credentials is where you will type in the domain, username, and password for the target PC so you can log in through the remote connection. Resolution, colors, and full screen mode are all personal preferences for how you want the remote desktop to launch on your machine. If you're not sure, start with the standard settings and go from there.
rdc6.jpg

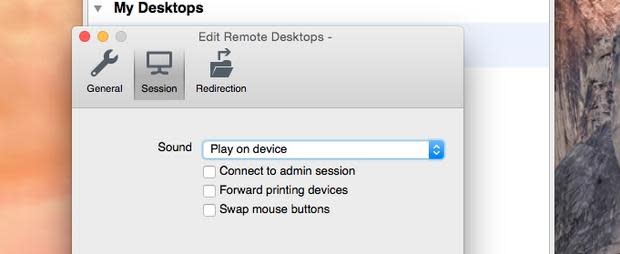
If you want to configure peripheral devices for your remote desktop, you can find options for that under the middle tab, "Session."
The first choice is a drop-down menu for sound. You can disable sound, have it play on the remote PC, or have it play on your Mac. If you want to connect to an administrator session on a Windows server, click the box next to "Connect to admin session."
The next option to "Forward printing devices" will make your local printers available during your remote desktop session. "Swap mouse buttons" will allow you to use left click commands with a right-click Mac mouse.

rdc7.jpg

The last tab at the top of the window is "Redirection." This is where you would choose a local folder you wanted to be available during your remote session. Click the "+" button, choose a name for the folder, and input the folder's path to have it available.
When you are finished configuring your remote desktop, click the red close button at the top left of the dialog box and your new remote desktop will be added. To start a session with that desktop, simply double-click it to begin.
If you want to edit, duplicate, export, or delete that remote connection, right-click (control + click) on the desktop name to access those options.
What do you think?
Is there a better way to access your Windows applications? Tell us in the comments.
