


Automatically Eject Drives at Boot in Mac OS X with Automator

The popularity of FireWire, Thunderbolt, and USB devices mean that most Mac owners have at least one external hard drive connected to their computer. Depending on the purpose of each drive, however, not all users want to have every drive mounted.
In our case, we have a backup drive that holds an exact clone of our system drive. We only use it once per week to perform a clone operation and, to protect the drive from inadvertent changes while we use our Mac, we don’t want it to mount when it’s not needed. Instead of physically disconnecting the drive or manually ejecting it from Finder, a small Automator workflow can do the job for us. Here’s how to automatically eject a disk in OS X with Automator (Note: while this tutorial deals with an external FireWire drive, the steps will work with drives attached via any external interface, along with internal drives in Mac Pros or other Macs with multiple internal drives).
To get started, make sure the target drive is powered on and mounted. Then open Automator from your Mac’s Applications folder. We’re going to create a workflow that will operate as an application, so choose “Application” from the document type dialog.
For those unfamiliar with Automator, the utility provides an easy way to automate tasks in OS X. Actions and variables are available in lists on the left and they can be dragged into a particular order in the workflow on the right. Experimenting with Automator can be both fun and rewarding, and is a great way to discover new functionality in OS X. For our purposes, we’ll walk you through the steps so that you do not need prior Automator experience.
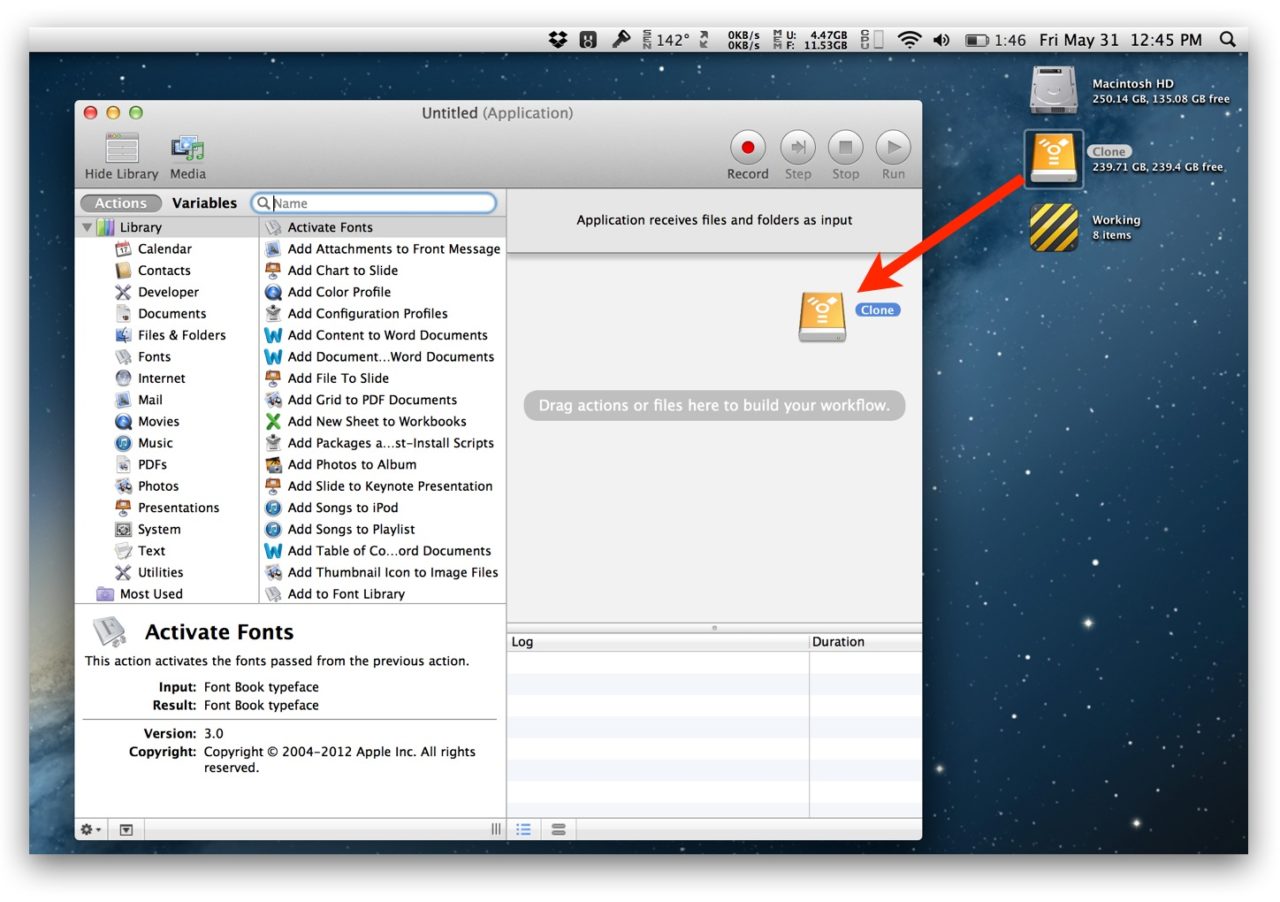
Now that you’ve selected your document type, we’ll create a very simple workflow consisting of just two steps. First, drag and drop the target external drive into the workflow on the right side of the Automator window. This tells Automator that we want it to start with this particular drive. In our example, we’re unmounting only one drive; if you’d like to unmount multiple drives at once, simply drag additional drives into the “Get Specified Finder Items” action under your first drive, or use the “Add” button to manually select additional drives from the Finder.
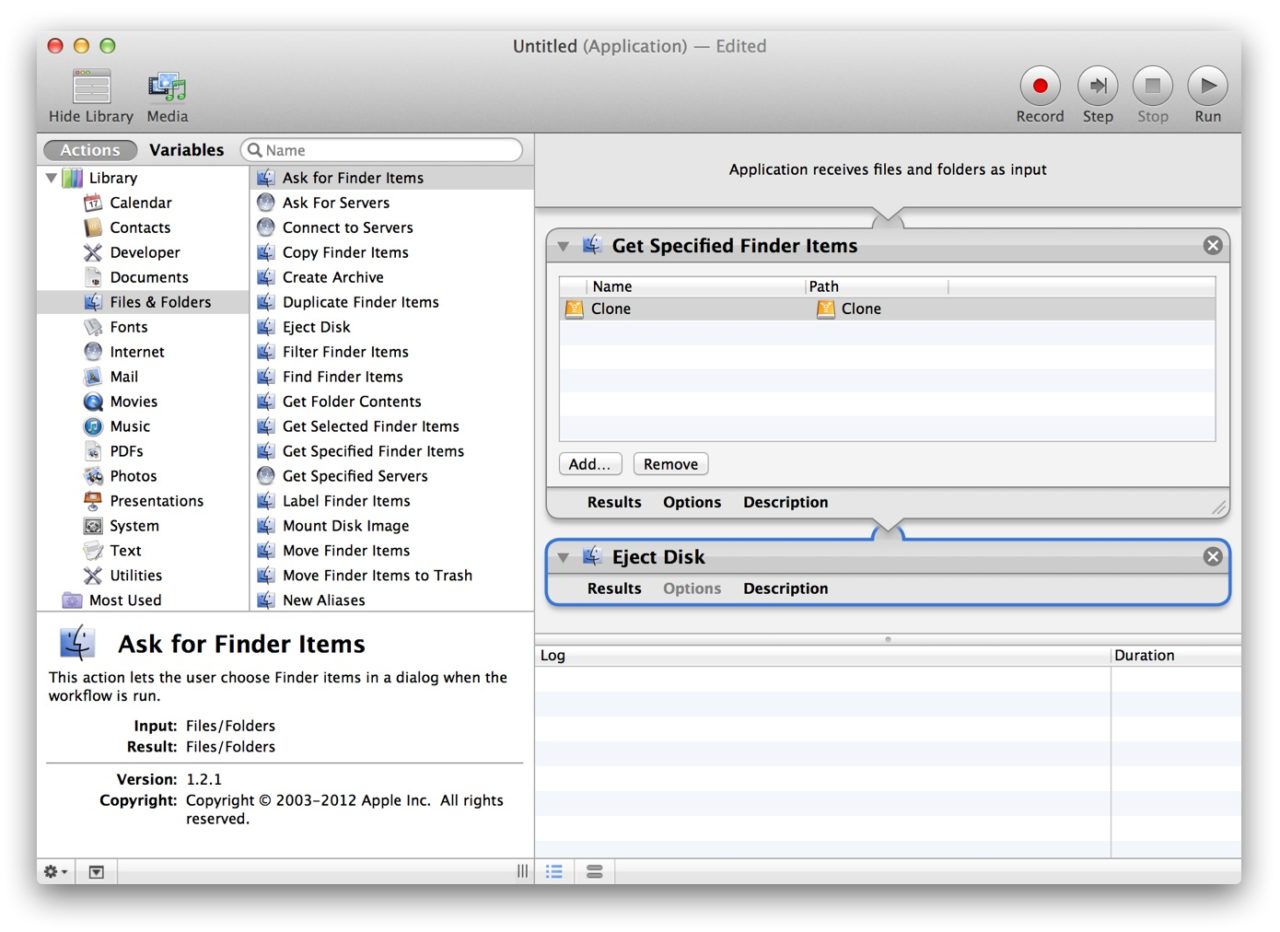
Now that we’ve told Automator which drive we’re working with, we need to tell it what to do. From the Actions list on the left of the window, choose “Files & Folders” and then “Eject Disk.” Drag “Eject Disk” to the workflow on the right and drop it below the “Get Specified Finder Items” action.
When the workflow runs, it will now get the disk(s) we chose in the first step and eject them from the system. Note that when the “Eject” command is applied to an external hard drive, it will unmount all volumes on the drive. If applied to an optical disc, it will physically eject the disc from the drive.
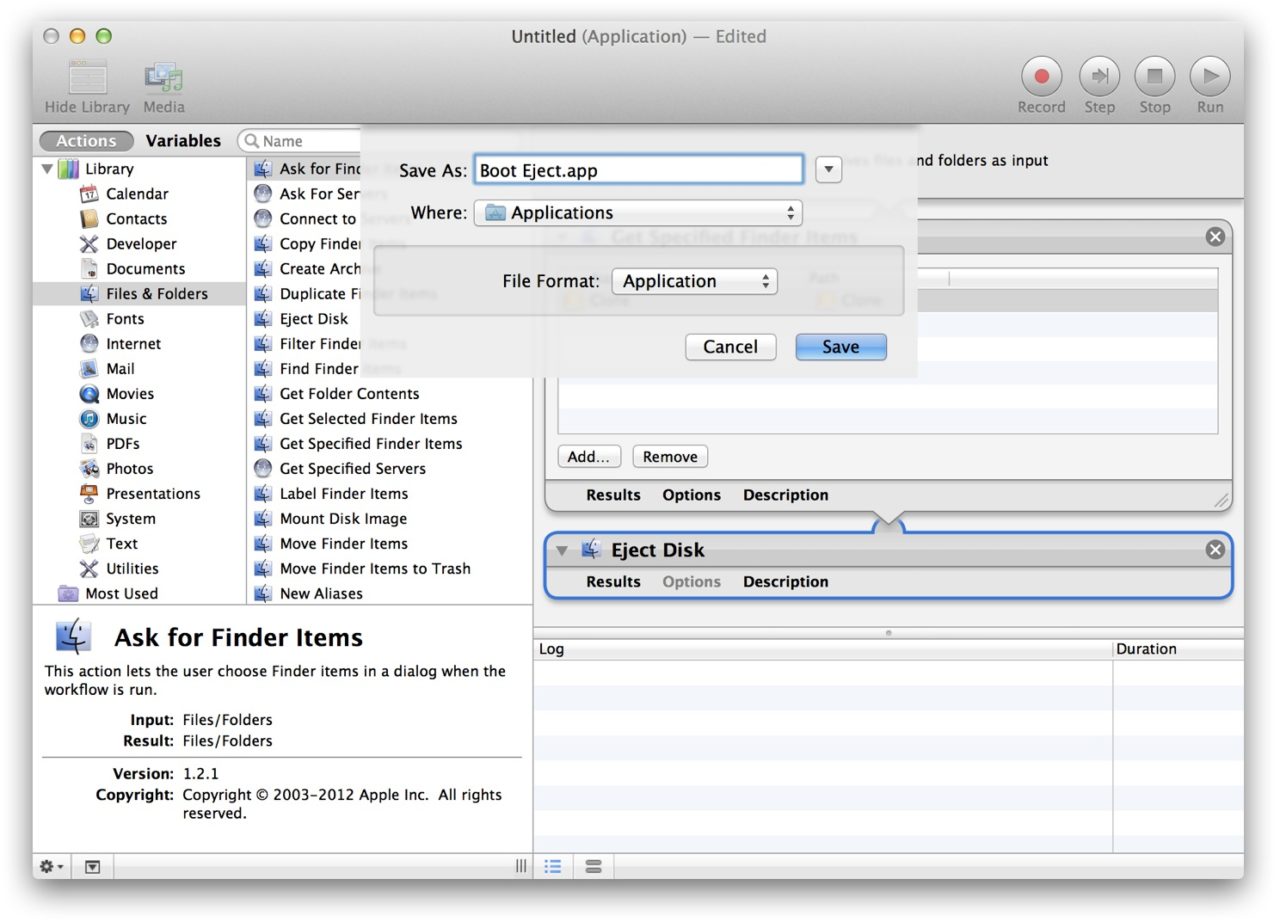
Next, we need to save the workflow as an application so that we can tell OS X to launch it upon boot. Go to File > Save and give your workflow app a name. We’ll use “Boot Eject” and save it to our system’s Applications folder.
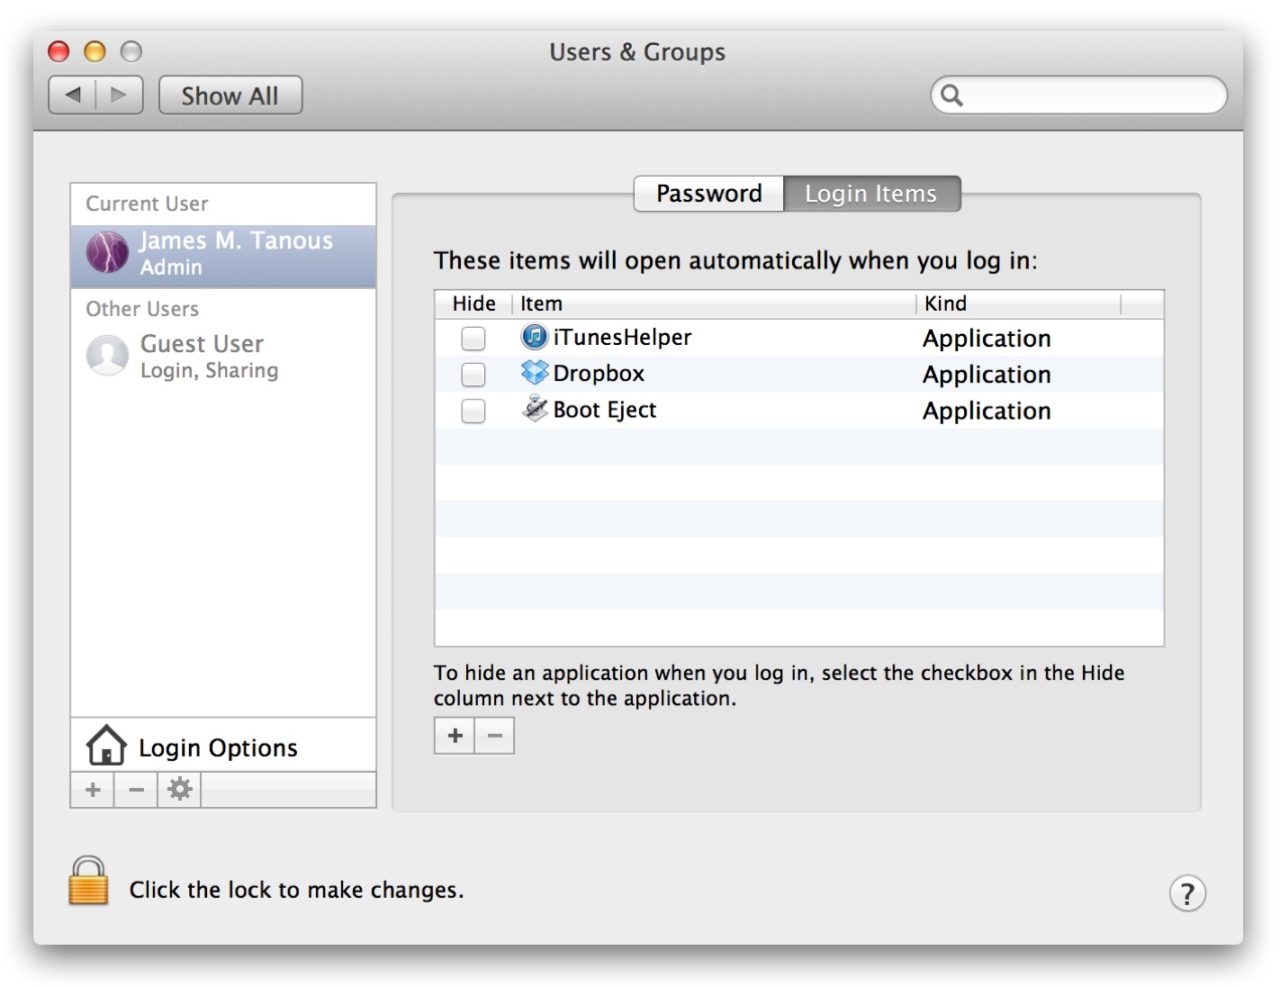
We now have a self-contained app that, when run, will eject our desired disks. We can run it manually from the Applications folder, but we want it to run automatically at boot. To do this, open System Preferences > Users & Groups. Select your user account and choose “Login Items.” This shows a list of all apps that are currently configured to run when a user logs in. Press the plus button to add an item, navigate to your Applications folder, and select your Automator eject workflow.
Now, whenever you log in to your user account, or reboot your Mac, your selected disks will automatically eject. If you need to mount them temporarily, in order to access the data or perform backup operations, you can use Disk Utility to manually mount each disk. If you’d like to undo the process entirely, simply remove the Automator action from your user account’s login items in System Preferences.


3 thoughts on “Automatically Eject Drives at Boot in Mac OS X with Automator”
Thanks.