Reports surfaced this morning that the Nexus 4, Google’s latest flagship Android smartphone, supports LTE via a relatively easy software hack. After testing, it turns out that’s definitely true, so I’ll show you exactly how to enable it on your device. Fair warning: the Nexus 4 only supports LTE on the AWS band (1700 or 2100MHz), which is currently used for LTE networks in Canada, and for some areas served by T-Mobile’s fledgling 4G network.
Step 1: Access Phone Testing Settings
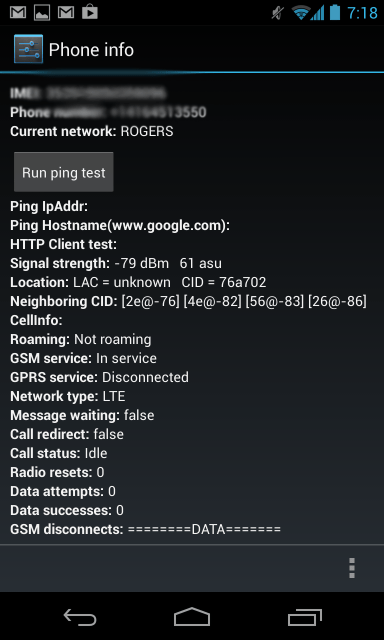
Your phone’s dialer is the key to getting entry to the system menu where you can switch your radio preferences. Just open your phone app, and type in *#*#4636#*#*, which will instantly take you to the necessary preference panel seen below. You can also download and install the Phone Info app from Google Play if you’d rather not have to re-enter that sequence every time you want to change these settings (the app also stays open, so you can recall it via Android’s app switcher so long as it has been active recently).
Step 2: Change Your Phone’s Cellular Network Type
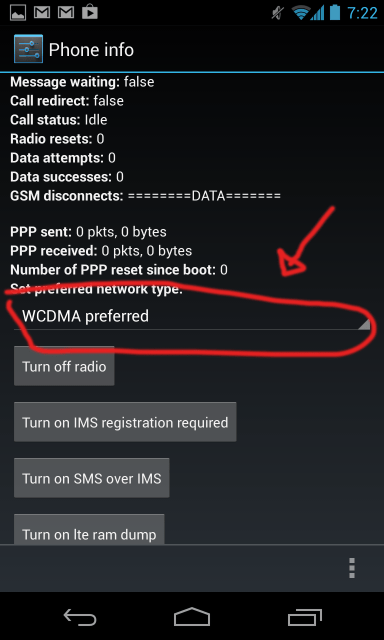
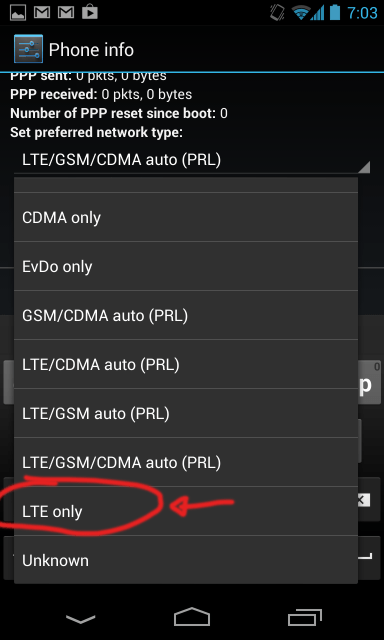
From this screen you can switch which networks your phone connects to under the “Preferred Network Type” drop-down menu. There are options for various combinations of CDMA, GSM, LTE and more.
In my testing, I found that the only sure way to get LTE to actually kick in and take over is to set your preferred network to “LTE only.” Using the options that auto-select between LTE, GSM and CDMA seemed to just cause the phone to default back to HSDPA+ speeds where available, although I’m seeing other users are having success with any option that includes LTE.
Step 3: Change Your APN Settings
Dig down through Settings, Mobile Networks, Access Point Names and change your APN Settings. The XDA Developer forums show you a number of ways and which values you need to change to make it work, depending on your carrier. You just change the APN name for Rogers users, to “lteinternet.apn.”
Step 4: Enjoy The Speed Boost
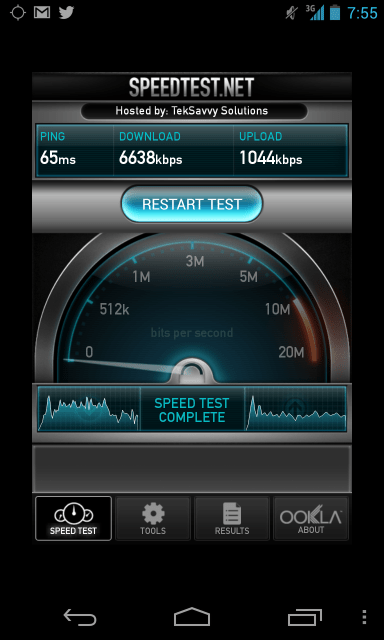
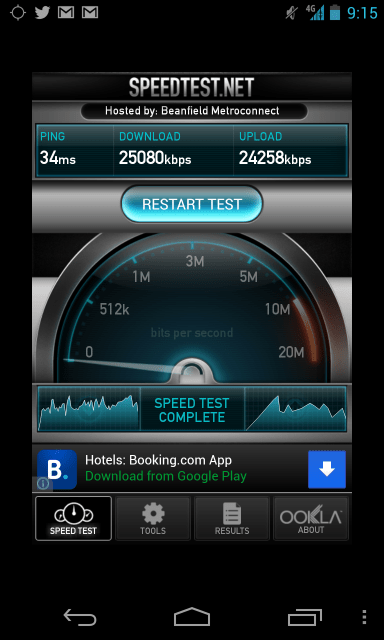
It may seem like there should be more to this, but there isn’t. After you’ve changed that radio setting, your phone should disconnect from the network, and then reconnect with LTE speeds. I immediately jumped into Speedtest to check out the difference, and lo and behold, download speeds exploded, as did upload rates.
HSPA+ Speeds
LTE Speeds
Caveats
This is great, and I’ll be using my Nexus 4 hard-switched to LTE bands for the foreseeable future, but there are some things to keep in mind. First, this is technically a back door trick, even though it’s relatively simple and doesn’t require any hardcore hacking. That means Google could potentially shut down the loophole if it has reason to. Second, there’s no telling how enabling LTE on a phone which ostensibly isn’t designed for it will affect device battery life. The Nexus 4 wasn’t the strongest performer in that regard to begin with, so I’m a little worried about the ultimate effect there, but not enough to stop me using those sweet, sweet LTE speeds.
If, for any reason, you want to turn this off after enabling, just follow the same steps above and choose a preferred connection speed that’s compatible with your carrier’s network but doesn’t include LTE as an option.
Update: It turns out that enabling LTE breaks Google Now’s ability to connect to the network for some reason. That’s too bad, since Google Now is arguably on of Android 4.2’s best features, but if you can live without it, the LTE speeds are a good trade-off.

