
Macs are awesome, but macOS search isn’t always great. While the built-in search tools for Finder are powerful, they’re not immediately discoverable. Users can work on Macs for years without realizing how capable Finder’s search is beyond simple keyword search. Here’s how you can unlock the power of Finder and search for files on macOS more effective.
1. Use search operators
Finder’s search box goes beyond simple keyword search. You can control what files appear with simple text operators and more flexible smart operators.
Text operators
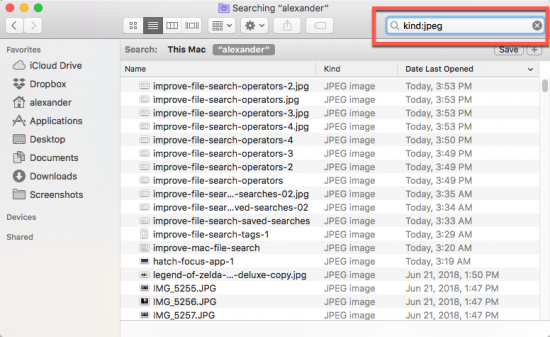
The simplest but least powerful way to target your search is with textual operators. As when searching in Google with advanced options, these text cues refine and control your search behavior beyond keywords. The most common text operator, kind, is written like so:
kind:[file type]
The file type can be almost anything, from a word like “document” to an extension like .docx. It scans the text under the “Kind” title. If you’ve seen something there, you can use it as a keyword.
Similarly, you can use the date operator to limit your scope to files of a certain date or recency. Using date:today will only search for files from today.
date:today
The date operator use relative date operations, so yesterday also works.
You can further narrow your search by using the created and modified operators which accept an eight-digit date, like so. This will search for files from that date only, and none of the days around it. Unless you know exactly when you created the file, it’s not typically that useful.
created: 01/02/2003
modified: 04/05/2019
Smart operators
Moving beyond text-based operators, smart operators allow you to search with preset system tools. These operators aren’t specified in the text box, but instead added to your keyword search after the face.
First, start a basic search in a Finder window by typing text in the search box. Then click on the “+” button below to add the first operator.
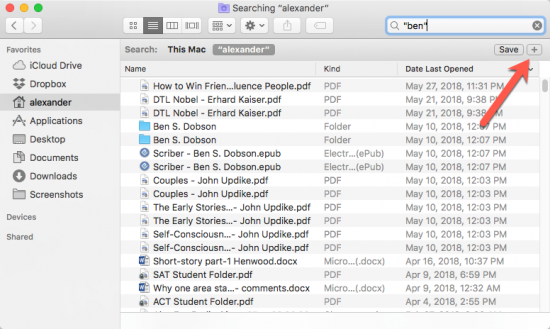
This button adds a new smart operator. By default, they add in a specific order, but can be modified by clicking the first drop down box. The first smart operator will automatically set a “Kind,” the next “Last Opened Date,” and so on.
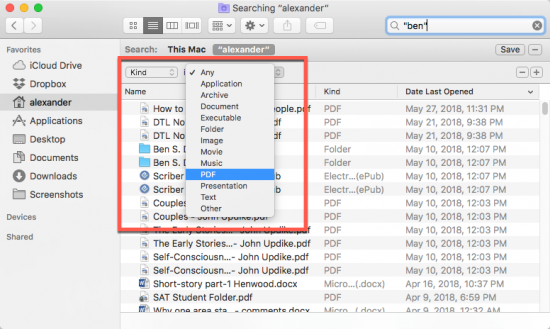
For now, we’ll set the Kind to “PDF,” so we only see PDF files in our search. Of course, this will only include PDF files that match our search string. It will also search within documents by default.
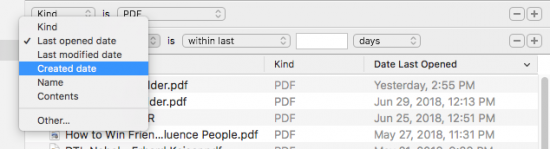
Click the “+” button again to add another operator. This will reveal a different operator. By default, it will be “Last Opened Date.”
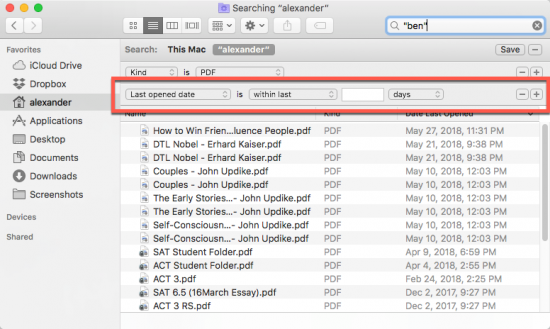
Let’s click the first drop down and select “Created date.” Now we can limit our search to files created in the last few days.

There are a number of other options that can be applied. Keep adding search operators, or adjusting the existing operators to refine your search.
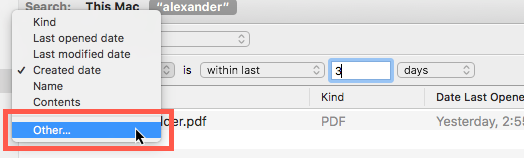
Uncommon Search Operators
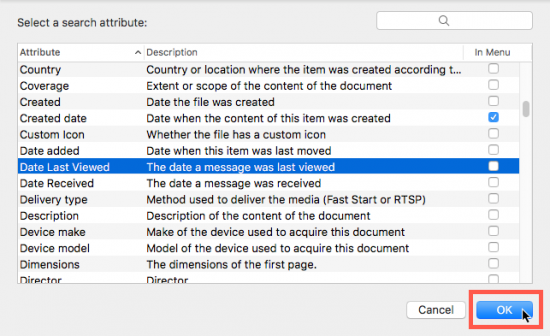
To expand your search even further, chose “Other…” in the first drop down to access a list of uncommon smart search operators.
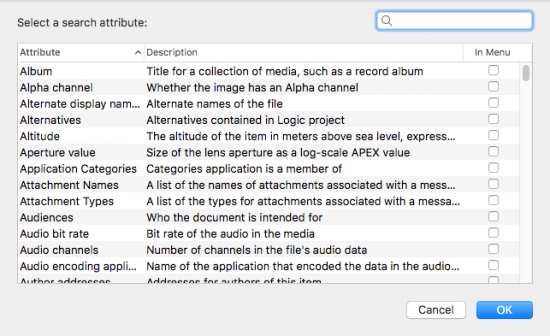
If you want the search operators to appear in the drop down menu from now on, tick “In Menu” on the left-hand side. This allows you to adjust the drop down to include your most-accessed operators. You can also un-tick the default operators if you never use them.
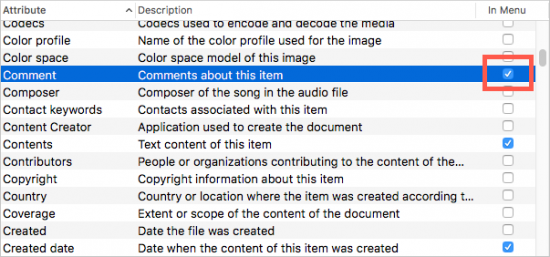
If you want to add an operator to this search, click on the operator and click the “OK” button.
2. Search current folder
By default, Finder will search your entire system when you type in the search box. Set it to default to your current folder instead for more precise searches.
1. Open Finder’s preferences under the Finder menu.
2. Click on the “Advanced” tab.
3. Change the drop down box to “Search the Current Folder” to limit your searches.

3. Set tags and Spotlight comments on important documents
File names and contents aren’t always perfect. Often, you might search for a document later with different search terms that it contains.
Let’s say you’re trying to look at all your tax documentation from the last several years. You know it’s saved on your computer, but it’s in different folders and with different names. If you tag all those files with a certain tag, or include specific Spotlight comments in the file info, you can search them up easily in the future. This allows for flexible keywording of files on a selective basis.
You do need to put some work in beforehand for this to be useful. But if file management is important to you, it’s a relatively simple process.
Using Tags
Tags can be customized in Finder’s Preferences window under the “Tags” tab. Right-click on a tag and choose “Rename tag…” to apply your own name.
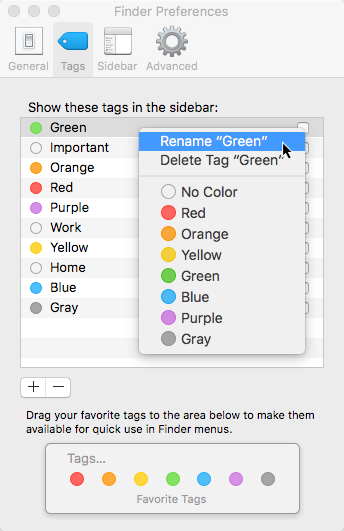
Right-click on a file and choose the color tag to apply. Tags will always have their visual color (red, green) as a search term, as well as the title of the tag, if different. This enables you to search by color or tag name.
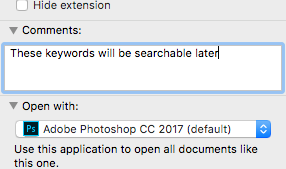
Spotlight Comments
If you want to get more invasive, you can set Spotlight Comments. They’re way more flexible than tags, but unless you know how to write a script to batch apply them, they’re far more time consuming.
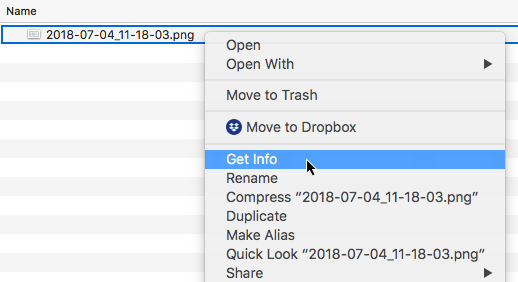
On a given file, click “Get Info.”
Expand the “Comments” drop down if necessary.
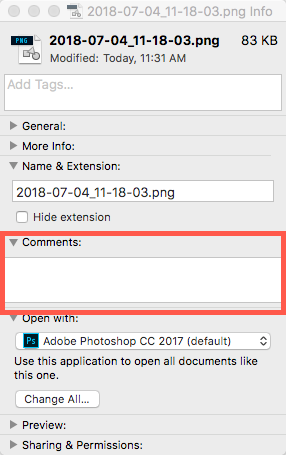
Type your keywords into that box.
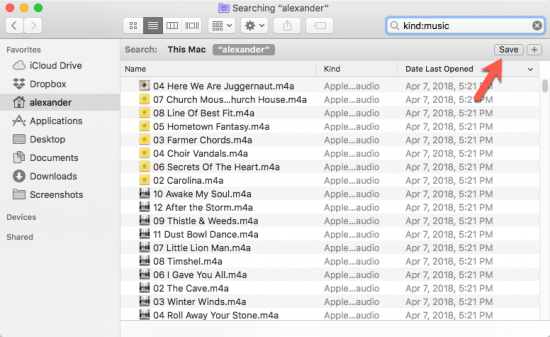
4. Save searches
Searches, especially smart searches, can take a little bit of effort to set up. If you frequently execute the same search, you can save it to the Sidebar of Finder. Simply clicking on the entry will recreate the search. This also has the effect of building a system-wide, always-updated “folder” of items matching your search terms.
First, build your search in Finder as normal. For the sake of example, we’ll use a simple text operator search. Then, click the “Save” button underneath the search window.
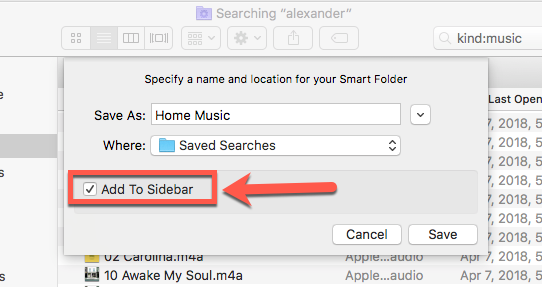
Give the search a name that’s descriptive enough to remember what it does. Leave the saved location the same. Most importantly, make sure that “Add to Sidebar” is checked.
5. Expand with other tools
These tips will help you improve your searching effectiveness while using Finder. If that’s not enough, other applications can expand your search prowess.
EasyFind is an older application, but it will search through every file on your system, including system files. Path Finder is a Finder-replacement utility that includes powerful search and filtering tools, which are much faster and more effective than the default Finder set. Alfred replaces spotlight, enabling powerful search directly from the task launcher, without touching your mouse.