Did you ever download an audio file to your iPhone, and then wonder just how you are supposed to listen to it? Maybe you have a few recorded lectures you want to listen to on a plane, or you have some audiobooks you’d like to listen to on the beach. The bad news is a that you can’t add music or any other audio to your Music app library without a Mac or a PC.
Since iOS 11, you’ve been able to download and save audio files in the Files app, but good luck listening to them. It’s like listening to audio in the Finder on your Mac, with no way to save your place, or really control the playback much at all.
But there’s a better way. The Overcast podcast app, which is pretty excellent in general, also lets you upload your own audio files, and then it treats them as regular podcast episodes. We also have a more complex method that takes a bit of setup, but can be used with any podcast app, including Apple’s own. Here’s how to use them.
How to upload you own files to Overcast
Overcast is a fantastic podcast player, not least because it strips out the pauses in people’s speech, making podcasts much less frustrating to listen to. The app is free to download, but if you want to upload your own audio files, you’ll have to pay a $10-per-year subscription (this also unlocks several other features).
Once you have done so, you can upload your own files to Overcast, via its website. This is easy.
Step 1. Activate the paid subscription in the Overcast app on your iPhone or iPad.
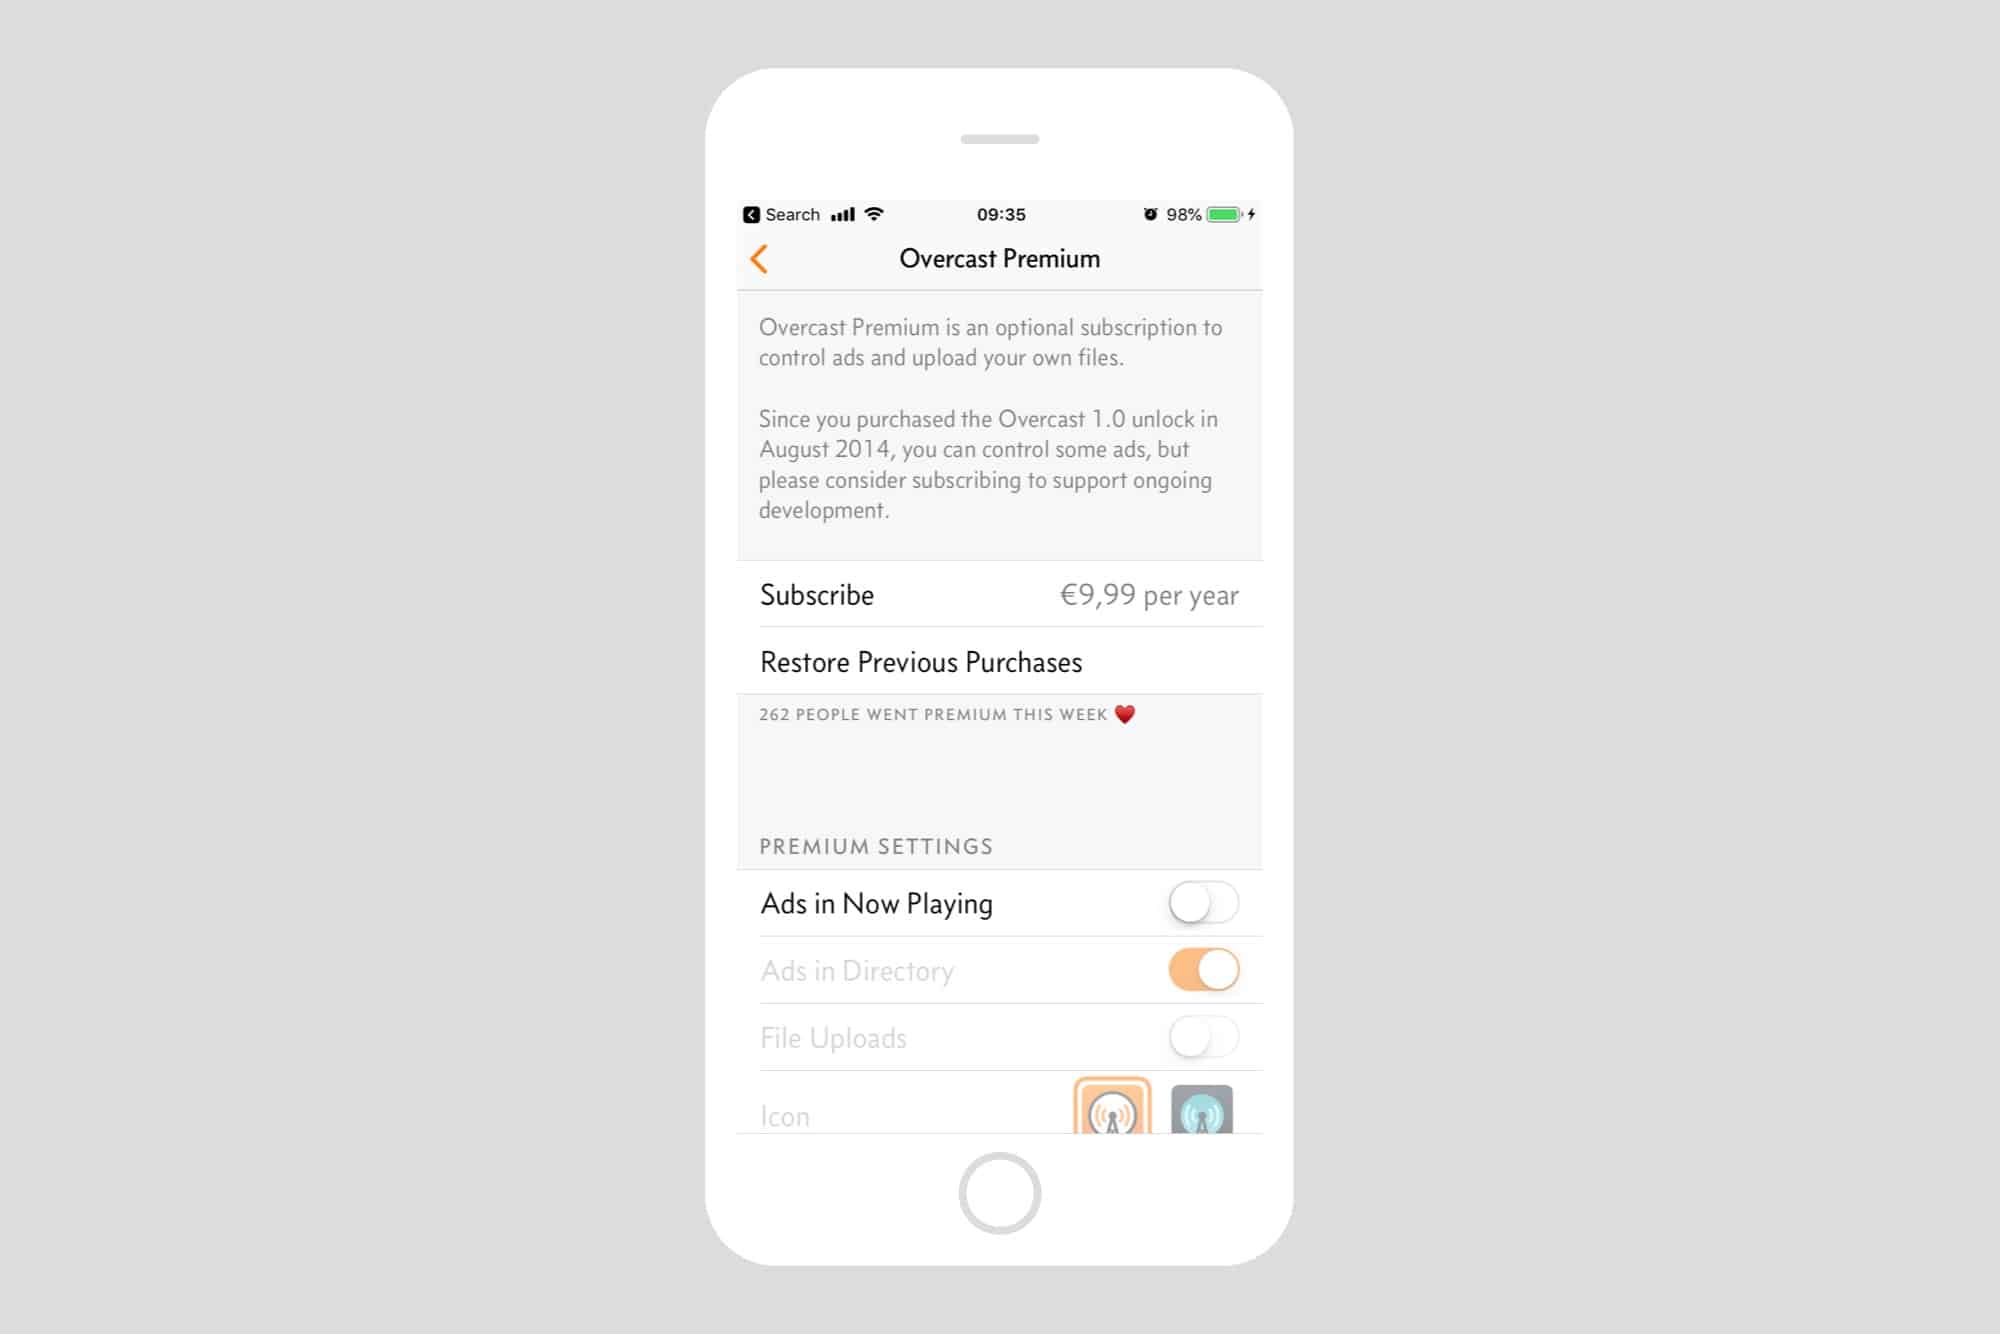
Photo: Cult of Mac
Step 2. Create an Overcast account.
You’ll need to create an Overcast account in order to sign in to the Overcast web app. This is also found in Overcast’s settings, as seen in this screenshot:
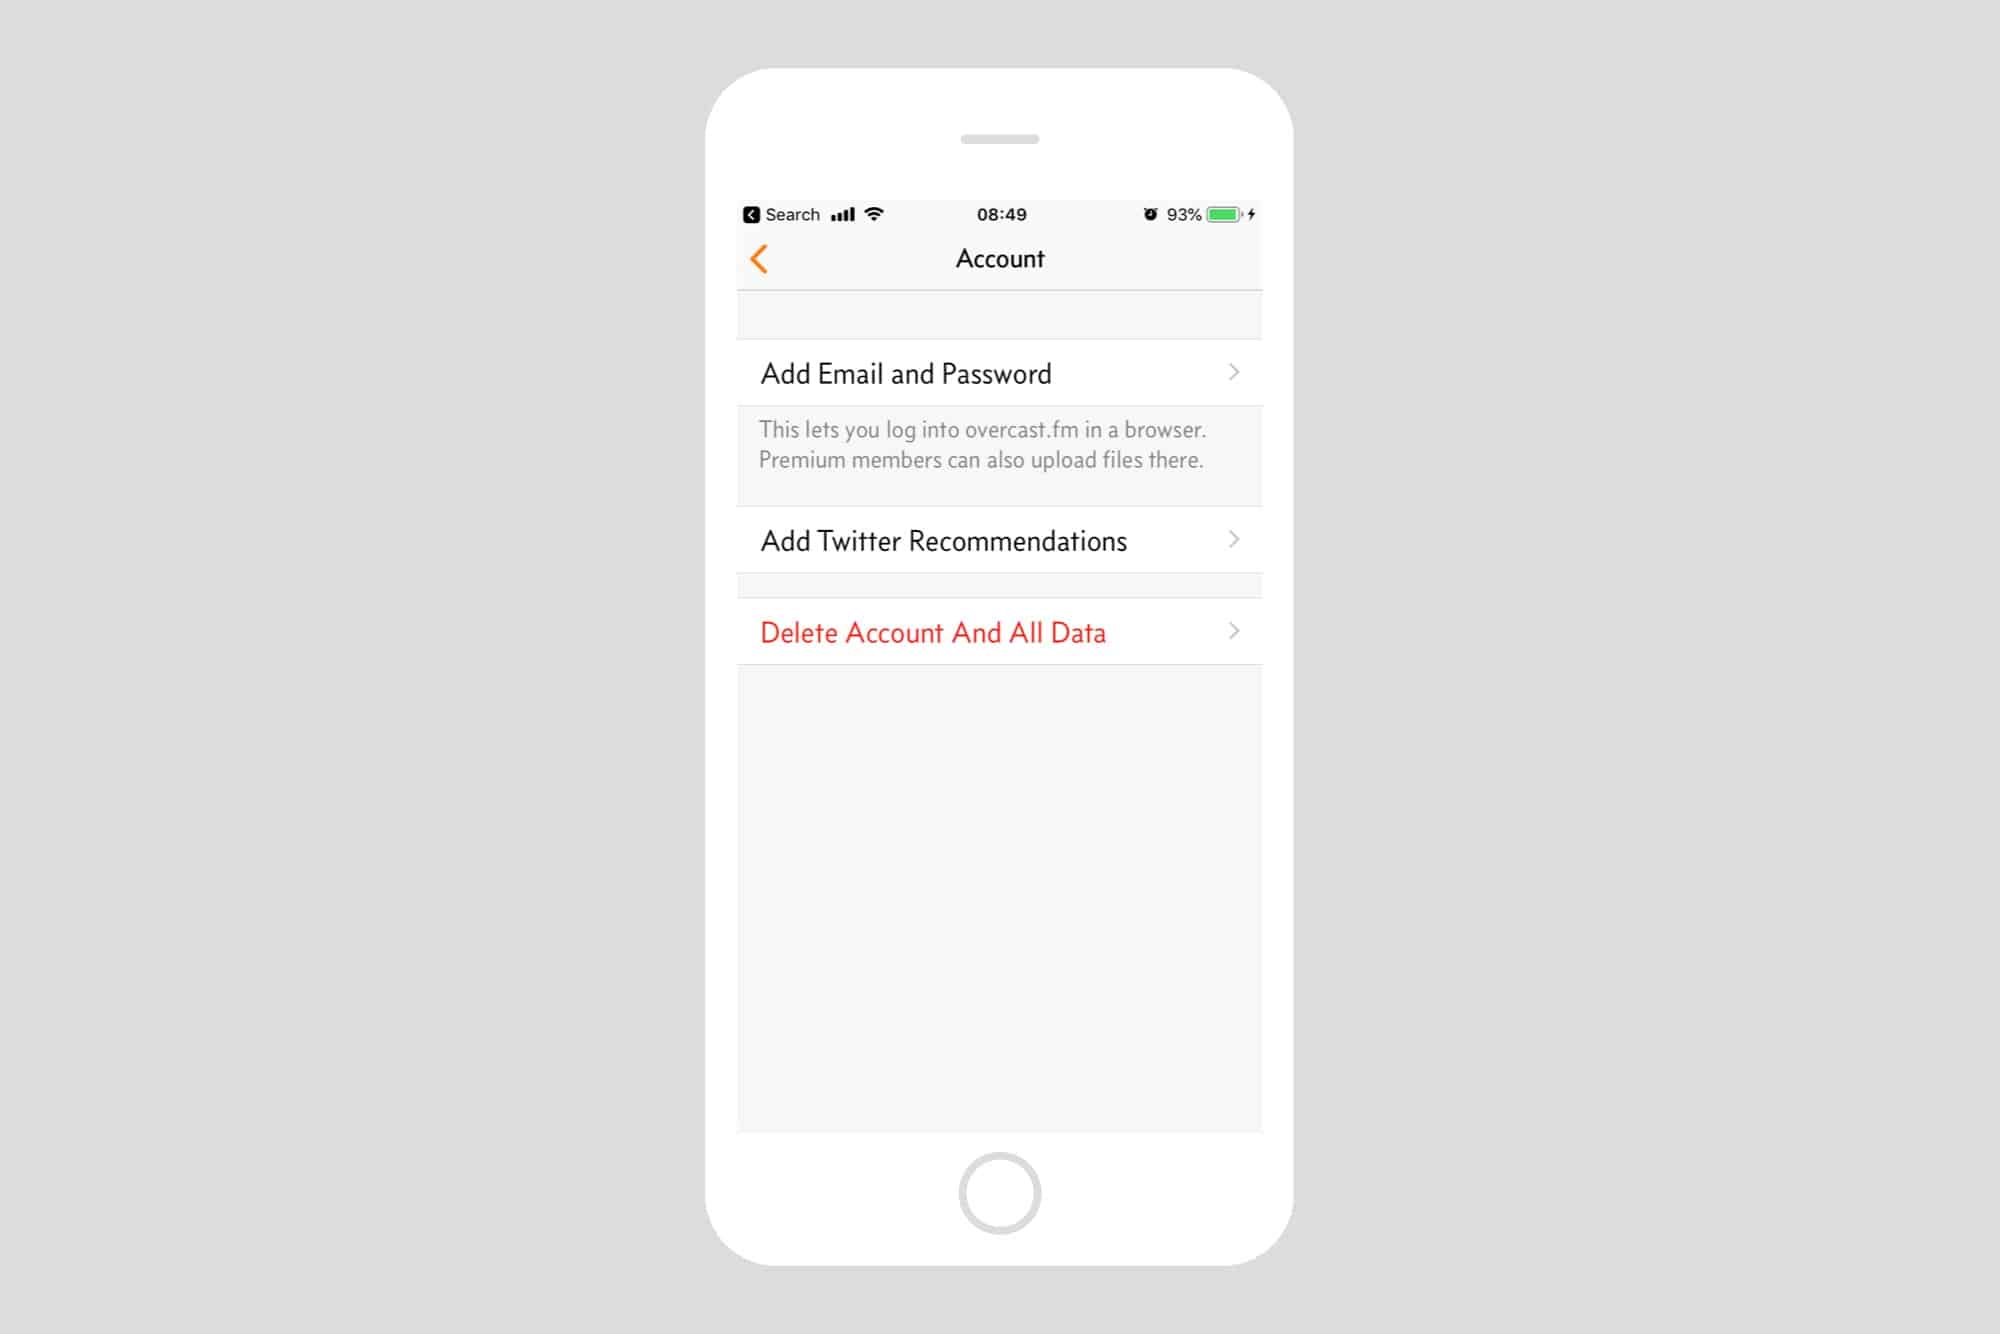 Overcast defaults to no account, so create one here.
Give it a username and password, and then you’re off! You’re now ready to upload a file.
Step 3. Upload any audio file.
Once you have an active subscription, and are signed into your account at Overcast.fm, just head to overcast.fm/uploads, and you’ll see a familiar web form for uploading files. You’ll actually need to have some files to upload, which is outside the scope of this how-to. IT’s easy, though — when you download an audio file from Mobile Safari, you just save it in a folder somewhere in your Files app and go from there. And you can, of course, upload files from your Mac.
Step 4. Listen and enjoy!
Your uploaded files appear in a special section of Overcast, ready to be downloaded or streamed just like any other podcast. This is a great way to add the odd file to your iPhone for listening.
Roll your own podcast with Zapier
Long-time readers will be familiar with If This Then That, or IFTT, a great service that connects other web services to each other, enabling automation. Zapier is like a pro version of IFTTT, with a lot more control, better features, and far, far less home-automation crap.
For today’s how-to, we’re going to use Zapier to turn a folder of audio files in your Dropbox into a podcast RSS feed. This is super-simple, because Zapier already has an action set up to do it. All you need to do is sign up for an account (it’s free to join, with limitations), and point it at your own Dropbox.
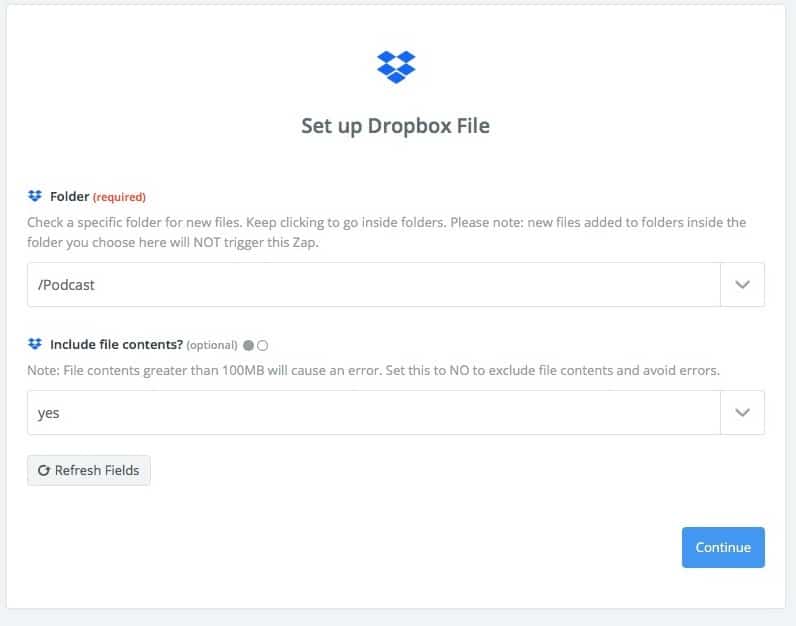
Photo: Cult of Mac
First, sign up at Zapier, if you haven’t already. Then, create a new folder in your Dropbox. Let’s call it Podcasts. Next, head to Zapier and add this action: Get an RSS Feed of All New Files in Your Dropbox. If you haven’t already connected your Dropbox to Zapier, you’ll be prompted to do so.
Then, you just follow along with the step-by-step setup process. It looks complicated, but you don’t really have to do very much to the default settings. You’ll need to pick the Podcasts folder in your Dropbox, then hit Continue.
Roll your own podcast feed
You’ll see this screen, which looks like a nightmare, but you don’t ned to do much at all. Pretty much everything is filled in already. Just make sure to copy the Feed URL at the top of the page (you’ll add this to your podcast app later), and
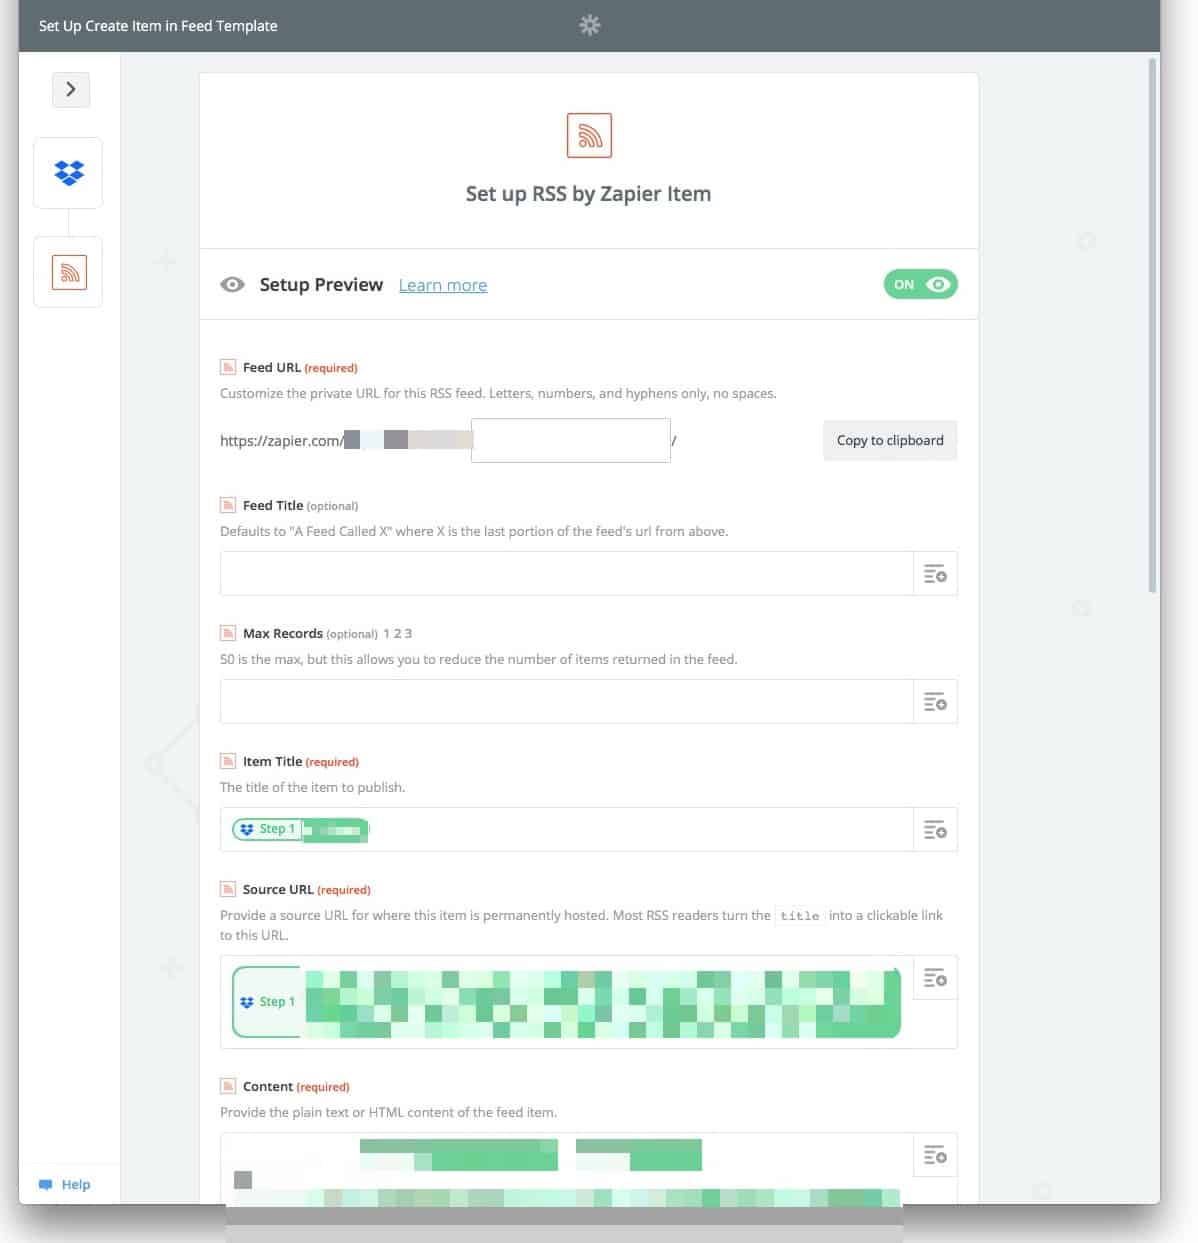
Photo: Cult of Mac
The one change I made was in the Media URL section, where you can “Specify a raw download URL for your podcast file, image, or other media file.” I clicked the dropdown arrow next to the box, and picked the Direct Media Link, as seen here:
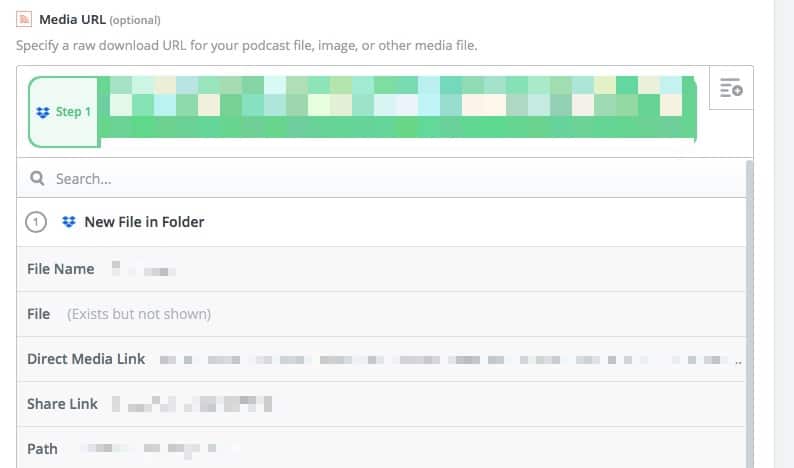
Photo: Cult of Mac
This makes sure (I think) that the RSS feed contains the raw audio file, so that Overcast (or any other podcast app) can use it. Then, click Done and Finish, and make sure to switch your “Zap” on.
Dropbox isn’t really meant for hosting podcasts, and if you host a popular public podcast this way, then you’ll soon get shut down or cut off. But for personal use its ideal. And if you are a teacher, say, then you could also use this method to share files with your class.
Add your new feed to your podcast app
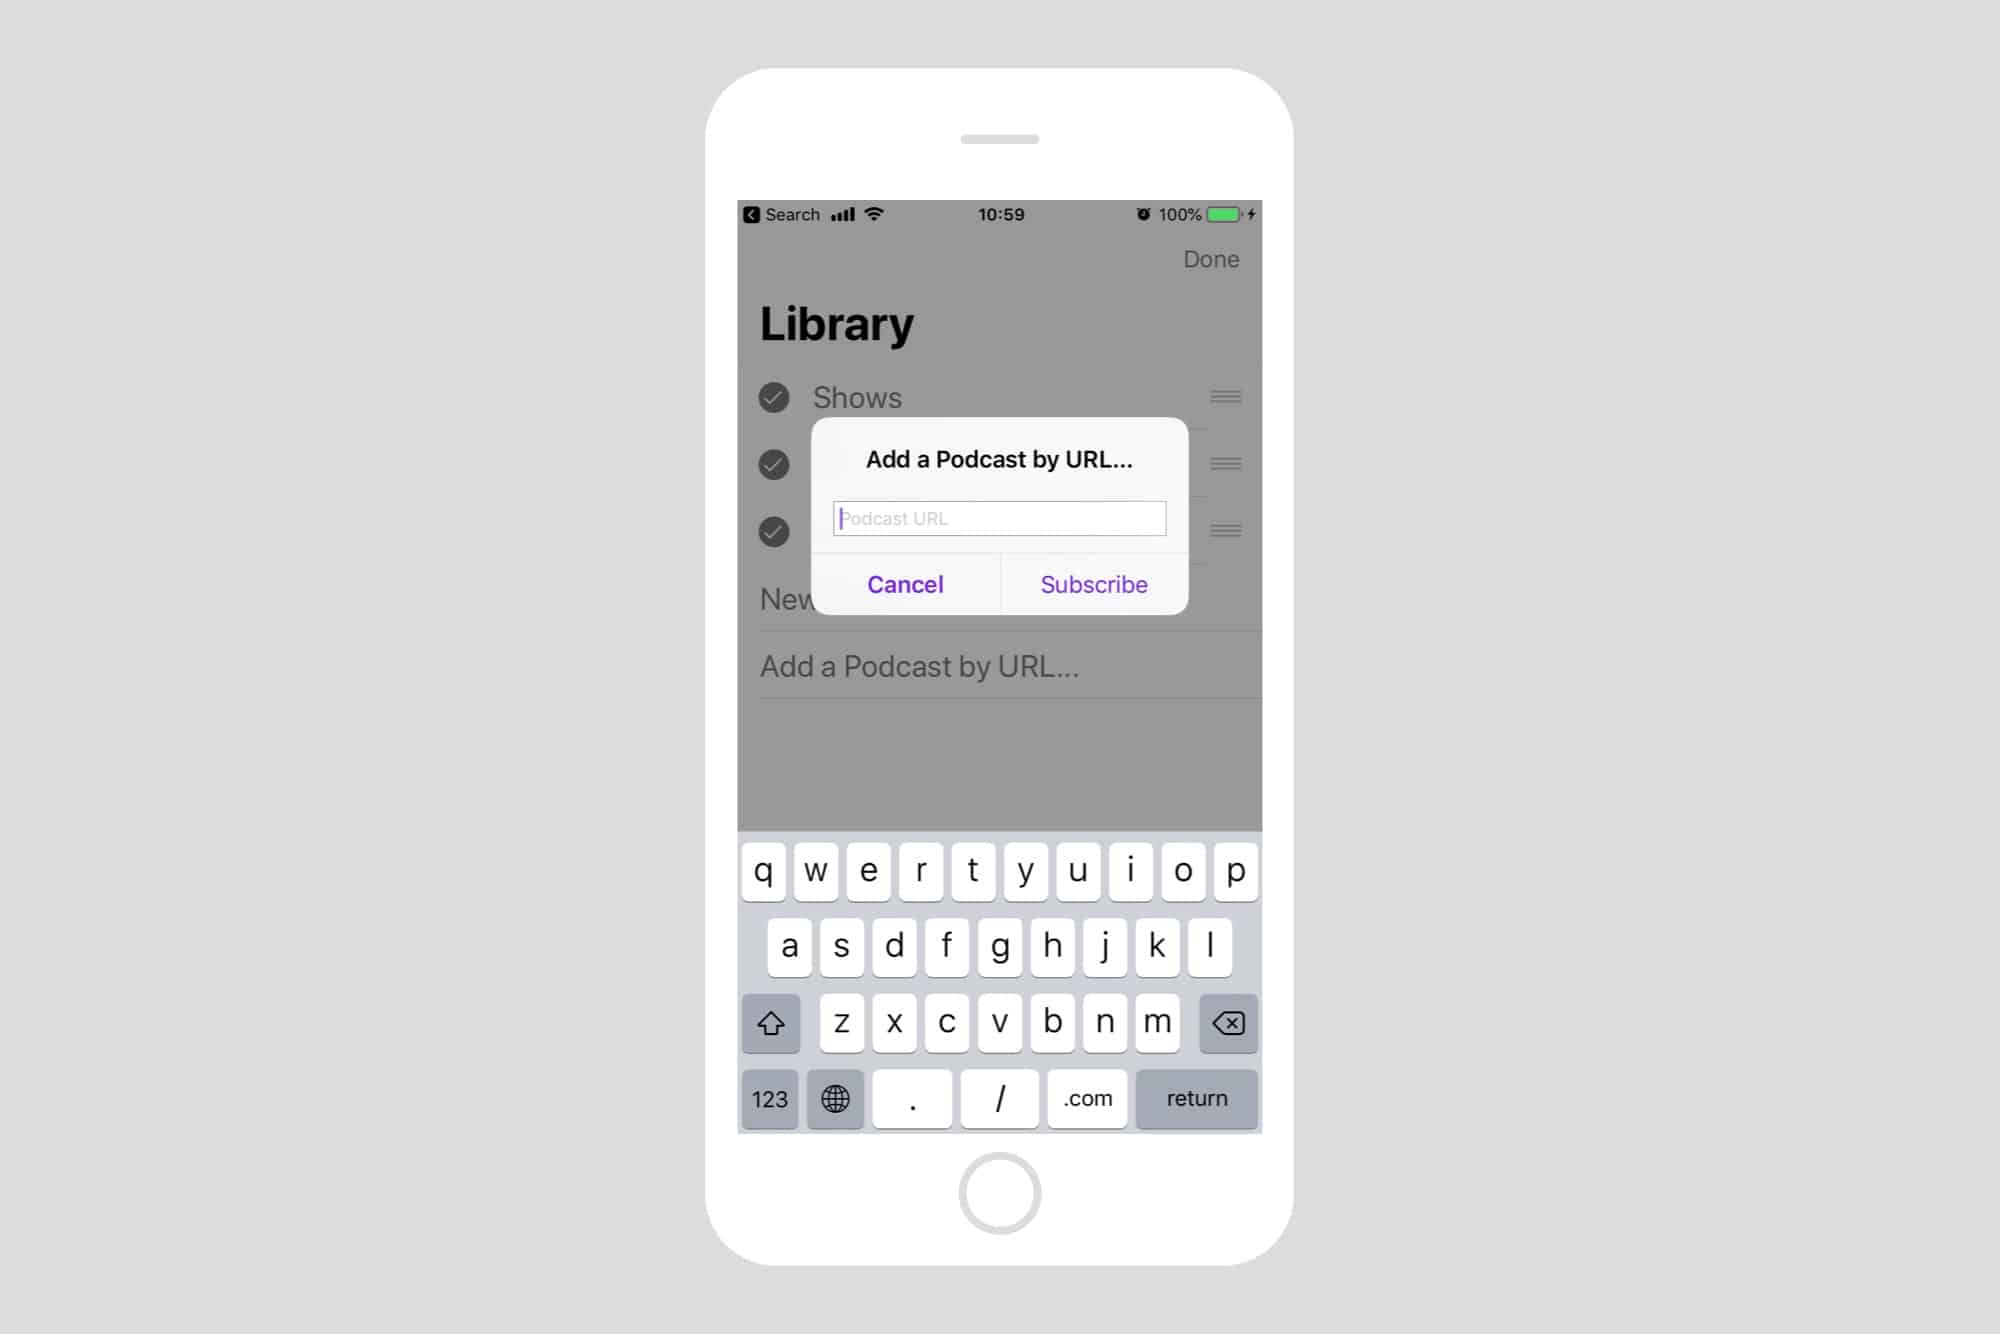
Photo: Cult of Mac
Remember the RSS feed address you copied at the beginning of the last section? Just open up your favorite podcast-listening app, and add a podcast in the usual way. There will be an option somewhere to add a new podcast by URL. Tap that, paste your link in, and tap save, or add, or whatever it tells you to do.
Now, whenever you add an audio file to the Podcasts folder in your Dropbox, it will show up as a podcast, and be automatically downloaded to your iPhone. Pretty cool, right? All you have to do is copy those audio files to your Dropbox.
The third way — HufferDuffer
HufferDuffer is kind of like Instapaper for audio files found on the web. All you do is sign up for a free account, then drag a bookmarklet to Safari’s bookmarks bar. You’ll be given a podcast feed, which you can add to the player of your choice with one click.
Then, whenever you find some audio on the web that you want to save, just tap the bookmarklet, and the audio will be added to your podcast feed, and will end up in your podcast listening app.
This is clearly the easiest way too save audio files you find already on the internet, but doesn’t let you add any old audio file you like. I’ve settled on a double-team effort, using HufferDuffer and the Zapier-Dropbox methods together. And because it’s all podcasts in the end, it all shows up in the same app for me to listen.
