How to watermark PDFs and images using Quick Actions in macOS Mojave
 Vadim Yuryev
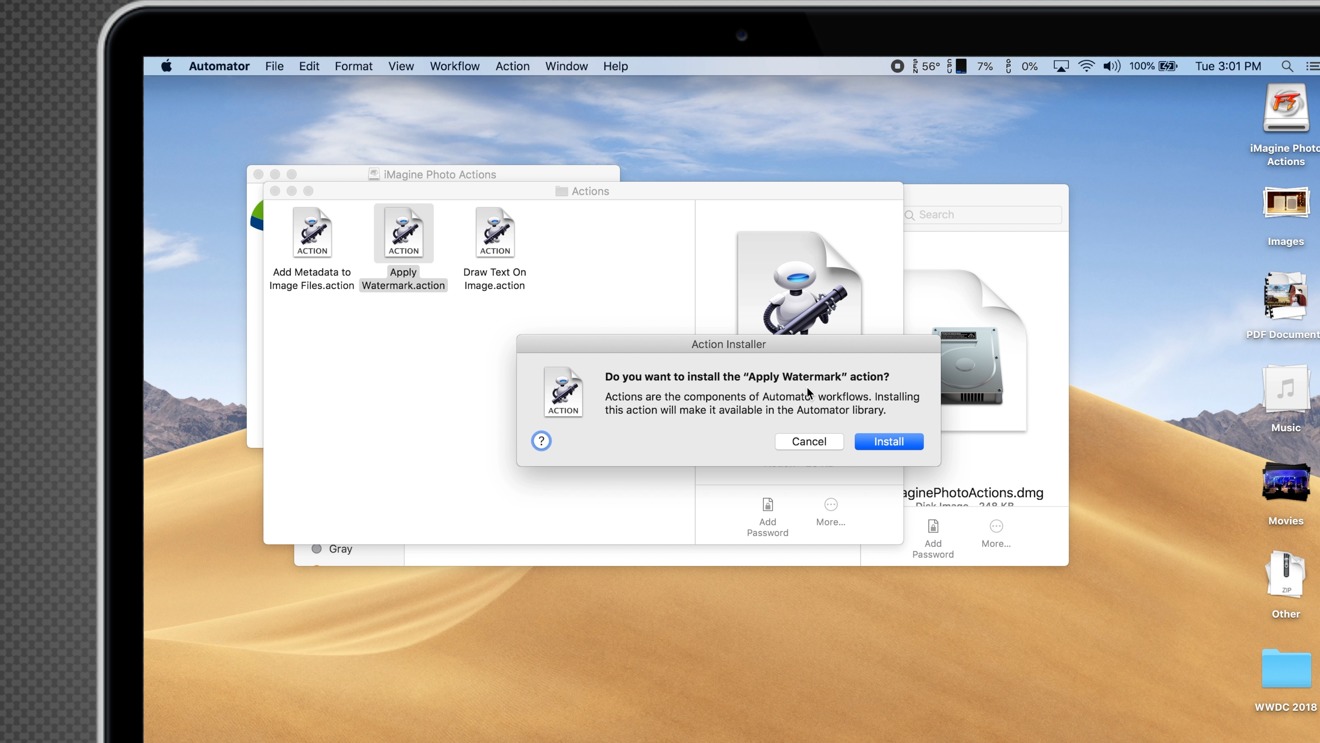
When Apple revealed macOS Mojave at WWDC 2018 last week, the company briefly teased a new ability that allows Mac users to quickly add watermarks to multiple pages within a PDF file, or a batch of images, using the new operating system's Quick Actions feature. Check out how it works before Mojave sees release this fall.
Quick Actions are a new macOS Mojave feature that grants easy Finder access to common tasks. Found in the lower right corner of Finder's Preview window, or via a direct right click on a file, Quick Actions can perform a number of duties, from rotating an image to transforming a cache of images into a single PDF file.
Watermarking is not a standard Quick Action option, at least in the first Mojave developer beta, but it is possible to get the feature working with a few Automator customizations.
Watermarking PDF pages
First, use Spotlight search to open Automator, then click New Document. Select Contextual Workflow and click Choose.
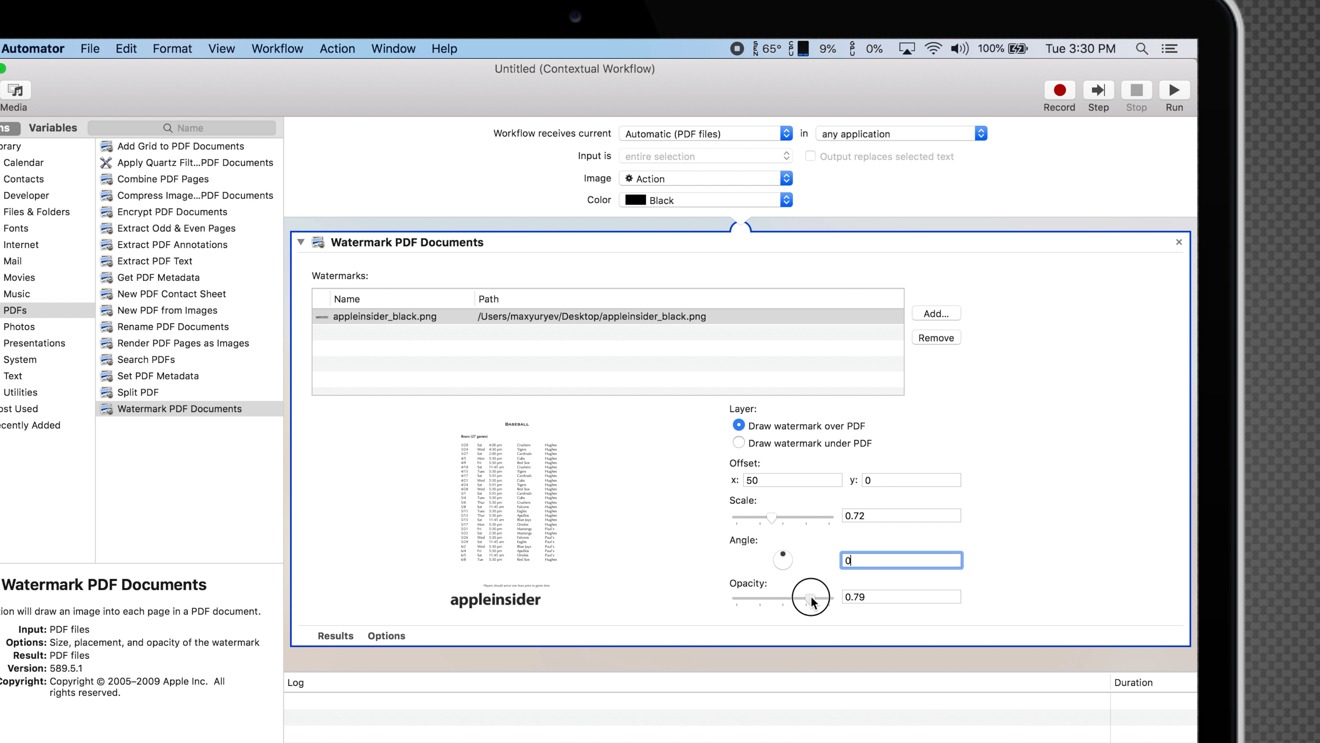
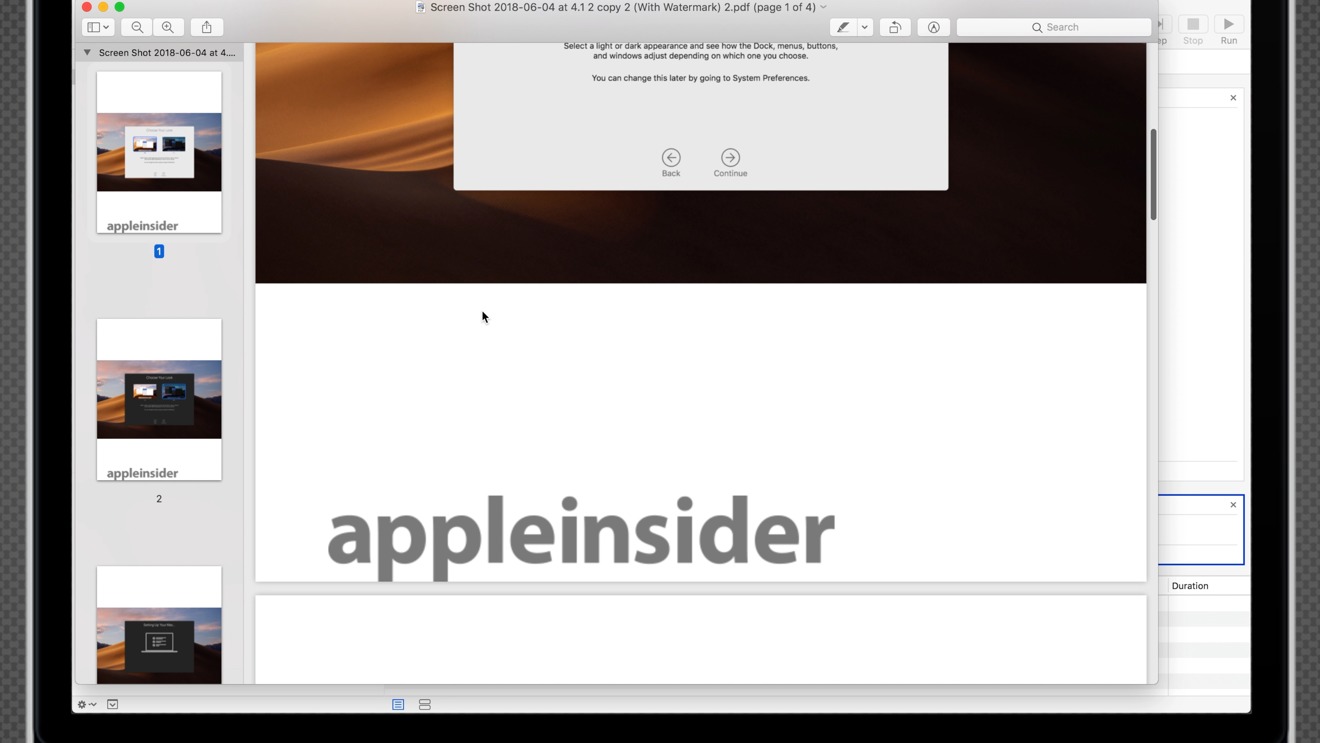
Next, navigate to the Library sidebar and select PDFs, then double click on Watermark PDF Documents. Click Add in the action and browse to find a suitable watermark image. Here, users can adjust the offset, scale, angle and opacity of the source file.
Navigate to Files & Folders and add the Move Finder Items action to the workflow. Users can select where the watermarked PDF will be saved once a watermark is applied. Save the new workflow and name it. Note that the workflow name will show up as a Quick Action.
To change the watermark image, simply return to Automator and duplicate the PDF workflow, replace the image and save it under a different name.
Batch watermarking images
In addition to PDFs, Automator and Quick Actions can be leveraged to instantly watermark multiple photos or images. Pixelmator is a popular image editing app that includes an Automator workflow for watermarking, but it costs $30.
For security reasons, we recommend downloading from the Mac App Store, but if you need to save a few dollars, there is a free option in iMagine Photo. Both the app and accompanying automator actions are available from developer yarra valley software's website.
Once you have your photo editing app installed, use Spotlight search to open Automator. Click New Document, select Contextual Workflow and Choose.
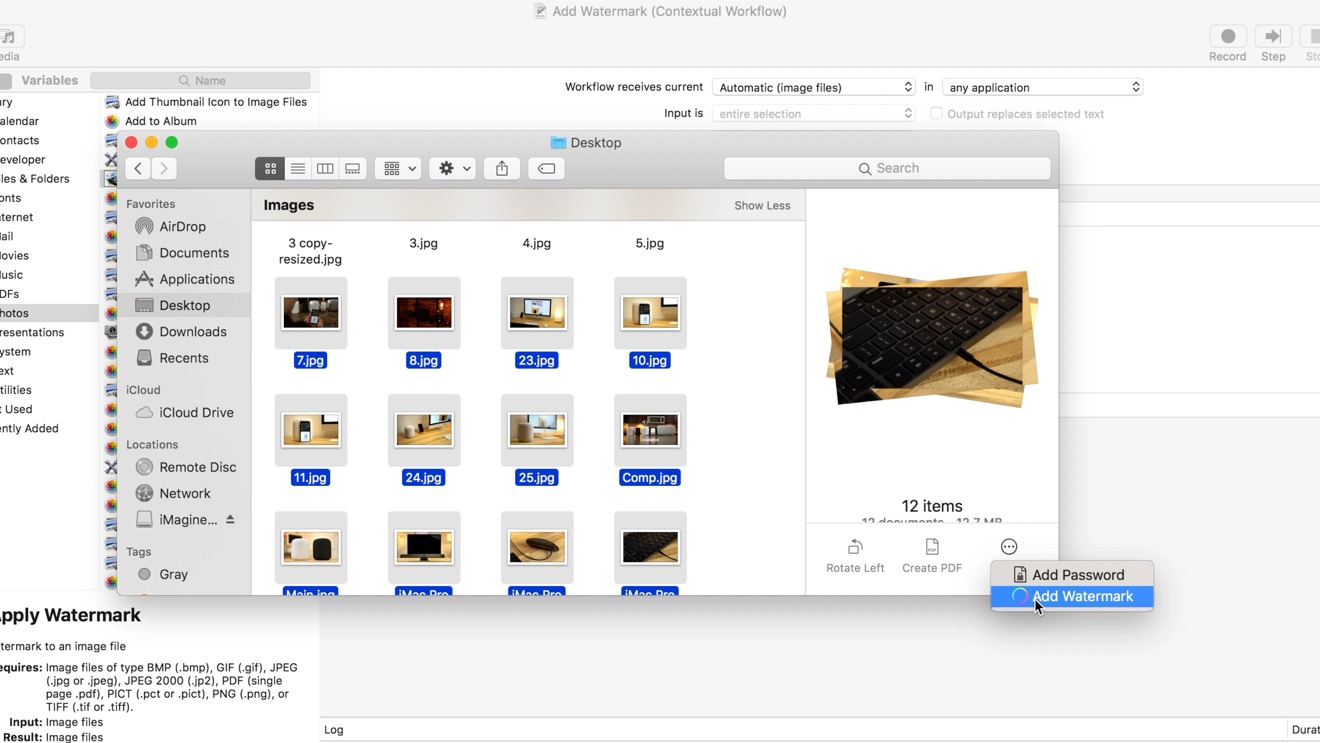
If using Pixelmator, drag the Watermark Images option from Photos into the workflow. A similar option is available with iMagine Photo, called Apple Watermark, though users will have to accept the risk of loading and using a tool from an unverified developer.
Once the watermark action loads, click Choose Watermark and browse to find a suitable image. Using PNG files are best, since they support transparent backgrounds.
Next, adjust the source image's opacity and scale and save the workflow. Again, use a name that is easily recognizable in Quick Actions.
For the lowest prices on Mojave-ready Macs, please visit our Price Guides for exclusive offers and the latest deals. And for more tips, tricks and Apple news, follow us on Twitter @AppleInsider and Facebook. Plus, don't forget to check out our YouTube channel for new videos.


 Andrew Orr
 Wesley Hilliard
 Amber Neely

 William Gallagher

 Malcolm Owen