How to transfer your iPhone or Mac Photo library to an external drive
 AppleInsider Staff
Storing an entire collection of photographs in Apple's Photos app on macOS can be a great way of keeping precious memories in order, but there are occasions when it needs to be stored on an external hard drive. AppleInsider explains how to shift the Photos Library to a new location while keeping all images safe and intact.
There are multiple reasons to move the Photos Library away from its default location, with the primary reason being to free up a Mac's storage. Images and videos can quickly consume storage, especially for prolific photographers shooting RAW files, so moving the library to an external drive can be the best option for those with internal drives that are close to their capacity limit.
Putting the library onto external storage also provides the option of sharing the library with others directly, by disconnecting the drive from the host Mac and plugging it into another. This is also useful for those who wish to use the same library across multiple desktops, like an iMac and a MacBook Pro, if they need to regularly access and change the held files.
Pre-move Backup
Before attempting any file transfers, it is highly recommended to make backups of all images, as there is always the possibility of file corruption or another mishap, and keeping a backup is always a good idea for just these occasions. An up-to-date Time Machine backup is ideal, but it is best to make sure the external or remote drive used for the backup is different to the one you wish to use for the Photo Library storage itself.
It may also be worth using cloud storage services to hold the images, such as Apple's own iCloud Drive, Dropbox, and Google Drive. It might also be an idea to try out iCloud Photo Library, a service that automatically uploads your photographs to iCloud, which can be shared to iOS devices and other Mac desktops using the same Apple ID.
Finding the Folder
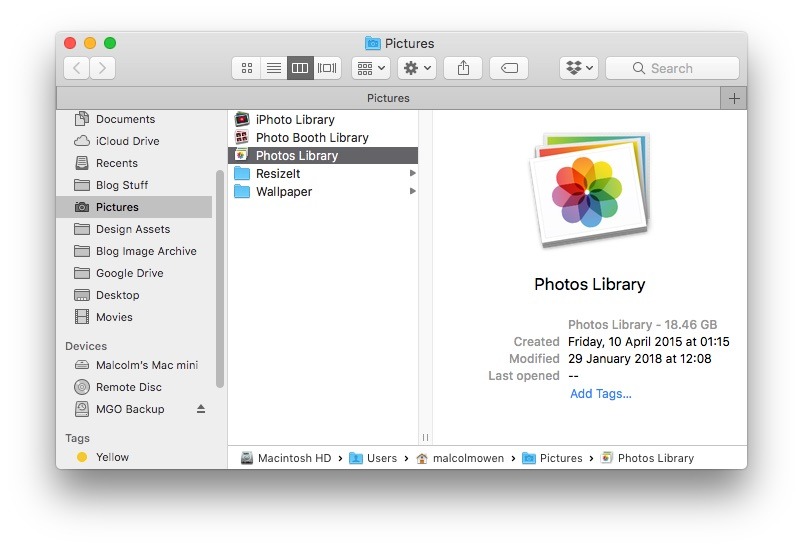
Before you can make the move, you need to find where the Photo Library is actually located. In most instances, it should appear in the Pictures folder of your Home directory, labelled as "Photos Library," potentially alongside other similar libraries for Photo Booth and iPhoto, the predecessor to Photos.
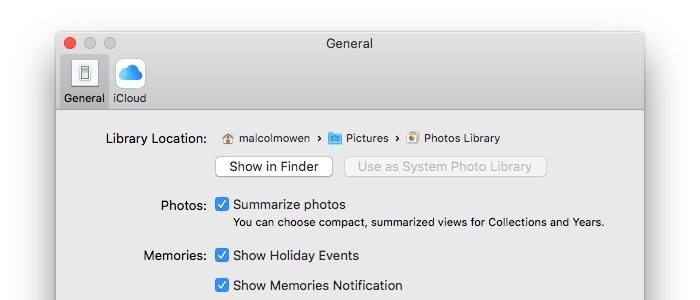
In the event it isn't at the default location, you can find it by opening up the Photos app, clicking Photos in the Menu Bar, then selecting Preferences. At the top of the General section will be a line marked Library Location, which will show where it is located, as well as an option to Show in Finder, which will spawn a new Finder window at the right directory.
Importing from iPhone
First, connect your iPhone to your Mac with a Lightning to USB charging cable. A popup will ask if you want to trust your computer, tap "Trust" and enter your passcode.
Now open Photos on your Mac, where your iPhone will appear under the Devices tab on the left side of the app. From here, you can browse through all of the photos or video in your iOS Camera Roll.
At the top of the page, click on Library, and you can choose to make a New Album for the import. If you wish to erase the photos off of your iPhone after importing, check the box below the Import button before clicking it.
If you chose that option, you will see your photos being deleted off of your iPhone in real-time after importing is completed. Your iPhone photos are now successfully backed up onto your Mac.
The Move
If it is still running, quit Photos by selecting Quit Photos under the Photos Menu Bar, or by pressing Cmd+Q.
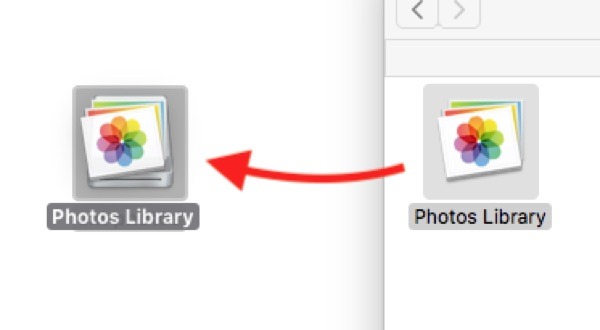
Connect the external drive that you wish to use for storing the library, and once it appears on your desktop, drag the Photos Library away from its current location within the Finder and on top of the external drive icon. If you want to place the Photos Library in a specific place within the new drive, open the external drive in a second Finder window, navigate to the correct directory, and drag Photos Library to the right place.
The amount of time it will take for the Photos Library to transfer to the new location will vary on a number of factors, including the amount of images that need to be transferred, the speed of the external drive for transfers, and the transfer method itself. Generally, transfers to an external drive over Thunderbolt 3 will offer the fastest potential speeds when compared to Thunderbolt 2 and USB-based drives.
Accessing the Library
After the file transfer has completed, you will need to inform Photos of the new location. To do this, hold the Option key and click the Photos icon in the dock to launch the app.
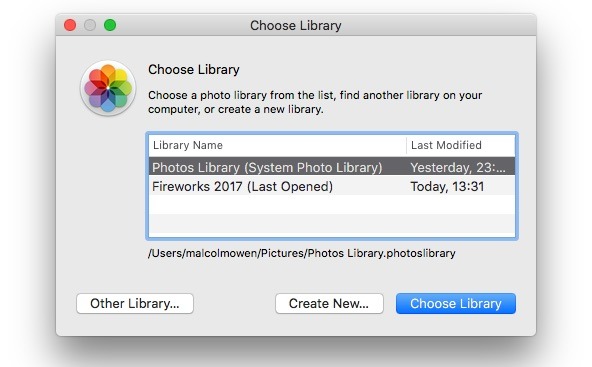
This will bring up a new Choose Library window, with a list of libraries available for you to access. Click Other Library and navigate to the location on the external drive that holds the now-transferred Photos Library, select the Library, and then click Open.
At this point, Photos will open and use the library located on the external drive.
While this process can be used to reconnect with the Photos Library, it can also be used to switch between multiple Photo Library archives. This is handy in some cases, such as if a friend or colleague provides their Photo Library on a portable drive for you to browse and use for work.
Note that in order to access your photographs, the external drive needs to be connected to the Mac before entering Photos. The Photos app will warn you if the Library is not accessible in this case, with the solution being to quit Photos and reconnect the drive before relaunching Photos.
Designating the System Photo Library
If you want to use the moved Photos Library - or one of a collection of the Libraries - with a number of Apple services and features, such as synchronization with iCloud Photo Library, iCloud Photo Sharing, and My Photo Stream, you will need to designate it as the System Photo Library. This also applies if you wish to have the photographs used by other apps, or to set an image as the desktop background.
Generally, the initially created Photo Library will be the System Photo Library by default, but actions such as moving it or designating another Library temporarily with the label can stop a Photos Library from being used in this way.
To re-enable it, hold down the Option key and open Photos, then select the Library you want to use as the System Photo Library. Once opened, select Photos in the Menu bar then Preferences.
Within the General tab of the Preferences window, you should see the current Library's path under Library Location, and two buttons: the previously discussed Show in Finder and Use as System Photos Library. Click the second option to set it as the System Photo Library.

Clearing Space
One of the main aims of this project is to free up space on your Mac's internal drive, and since the Photos Library resides elsewhere, it is likely to be in your interests to delete the locally-held version. Make sure that this Library is no longer required, and that the version on the external drive is complete and functional before considering deletion of the local copy.
Use Finder to navigate to the directory where Photos Library was located, as discovered in the 'Finding the Folder' section above. Right click on the Photos Library and select Move to Trash.
To completely remove it from the Mac, open the Trash from the Dock or Finder window, and click the Empty button on the top right of the window, followed by selecting Empty Trash in the confirmation dialog.


 Malcolm Owen
 Amber Neely

 William Gallagher


 Andrew Orr
 Christine McKee