Why am I now always taking screenshots by accident? Two things:
The volume buttons are directly opposite the Lock button (aka “Sleep/Wake” button), and
The combination for screenshot has changed. On phones with a home button, the iOS combination has always been Lock and Home buttons but is now Lock and Volume Up on iPhone X (due to lack of home button)
Trying to hold the phone with a stable grip while pushing the lock button means my thumb is resting on the lock button, and my index finger is on the volume up button.
Grip too hard; get a screenshot. Grip less hard; uh…drop phone?
Android uses a similar combo (Lock and Volume Down) for screenshots, and I’ve never accidentally screenshotted there.
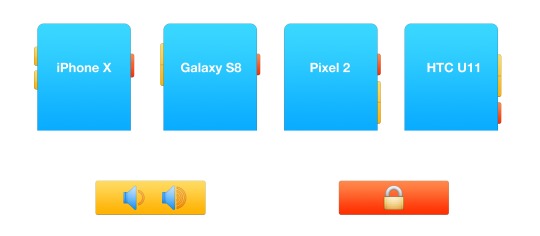
The “same side” layout allows a stronger grip, looks just fine, and as best as I can tell has few (if any) discernible drawbacks.
I’ve not seen a compelling reason to keep the current layout, which may only exist as it kept changes to a minimum when the iPhone became too tall to keep the lock button up top.
As a nice touch, HTC indents the home button for extra re-assurance if volume-adjusting from your pocket:
Given the lock button now does more on iPhone than ever before — I’m looking at you, “Double-Click to Pay” — it’s an important button to get right.
With iOS 13 now here, I’m sure I can’t be the only one who couldn’t figure out how the hell to delete an app on my iPhone.
Coming from an model with 3D Touch (iPhone X), there used to be a distinction whereby:
A light press-and-hold would show ‘wiggle mode’ with X icons to delete apps
A hard press-and-hold (3D Touch) would show a menu with app-specific options
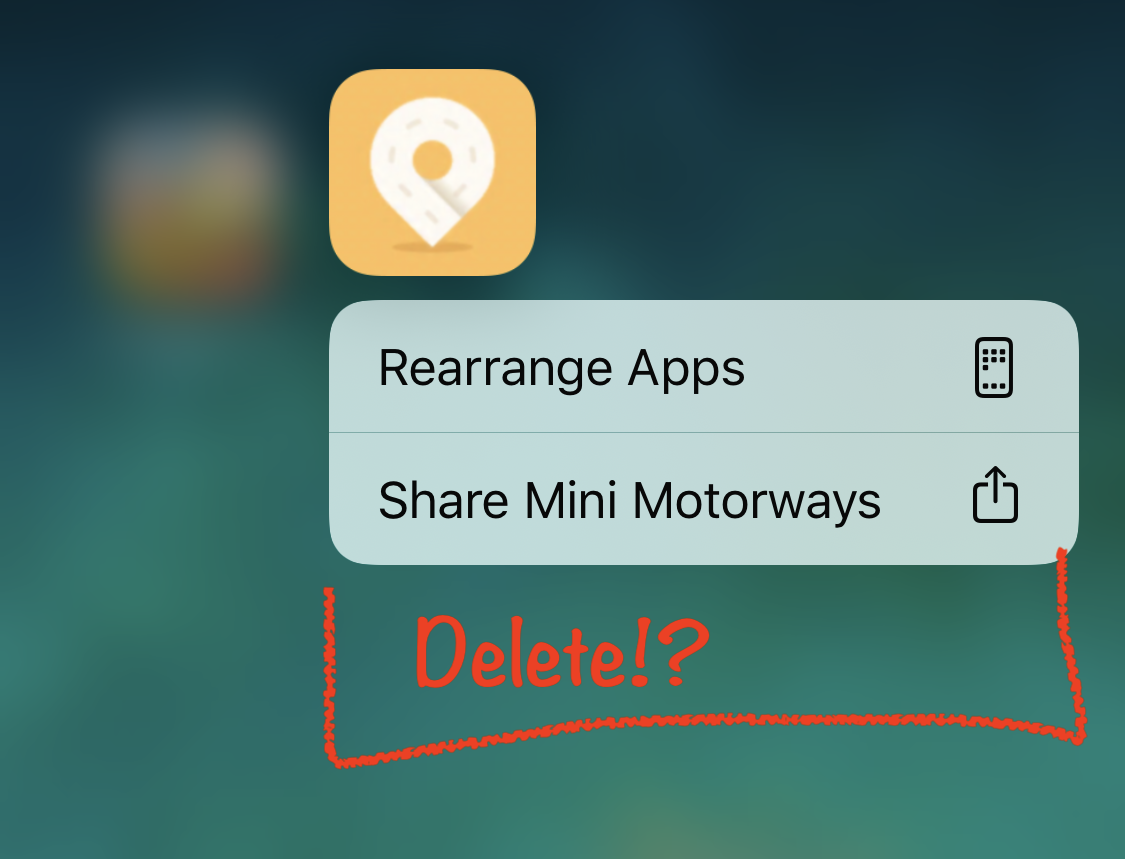
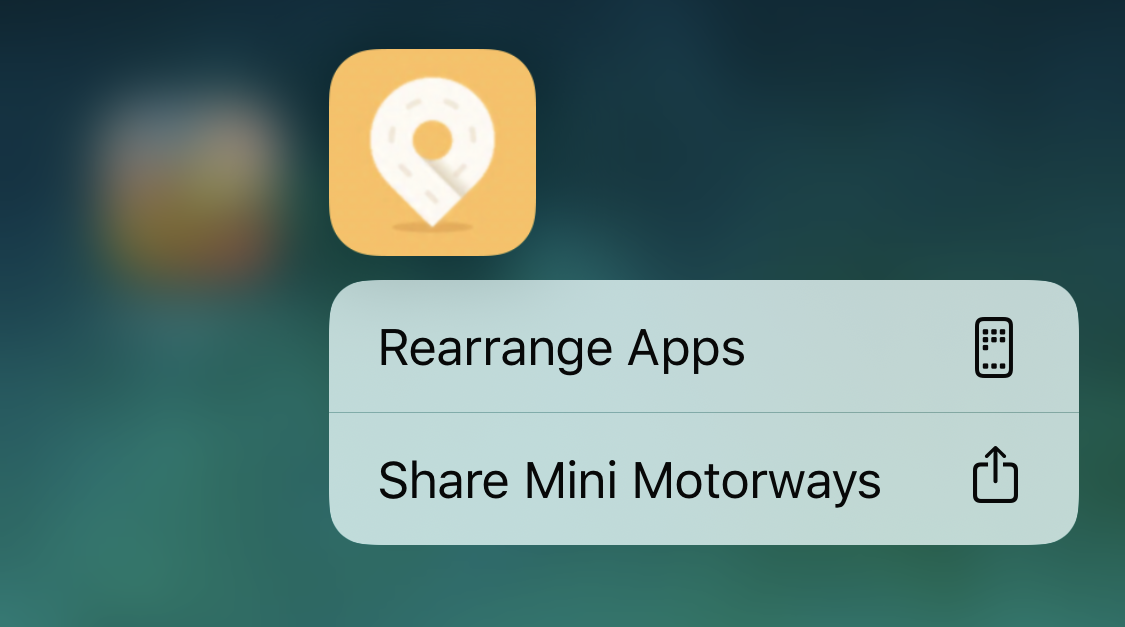
Above: the menu that used to appear with 3D Touch (a hard press) now shows whenever you press-and-hold an app, no matter how hard or soft.
To delete an app in iOS 13 you now have to do either of the following:
Method 1
Press-and-hold on an app until the menu appears
Choose Rearrange apps which causes the apps to wiggle and Xs to appear on each app
Tap the X next to any app you want to delete
Method 2
Press-and-hold on an app until the menu appears
Keep pressing and holding until the menu disappears (don’t stop pressing the icon until the next step)
Just after the menu disappears, ‘wiggle mode’ activates and Xs appear on the apps
Tap the X next to any app you want to delete
Basically - wiggle mode is one further step away now. The option to delete an app is now buried under the confusingly named rearrange apps option, or under a longer press than before on an app icon.
Once you get the wiggle mode to appear, it’s back to how it’s always worked.
This weird inaccessibility of one of the few springboard (home screen) actions seems more like an oversight or lack or priority than a deliberate decision that this is a good implementation.
I’m expecting long-time iOS users will be lost on this.
Long term, I see 3D Touch menus (now called Haptic Touch) and long-press options merging for a more cohesive experience. At least I hope that’s the direction this takes.
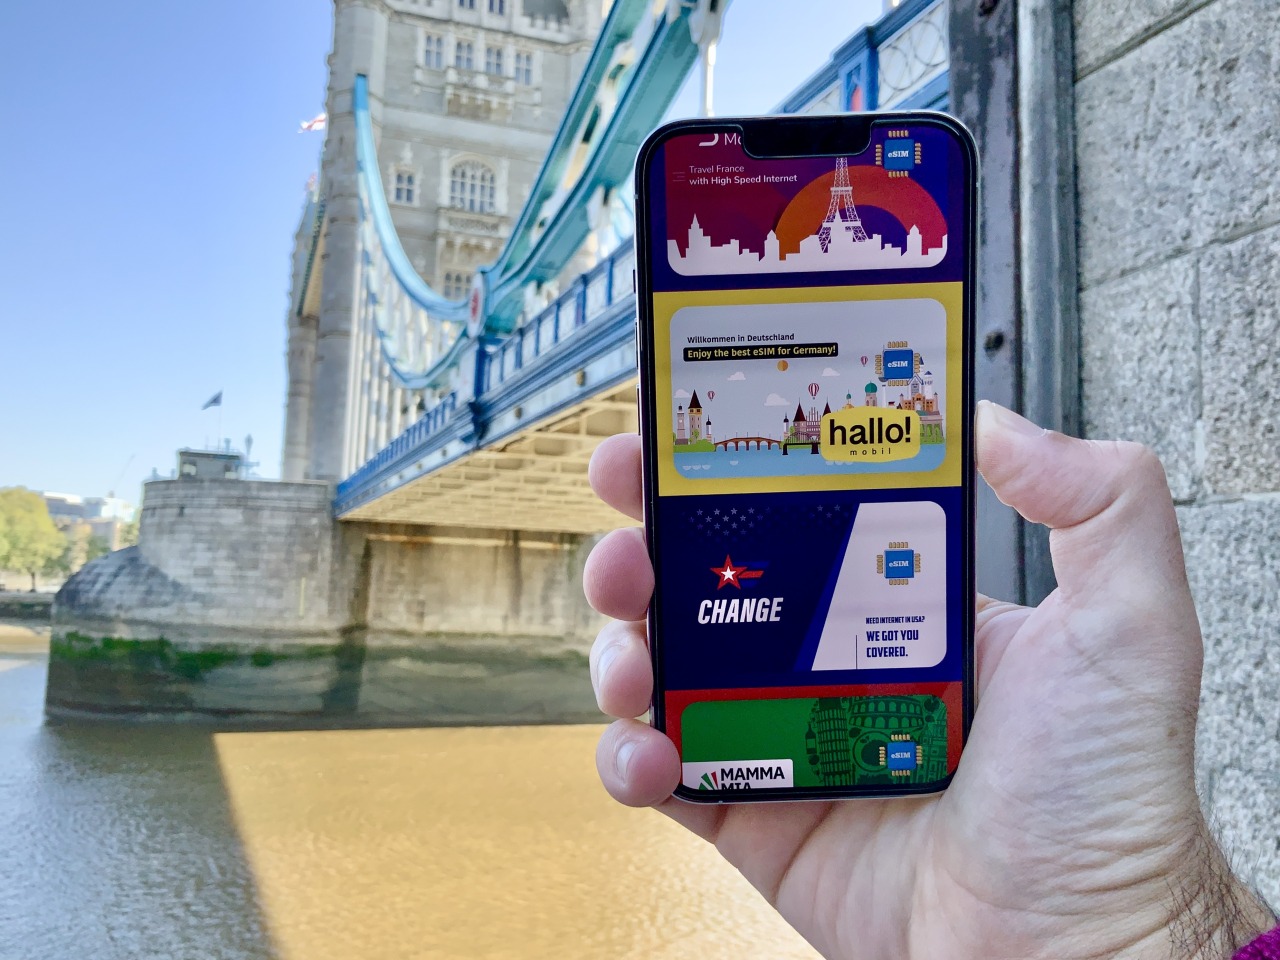
Alternative title: How and why to install an eSIM to save money on data roaming fees when overseas. Especially useful if you have an iPhone 14 with no SIM Tray.
I’ll keep this brief. People travelling overseas often fall into two categories:
1. Pay whatever your phone carrier lots of $$ for data roaming 🤑💸 2. Buy a local SIM card at the airport or downtown after arriving 🤓🏙
The first is easy, but costly. The second is sensible, but can be time consuming.
There’s a much better option that now exists; and middle-ground that is easy enough, and cheap enough, that you should consider.
As of 2022, every new iPhone and lots of medium or high end Android phones support my new best friend:
3. eSIM. Buy data online, in-app, before even arriving at your overseas destination. Keep your SIM in the slot. No payment to my enemy (data roaming fees) 🤩🤳
There’s lots of ways to do this, but if you’re reading now from the departure lounge of an airport or train station and want to dive right in, here’s my recommendation:
Search the App Store or Google Play Store for the Airaloapp
Choose your data pack (1GB for $5 USD or 10GB for $18USD)
Follow instructions to install
Activate eSIM when you’ve arrived at your destination
I also get a $3 credit when you use this link, but that’s not why I’m recommending this to you. There are lots of ways to buy eSIMs (in other apps, or in stores using printed QR codes), but personally this is the best I’ve used so far.
If there’s apps or services you find easier or cheaper, do let me know!
Airalo accepts Apple Pay, Google Pay, PayPal or regular credit card payment.
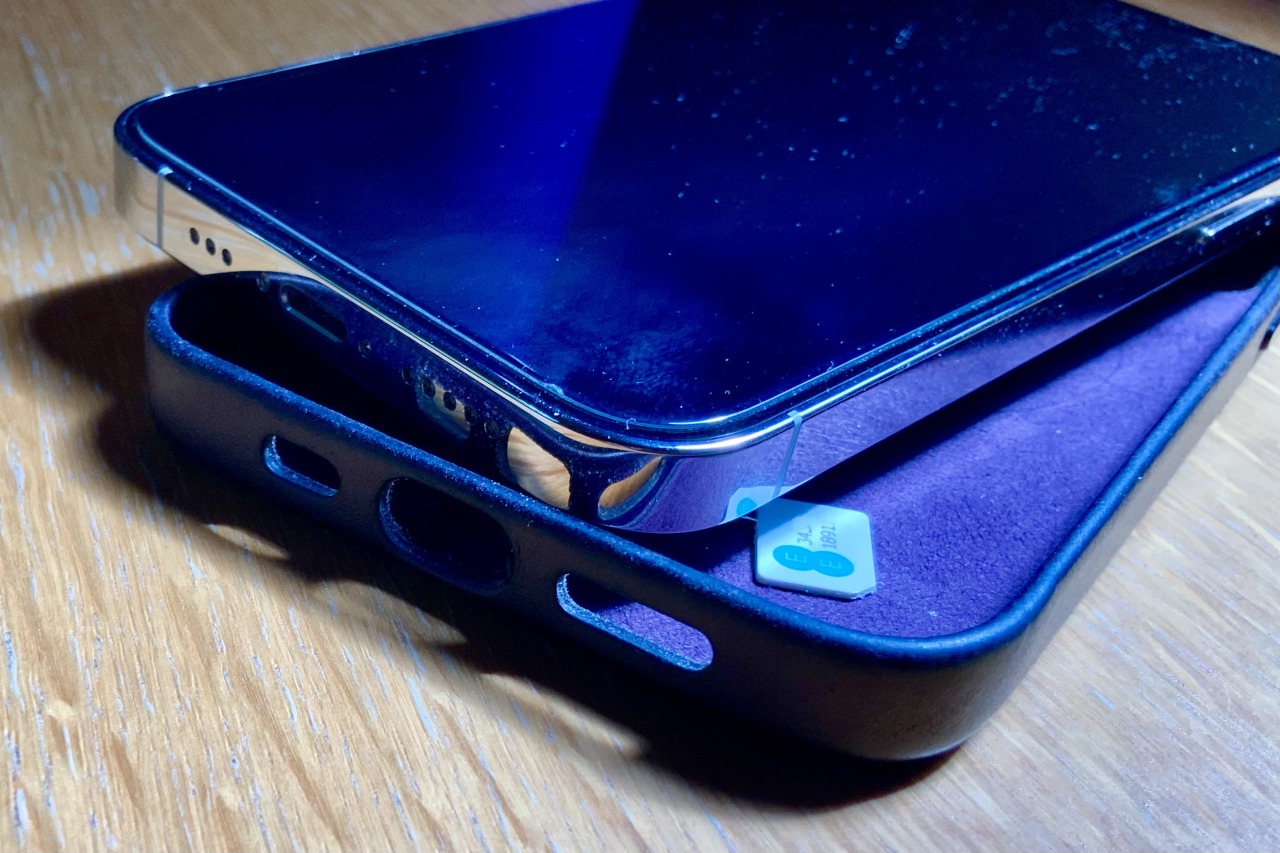
The best part of using an eSIM when travelling? You can leave your regular SIM in your phone, using it for phone calls (if you wish), iMessage, or any other service.
No more forcing your SIM behind your phone case so you don’t lose it when you get back home.
With Airalo’s signup referral credit, you can buy a 1GB pack for $2 USD to test the service out before committing to a larger purchase.
Eventually, every SIM will be an eSIM. But for now, they’re a great option for the efficient traveller, especially when your enemies are after you.
My notes on eSIM use using Airalo
📲 Installing an eSIM takes more steps than a physical SIM, especially as it’s a second line. While apps like Airalo give great instructions, this could be simplified in future.
💵 A rate of $18 USD for 10GB in most countries is much cheaper than many data roaming rates, but won’t beat a local SIM for value in some countries.
🇪🇺 UK residents, having recently lost much of their free EU roaming due to Brexit, still often get up to 20GB free EU roaming on some plans. However once that runs out, this is a nice way to top up.
🛫 I recently visited Turkey and found the ability to buy an eSIM before even landing in the country to be useful. If you start running low on data, you can buy more before the current pack runs out. It is seamless.
🤷 For reasons unknown to me, Apple has a built-in interface to buy eSIM plans on iPad, but not iPhone. I have found Airalo much more reliable than Apple’s iPad option, and non-existent iPhone option.
👽 I haven’t tested Airalo on Android, but see no reason it shouldn’t work the same way.
🪧 You won’t recognise the name of any of these providers. The names and brands are made up, as best as I can tell, by Airalo.
🔄 Tapping any Airalo eSIM option will outline which network it will connect you to. For example, visitors to the UK will be assigned O2, but only on the 4G spectrum. This is normal, where carriers like to keep their latest-and-greatest networks for their own customers, not resellers of their network (known as MVNOs). As such, if you need a specific network for speed or coverage reasons, this might not suit you.
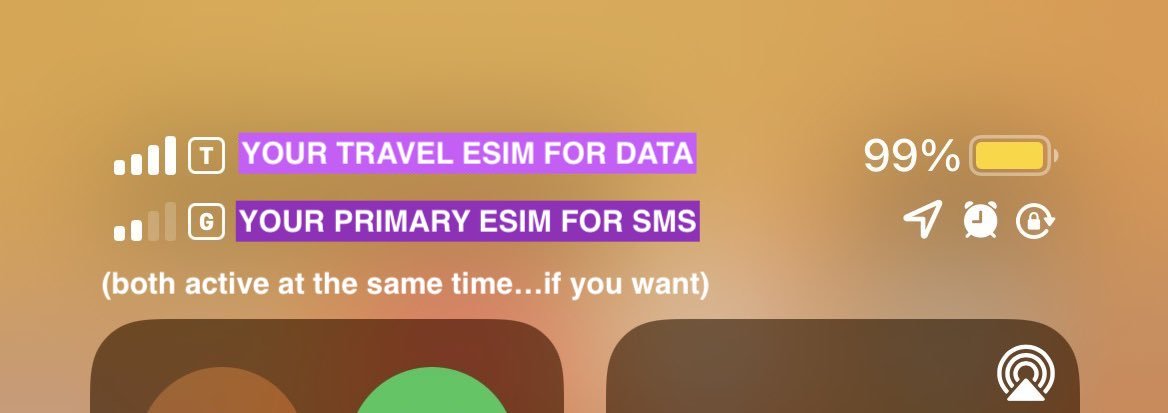
📶 You can leave both your physical SIM and eSIM active at the same time, and even get two status bars showing both lines. It’s the default option, having both lines active.
🪫 I did notice a small amount of additional battery drain from leaving both active. My decision was to simply disable my physical SIM while overseas (who needs phone calls anyway, right?)
————
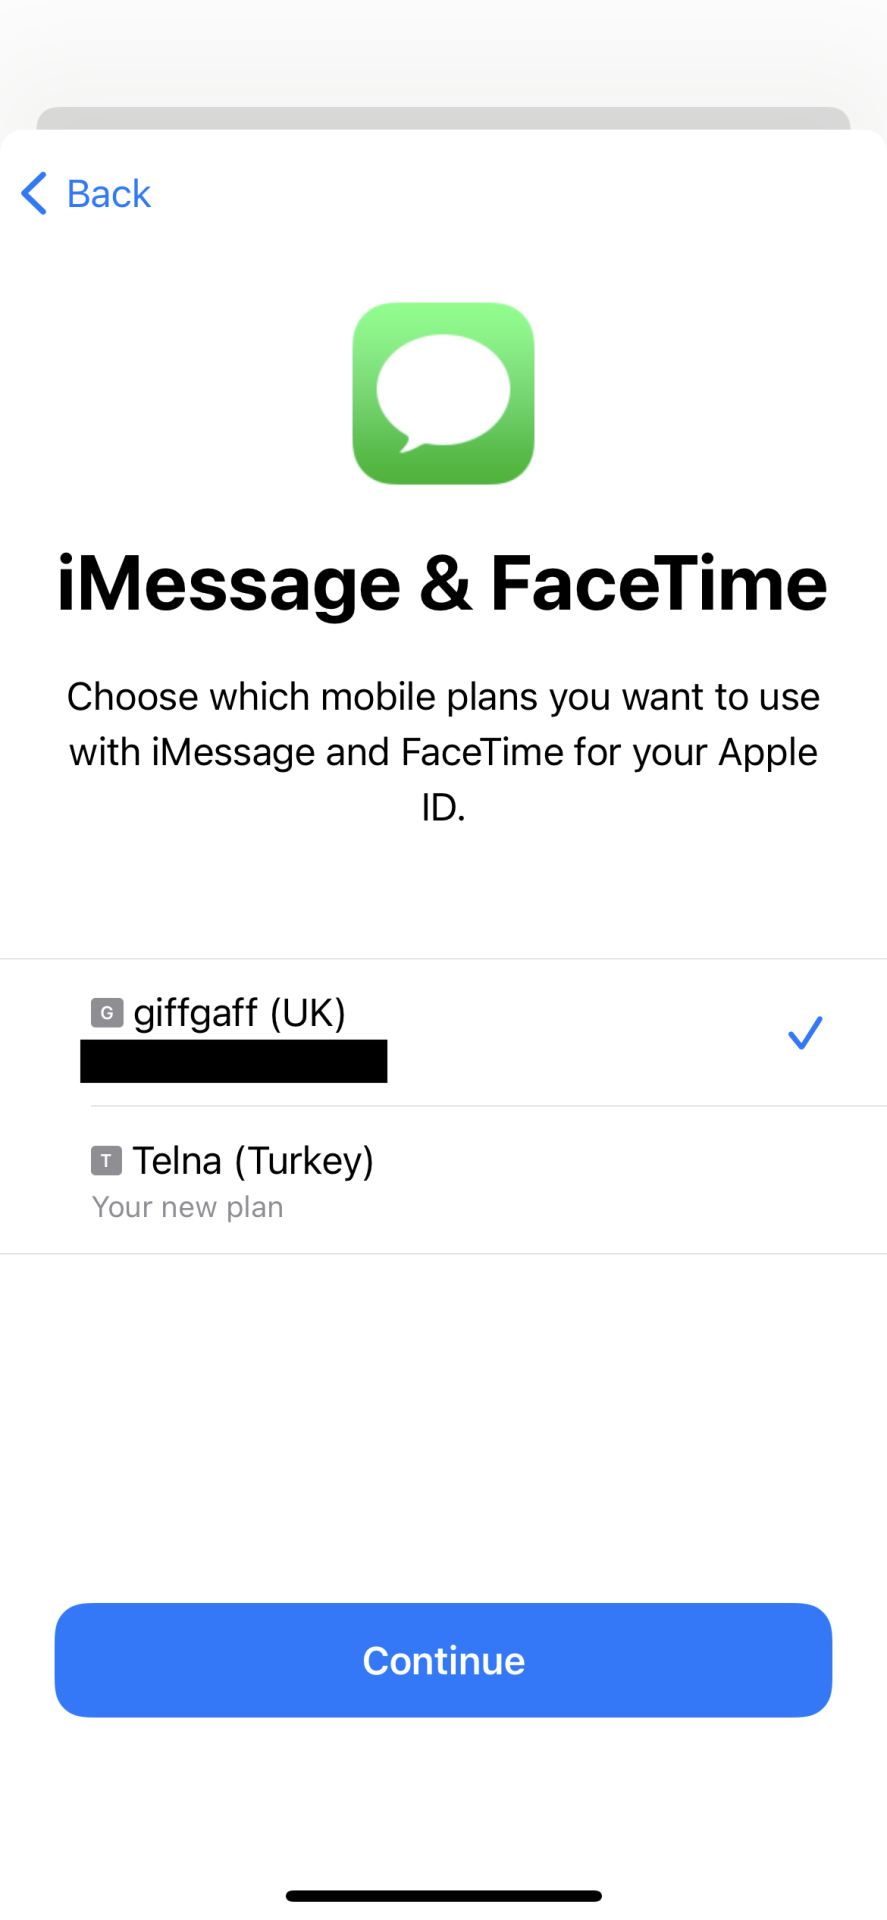
Here’s how it looks when you have two active SIMs running at the same time. For instance, your SIM (or eSIM) from home open for SMS, and your local Airalo eSIM for data:
——–
Below is a guide to every step of the Airalo eSIM setup on iPhone.
Step by Step
For full context, here are the exact screens I encountered when buying and setting up my Airalo eSIM in Turkey for the first time, with 10GB data.
You’ll note that iOS provides options to choose which line to use for calls, iMessage, or data. The defaults effectively route data over the eSIM, and everything else
—
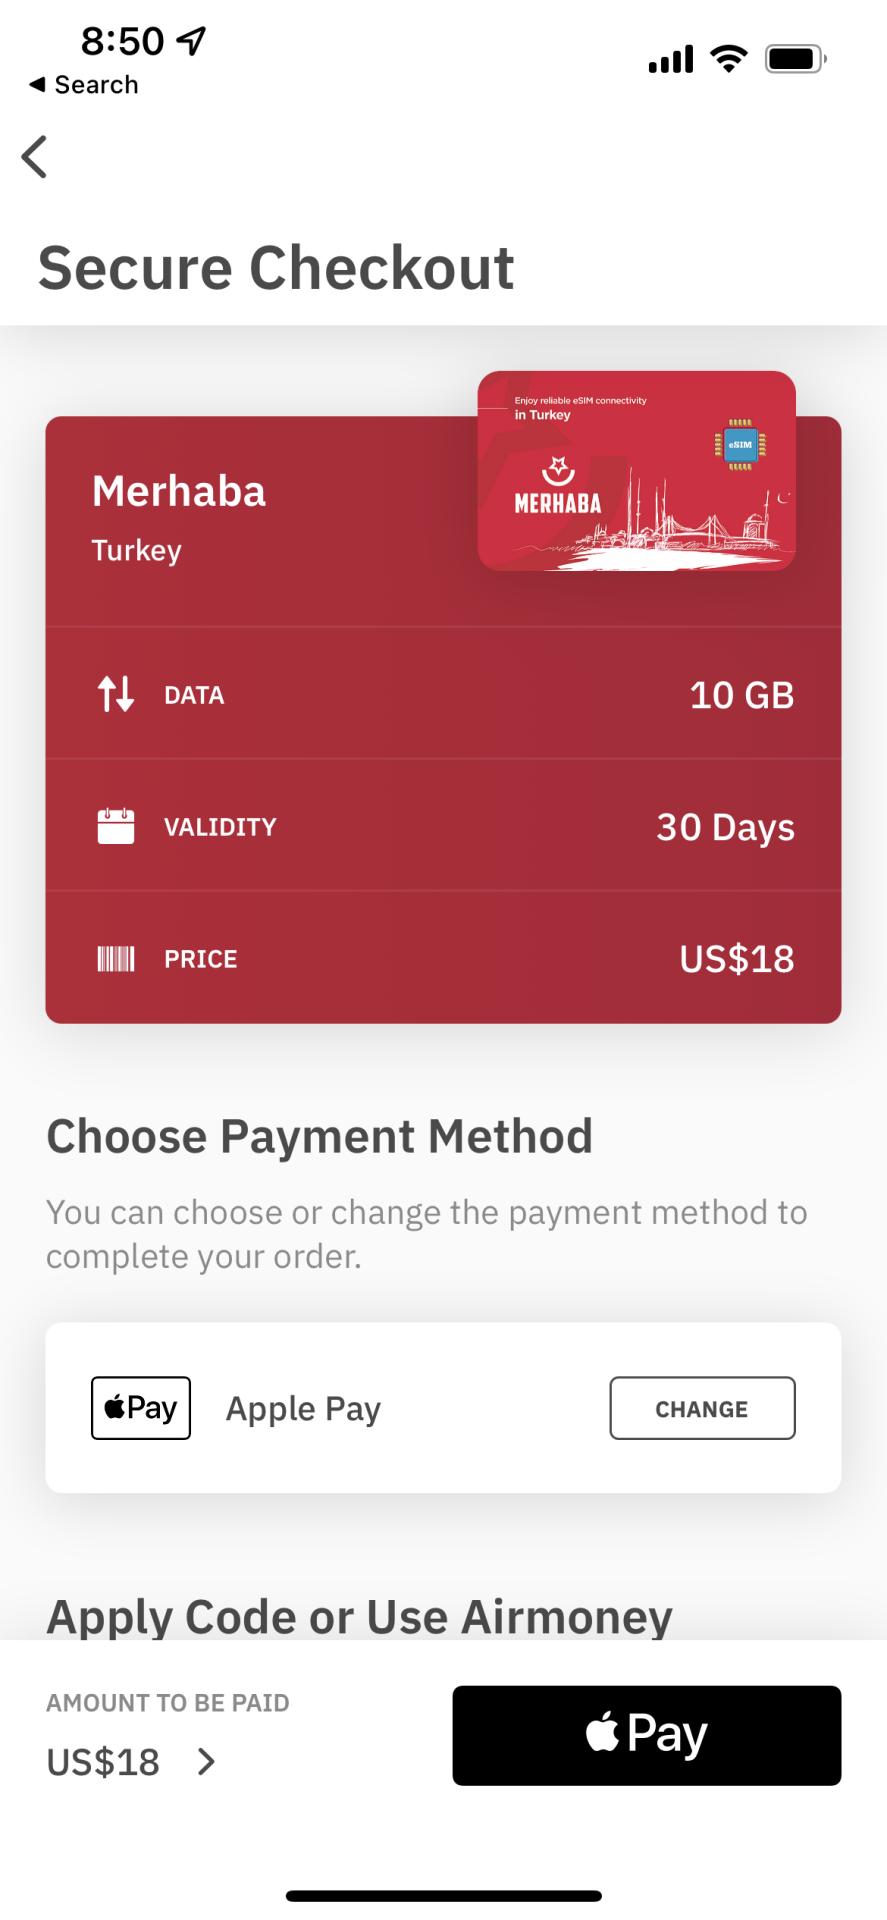
Step 1: Check out
—
Step 2: Order confirmation
—
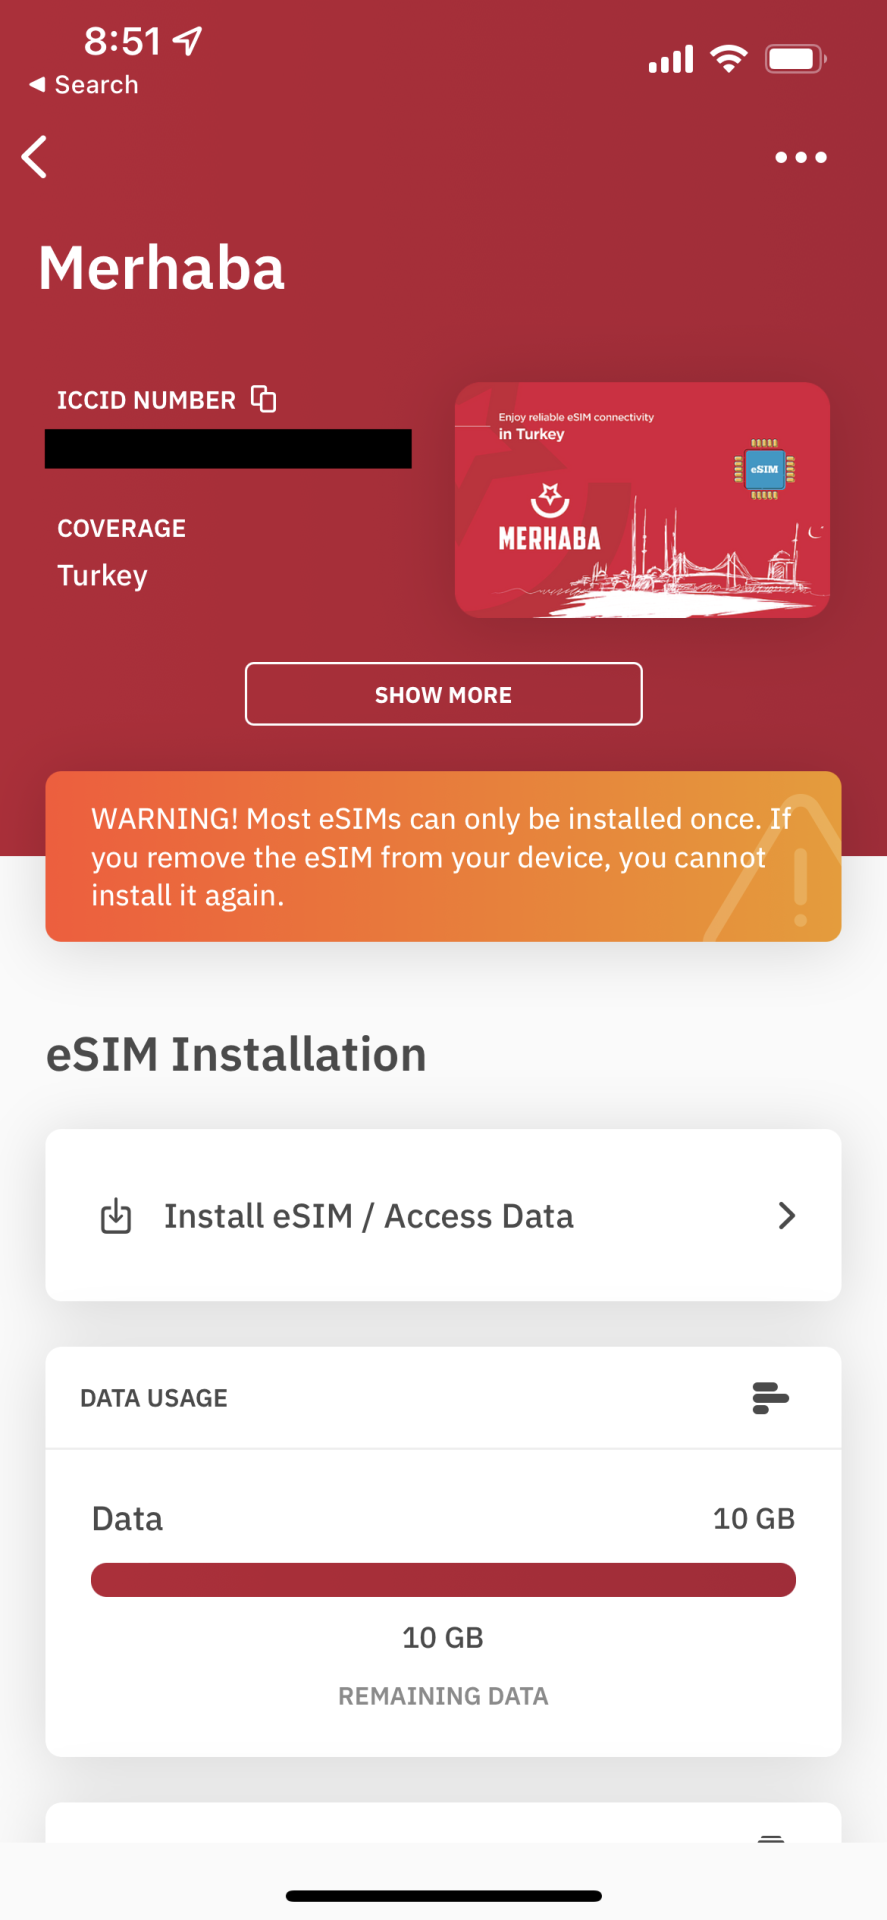
Step 3: A button appears to install the eSIM after purchase
—
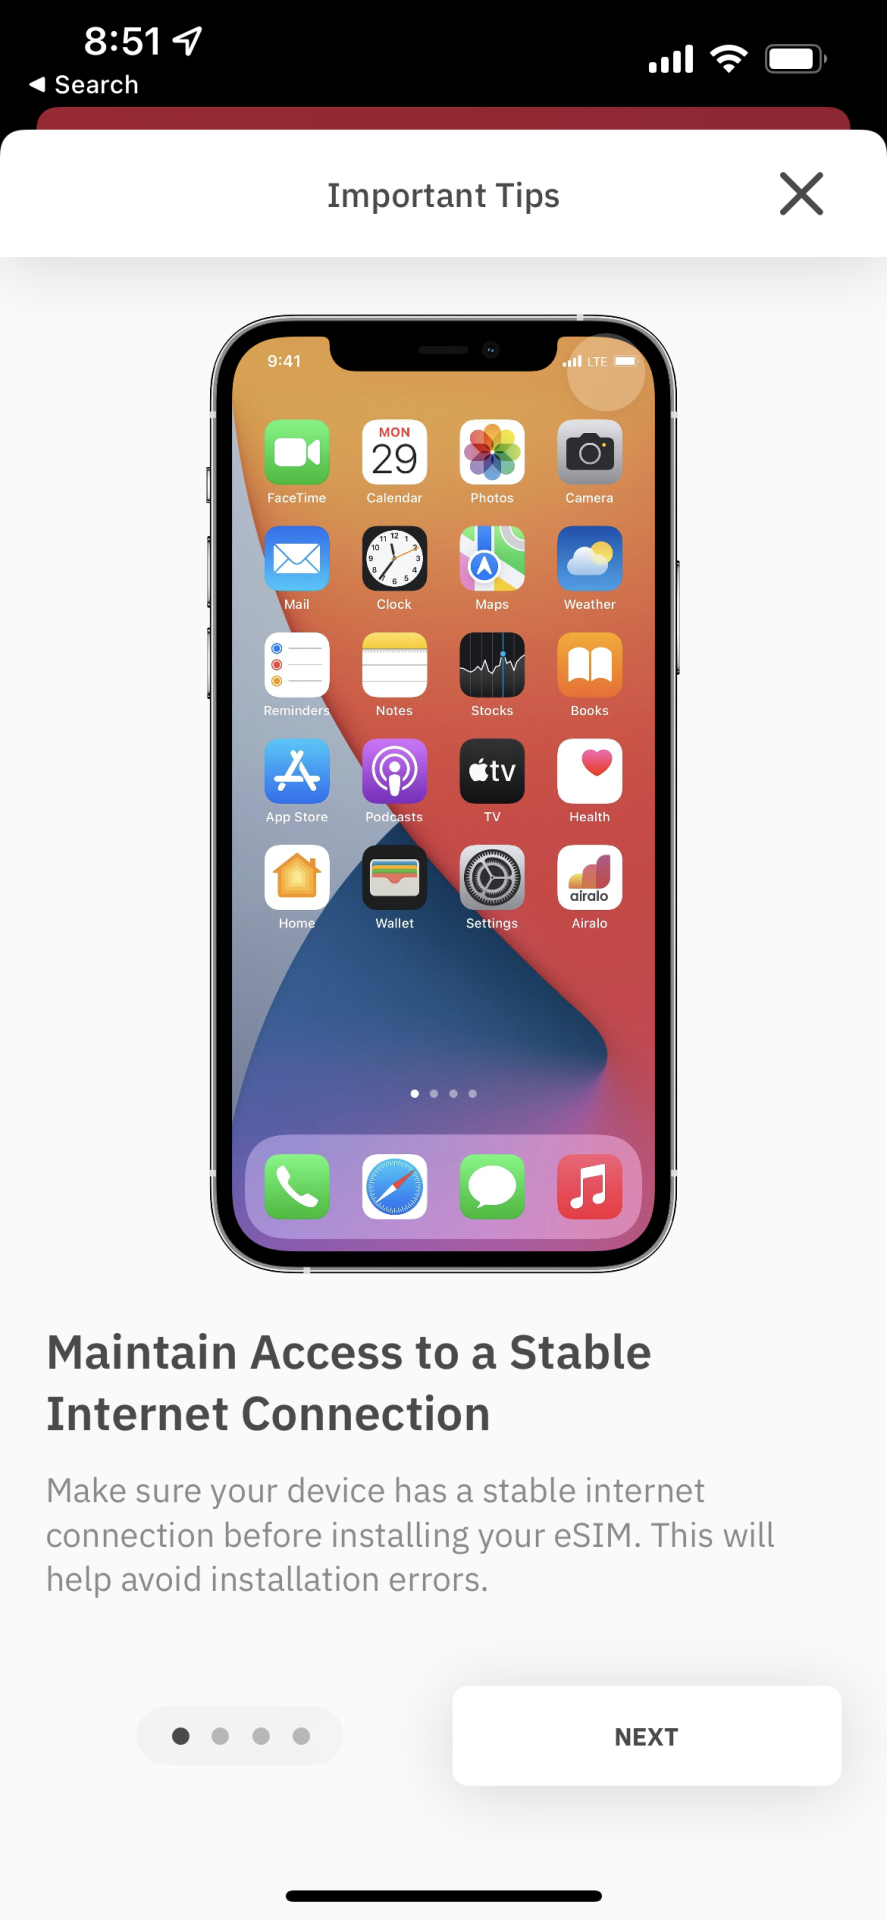
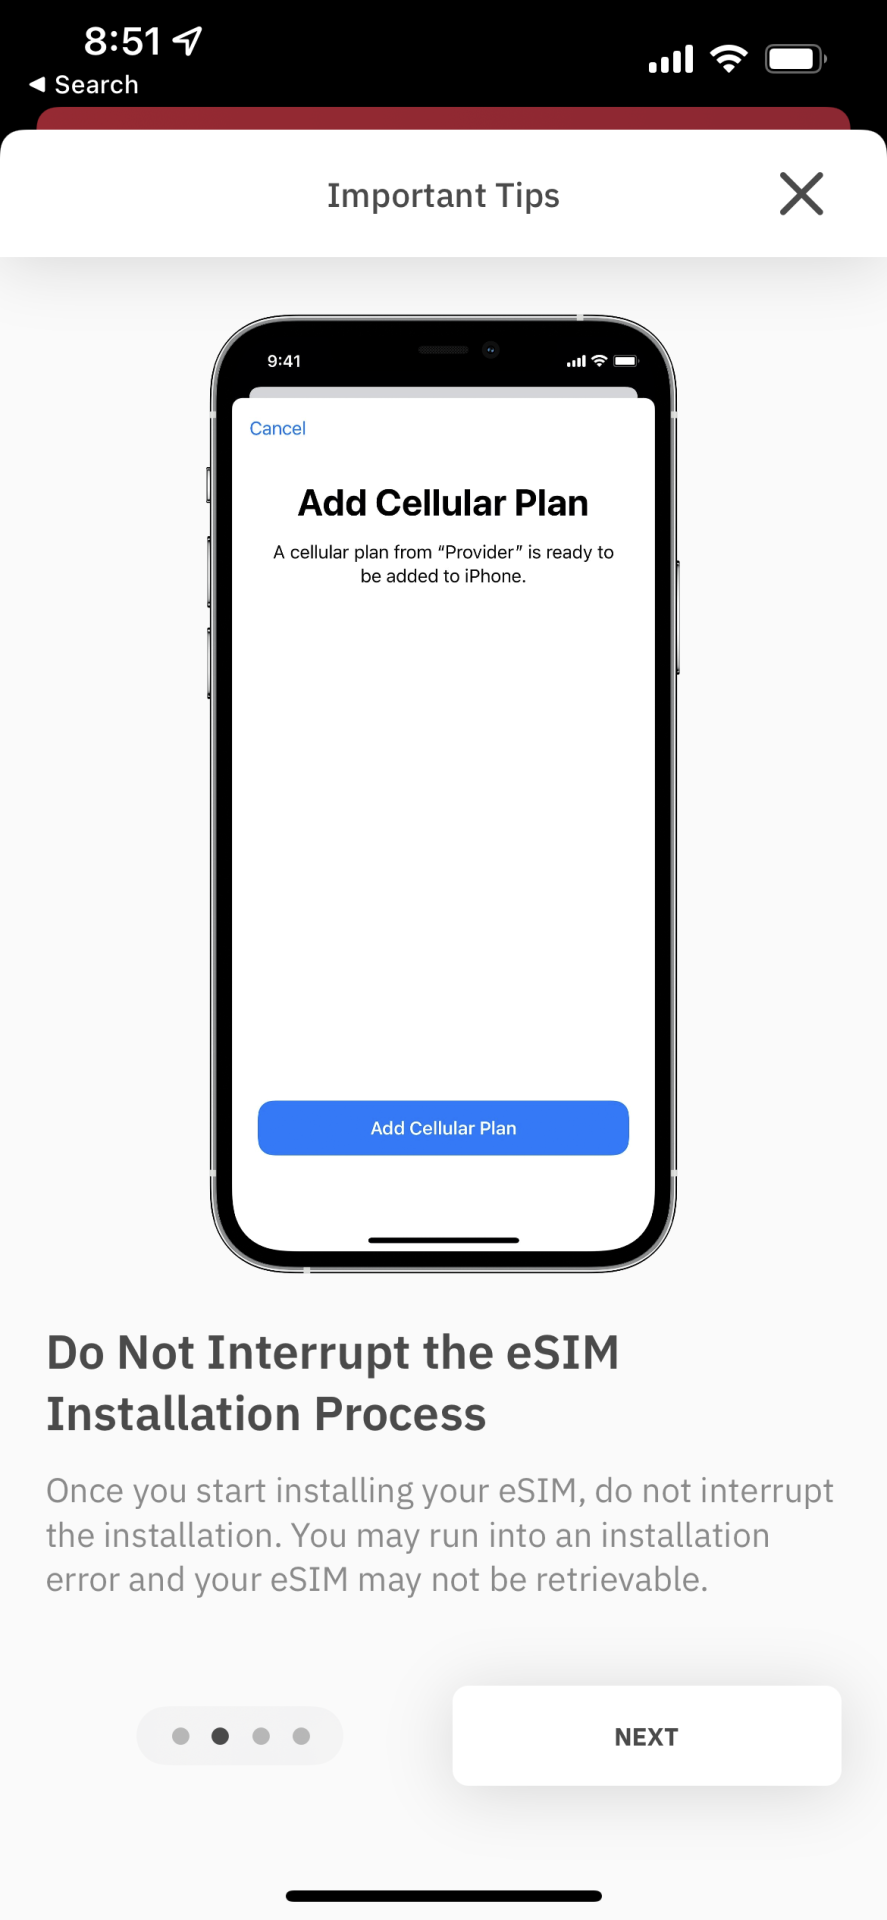
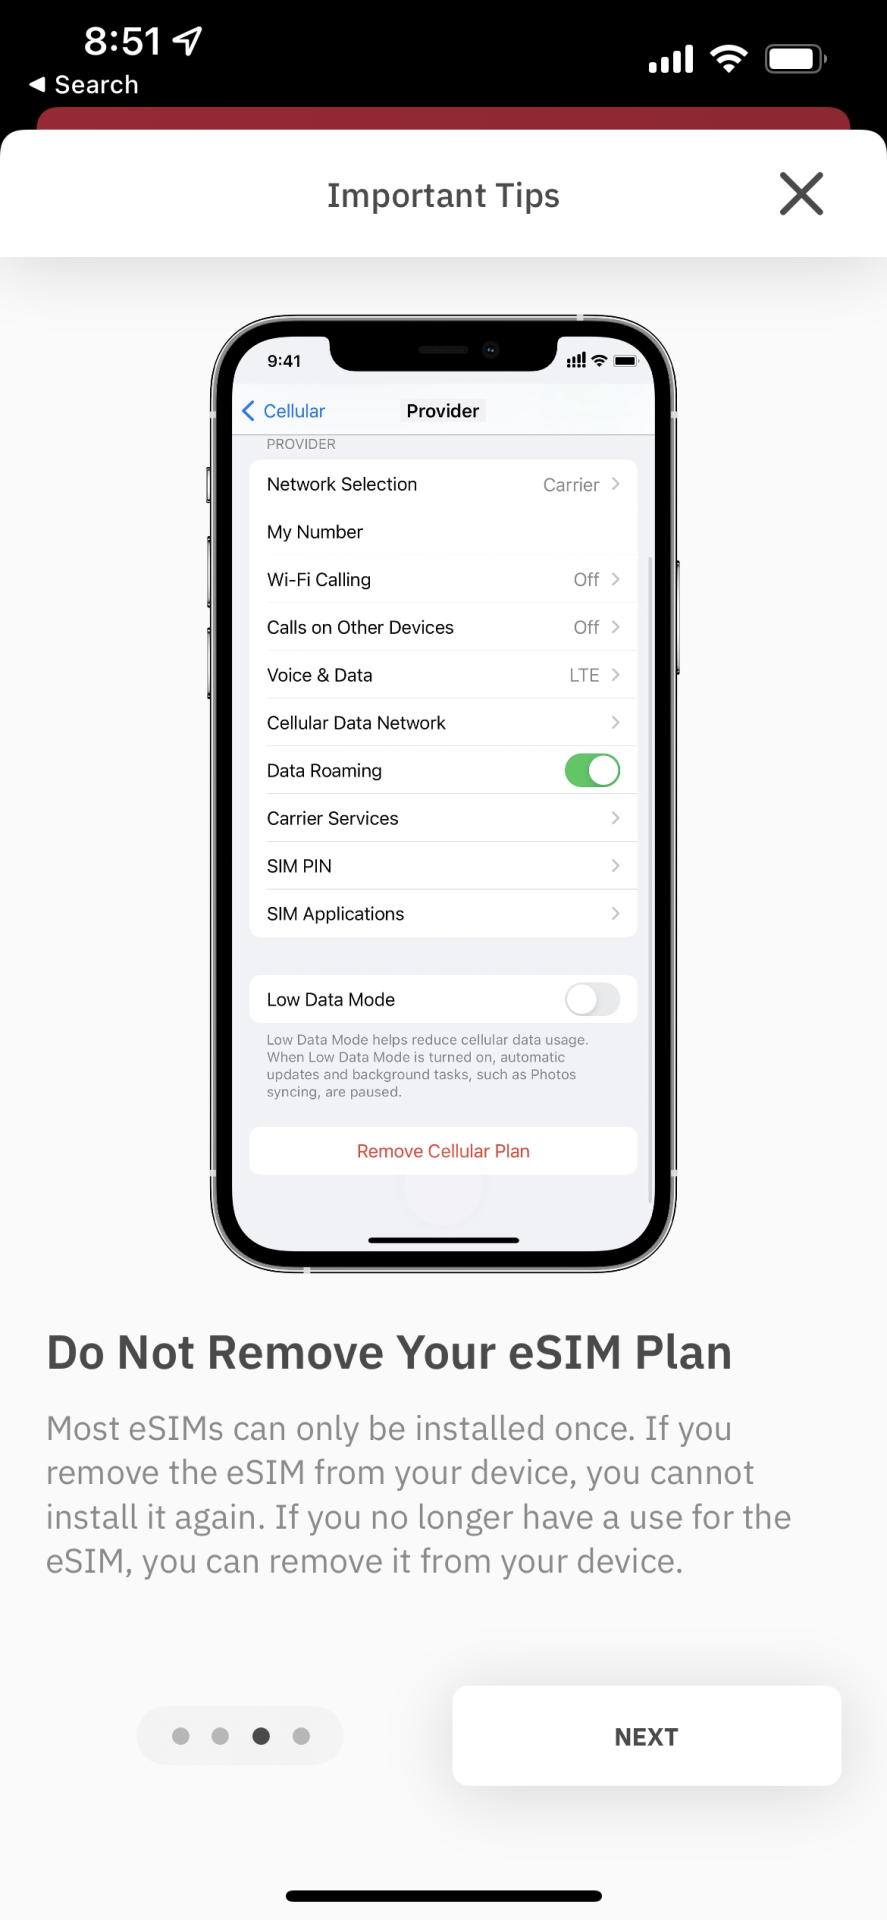
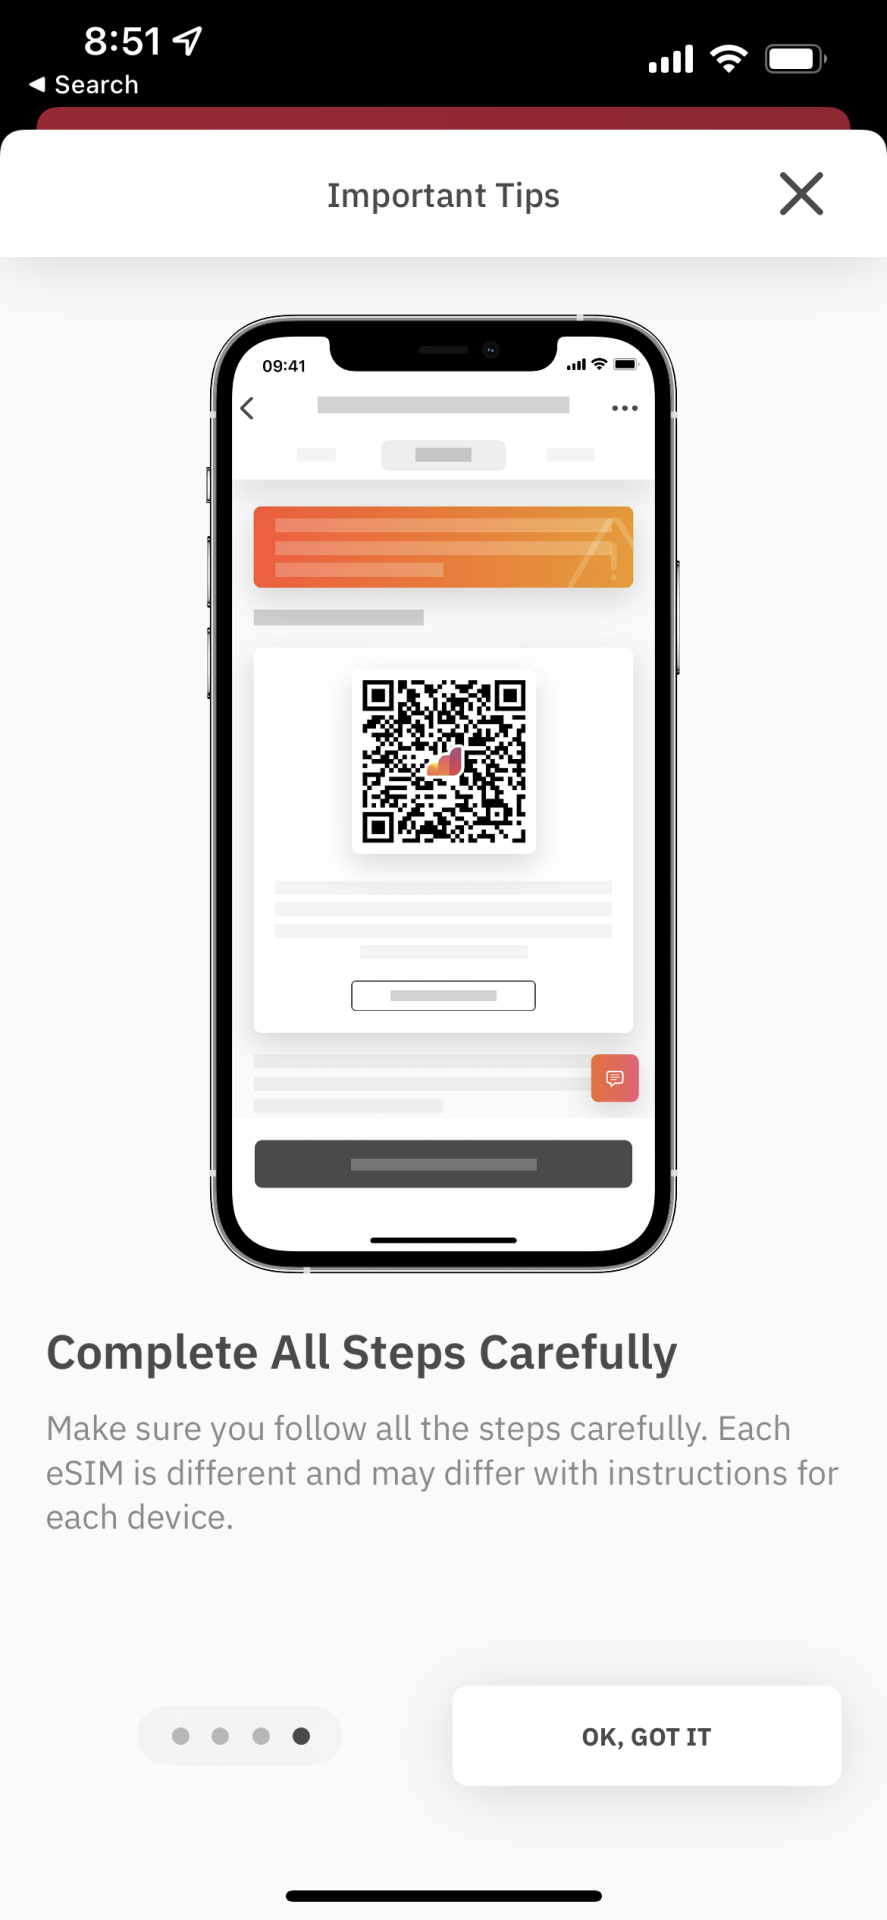
Step 4: a few pages of tips provided by Airalo
—
Step 5: More instructions reiterating the previous visual guide. Tap “Install eSIM” to continue and actually get this data on the road!
—
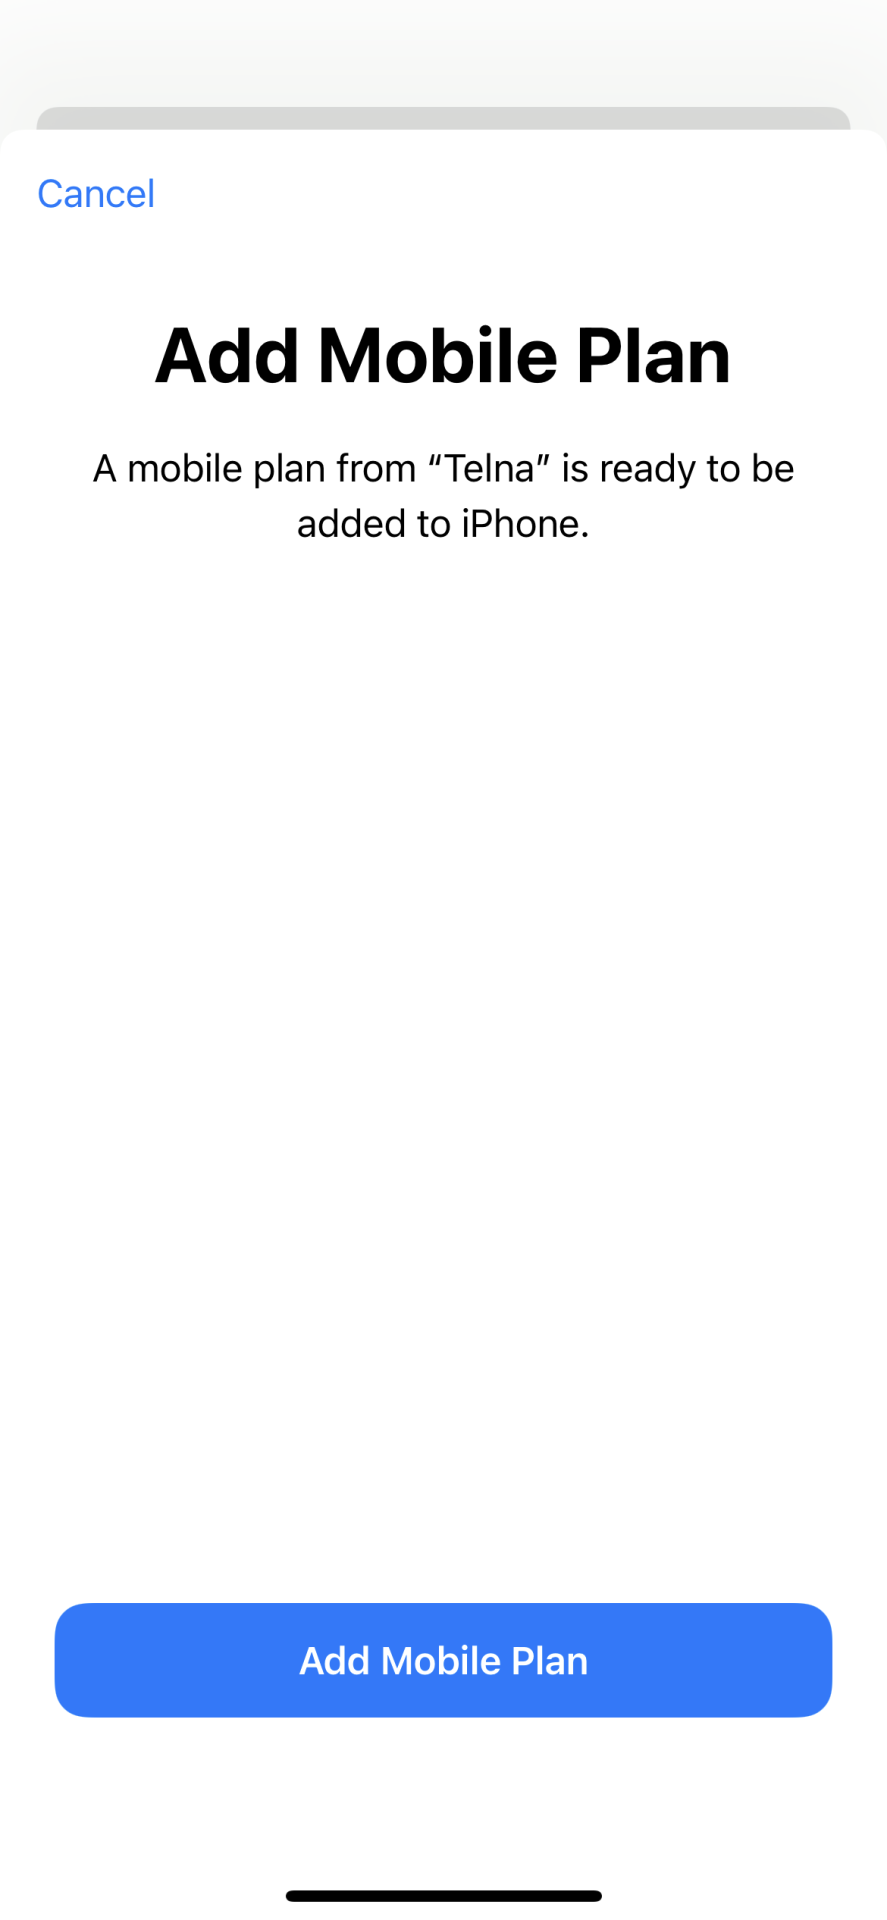
Step 6: iOS prompts the eSIM installation
—
Step 7: this screen seems a bit redundant and could be merged with the previous one.
—
Step 8: You could label your SIMS “home” and “away” or anything you’ll remember later on. This would likely be more important if you could install more than on eSIM at a time.
—
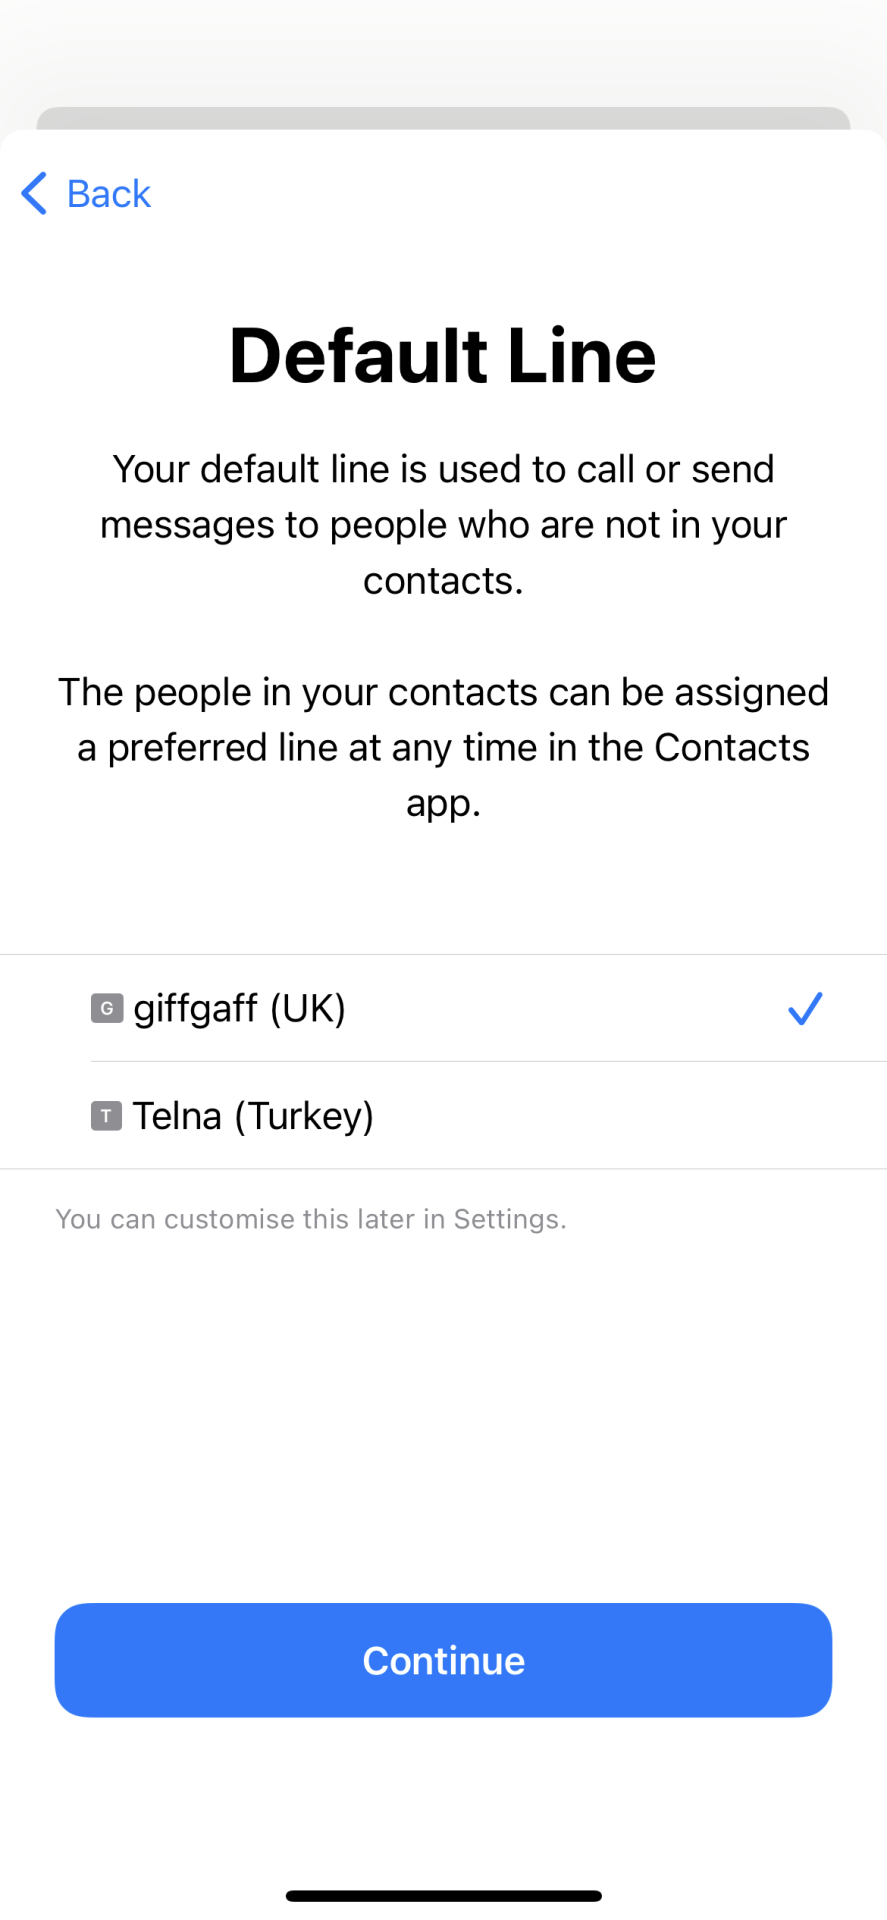
Step 9: Which number do you want to use for calls or messages? Defaults to your physical SIM, with it presumed you’ll use the eSIM just for the data
—
Step 10: the important step! You’ll want to use the eSIM for data. If setting up before you arrive in your destination, leave this on your normal SIM, and change in Settings once you land.
These eSIMs will only work in the country specified at purchase.
There’s not much more I can add here. eSIM is great for travel. Airalo is great. There’s likely going to be more good apps and ways to do this in future, but for now it’s my recommendation.
If you use this link to register your account, you will receive a $3 USD sign-up credit, or you can just type my referral code in the app: JEREMY0461. Or if you have a friend using Airalo, ask them for their referral code and they will get the $3 instead!
This setting that disables background tasks on iOS to give a longer battery life is great. I think most people would agree, additional battery life is worth far more than CPU speed or various background tasks.
Low Power Mode is so great that I’d argue it should be the default for iOS (when the phone is not charging).
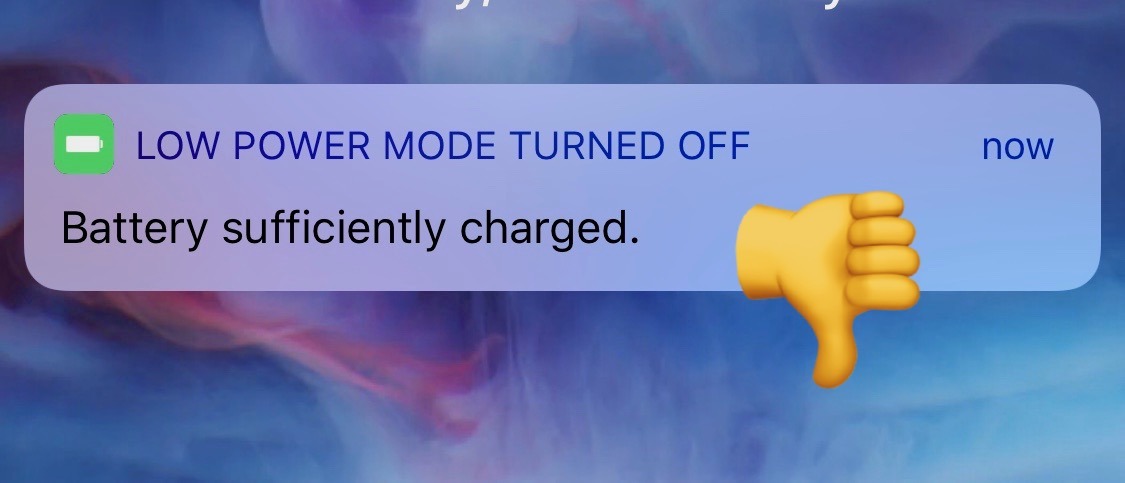
Speaking of defaults: nobody wants Low Power Mode to turn off at 80% battery level. Nobody. Why was this the chosen level of charge to the setting off? It should be 100%
I’ll tell YOU when you’re sufficiently charged!
Low Power Mode serves all kinds of purposes, and none of those are aided by going back to ‘full power mode’ at 80%.
When using an external battery pack, you literally have to babysit the phone to turn Low Power Mode back on after the phone hits 80%. Should it then drop back to 79% and up to 80%, you’d have to do it again.
If charging at home before heading out - you may need messages to come in (making Airplane mode not suitable) but want to get the best charge before leaving. Again, at 80% the phone will helpfully turn Low Power Mode off again resulting in background photo sync, mail checking and slower charge.
There is no drawback to 100% being the threshold. The mode should turn off sometime, as iOS should get a chance to perform backups, sync photos or check mail. But that can all happen when disabled manually, or when the phone is at a full charge.
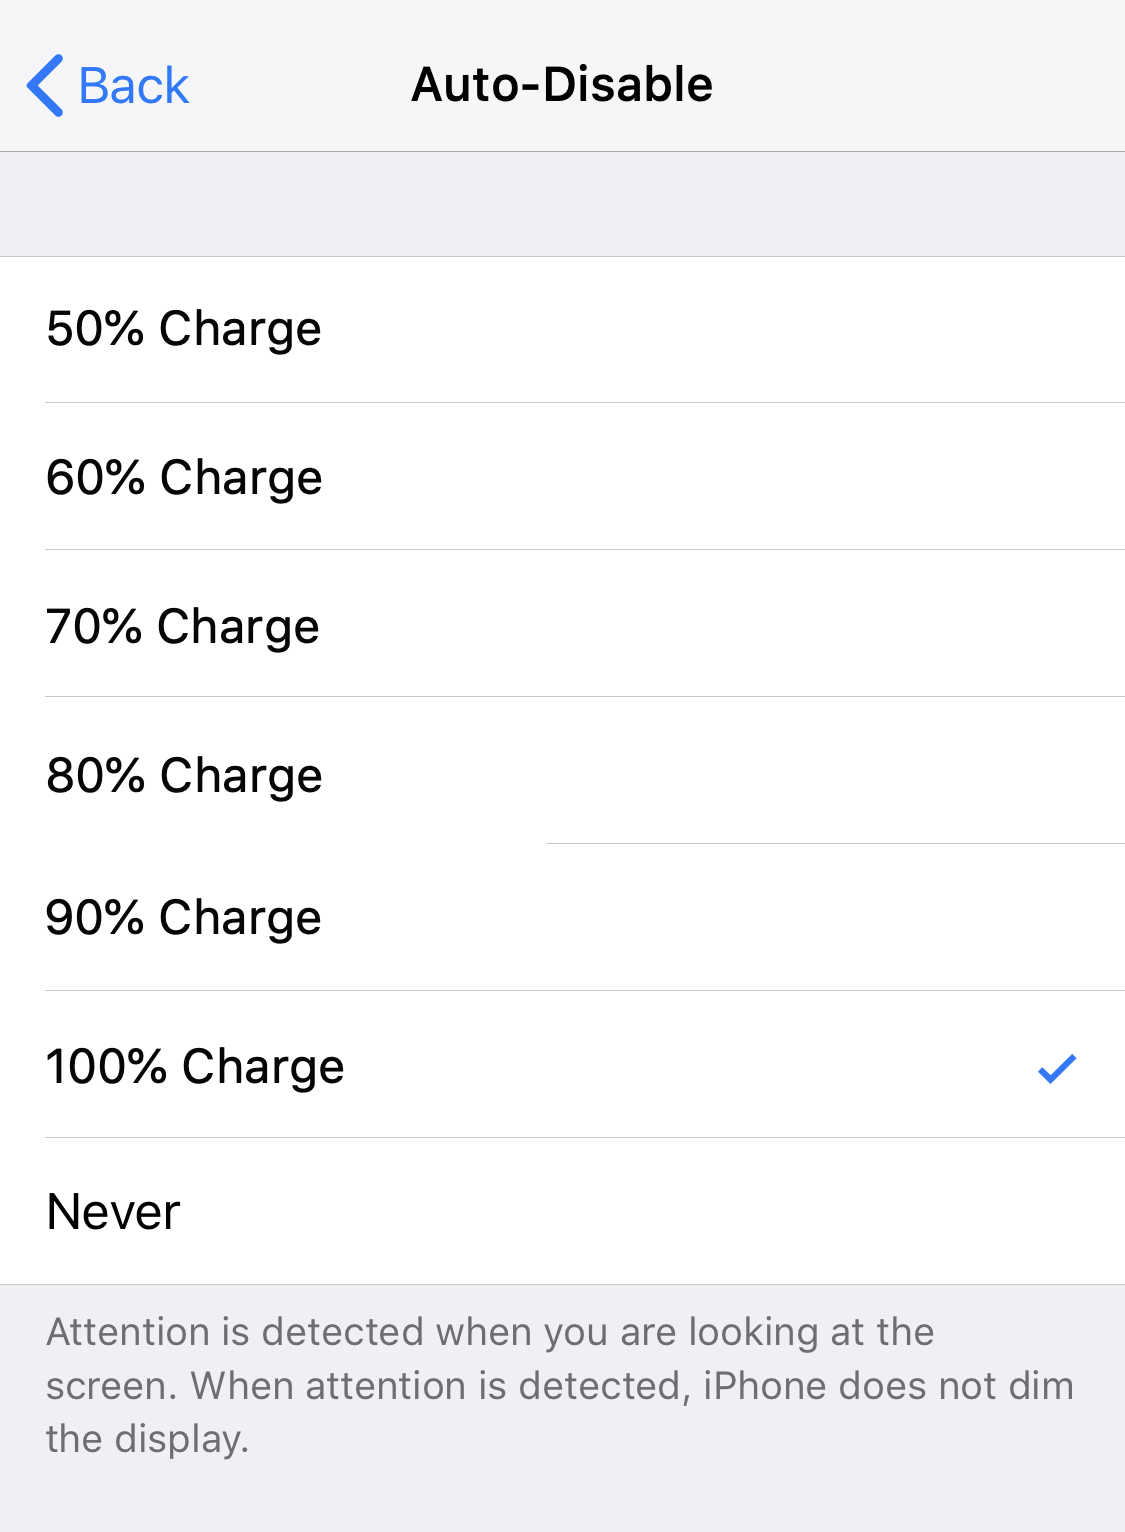
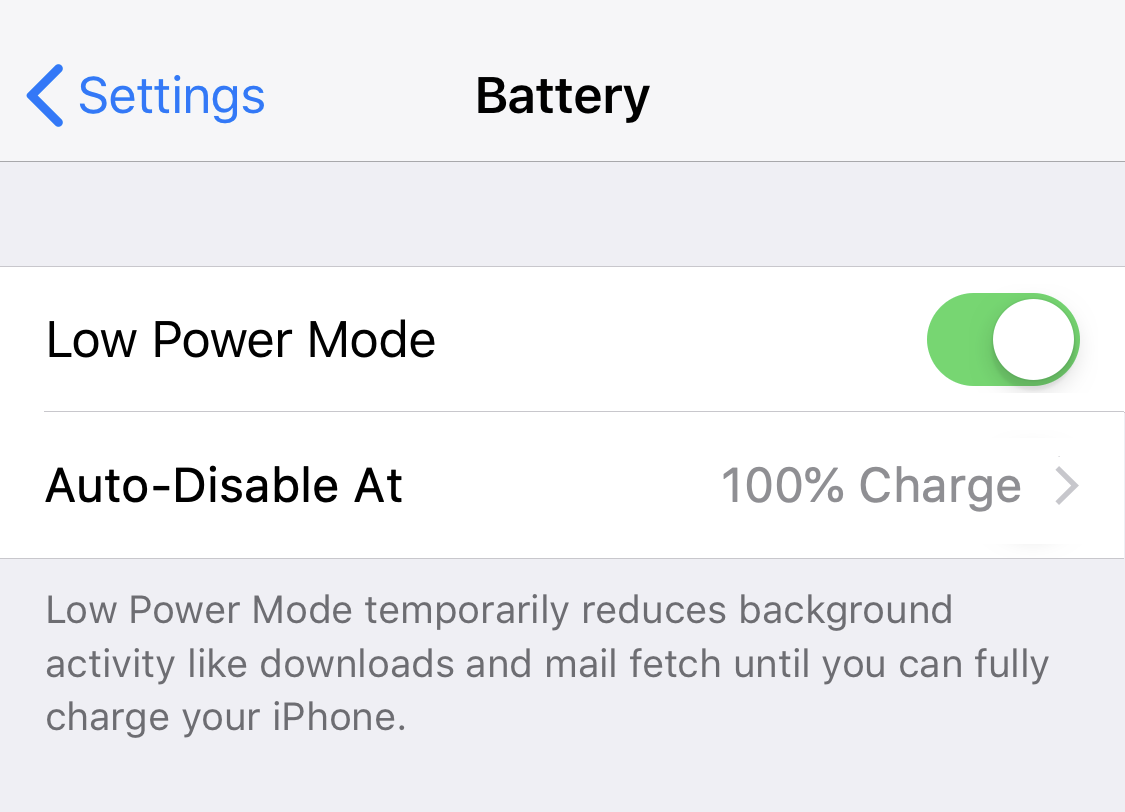
If you insist, make it a setting. iOS 13 feature request right here.
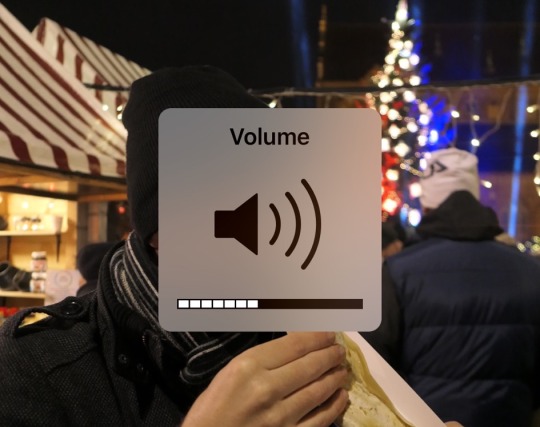
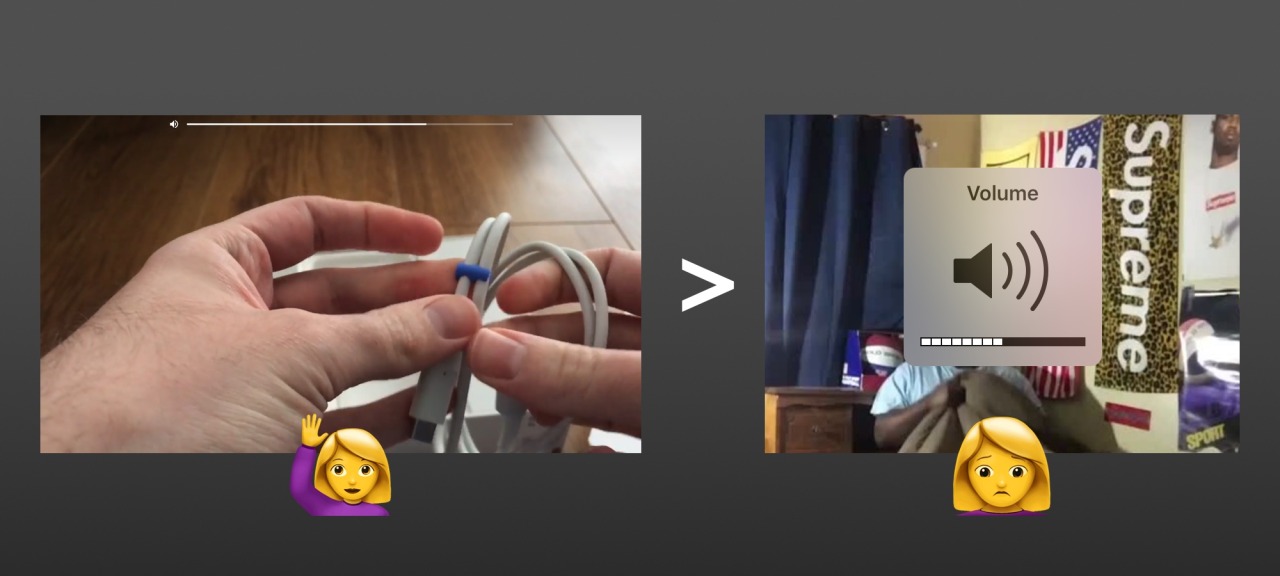
Didn’t it make you mad loading this page and seeing the image up there with a giant volume control on top of it?
When watching videos on iOS — particularly iPhone — it’s inevitable you’ll have to change the volume at least once. And you know what that means: the giant rounded rect hovering over the exact content you are trying to view.
👎
In recent years, a sneaking trend has emerged with some apps replacing the system-wide volume HUD with a skinny slider at the top of the screen.
Here’s a selection that I have come across:
YouTube
Instagram
Snapchat
Notes
This UI appears only in full-screen apps that hide the status bar.
YouTube shows a speaker icon for volume. The others imply it.
After using these apps for a while, it’s pretty jarring coming back to Facebook or Vine where a volume change hides content for what feels like forever.
In short:
Might be something for Apple to consider changing system-wide in iOS 11. It’s a great feature.
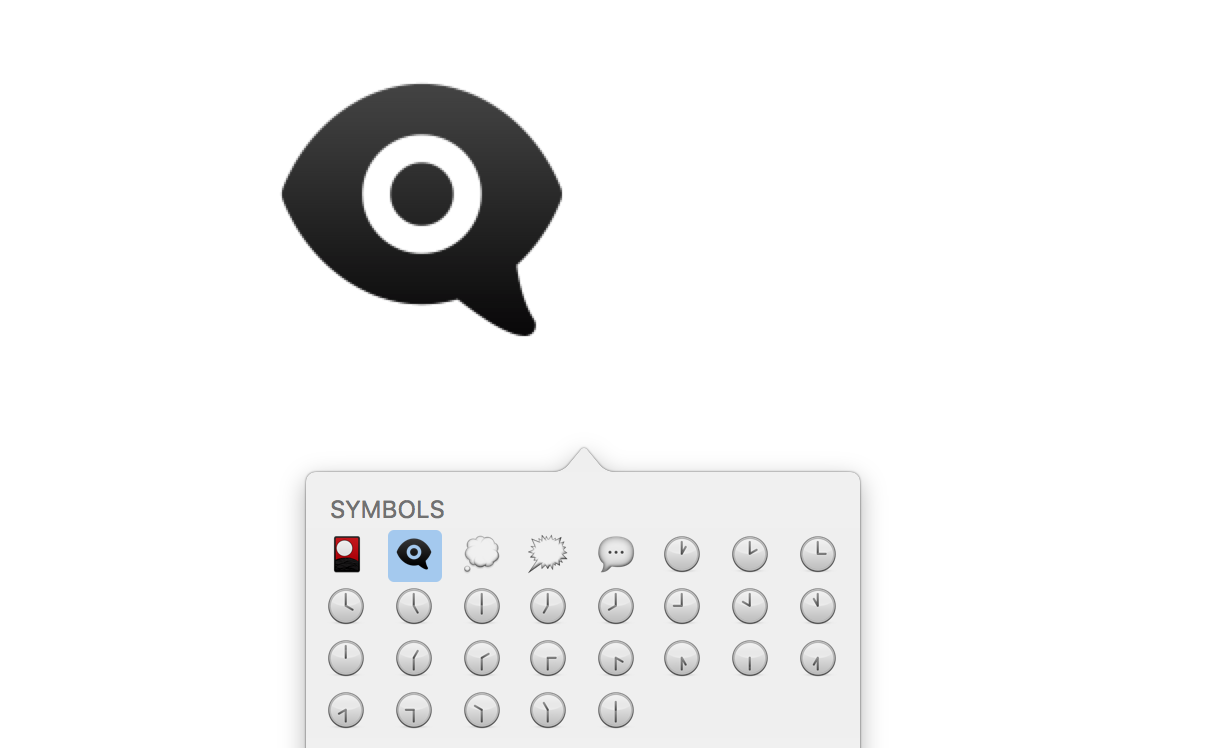
A mysterious new emoji has shown up in the developer previews of iOS 9.1 & OS X 10.11.1, and nobody knows what it is, or why it exists.
To a casual observer, this appears to be just another emoji - one of many planned for the iOS 9.1 emoji update.
But the strange thing about this character (which Apple calls “eye in speech bubble”) is that it’s not a standard Unicode addition. It can’t be found in Unicode 1.1, or any other version right through to the Unicode 9.0 candidates.
This new emoji shows as a placeholder ellipsis on the emoji keyboard of the current iOS 9.1 developer preview:
Tapping and holding on this ellipsis gives away some of what is going on here - showing an eye, and a speech bubble. The emoji is created from joining these two standard Unicode characters together.
Combining these two characters with a Zero Width Joiner (ZWJ) results in the creation of the eye in speech bubble emoji.
A similar technique (using the ZWJ to create new emojis) is used by Apple for the range of family emojis. For exampls, the 👩👩👧 Family (Woman, Woman, Girl) emoji is a combination of these characters:
When displayed in-sequence, the result is a combined image showing two mothers and a daughter on supported platforms.
The difference between the use of ZWJs here is that the family emojis are well documented by Unicode.
By comparison, the eye in speech bubble emoji has not been suggested or recommended by Unicode, nor have I seen any mention of it prior to this update.
Update 2015-09-29: Erik Veland has figured some of it out. When using OS X text-to-speech, this emoji is spoken as “Eye in speech bubble representing anti bullying campaign”. Is this to promote awareness, or does it have any associated functionality? Time will tell.
Update 2015-10-22: Robbie Gonzalez of Wired has the full details of this “I am a witness” anti-bullying campaign. A noble cause, but will this open the floodgates of campaigns lobbying Apple for custom ZWJ emoji sequences of their own? h/t Robert Hackett.
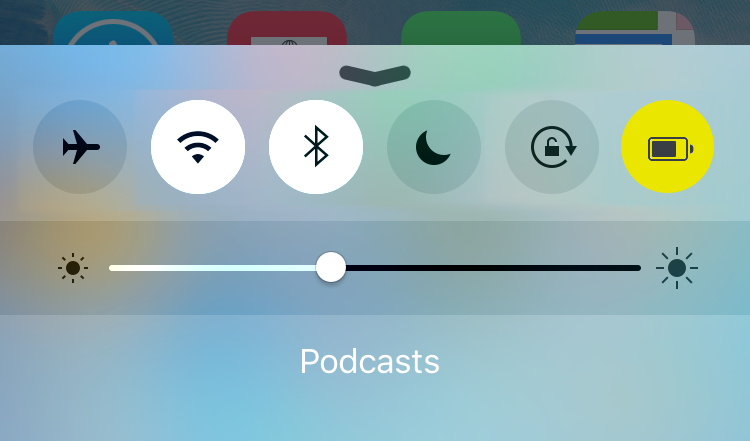
Low Power Mode is one of my favourite features of iOS 9. So useful, I want to toggle it every time I leave the house. Or have it automatically enable at 50% battery. No need to ask, I’ll always say yes!
I don’t want to overstate this, but the feature I love the most about
iOS 10 isn’t the clipboard sync, better maps, or photo search.
It’s this new tab in the middle of the 🕓 Clock app:
Improving something I do every day
I have to wake up every day, and I appreciate the time that went into making this process as easy as possible.
In no particular order, here’s what I like about the new Bedtime feature for iOS:
It’s recurring, but it doesn’t have to be the same time each day.
Modifying my wake-up time has gone from minimum three taps, to one slide gesture moving the big wheel.
Alarm volume remains the setting I choose, regardless of system alarm volume. I literally never have to think about my phone volume.
Bedtime reminders. Sometimes I’ll get carrier away with the day. A reminder of when I should go to bed alerts me on my watch, based on my wake-up time. I don’t always listen, but the reminder is helpful.
The wake-up sounds are amazing. I literally wake up feeling more refreshed as a result. They have a perfect way of starting soft, and building. Dreams turn into the first moments of the day.
I was trying to figure out how to describe how I feel when waking up to one of these sounds, but let me show you.
This is how I feel when waking up to the “Early Riser” alarm sound on iOS 10:
So to whoever worked on bringing this feature to life: making a fast interface, beautiful sounds, and smart settings: thank you.