Learn how to use the built-in document scanner feature of your iPhone or iPad Notes app to scan and save receipts, invoices, business cards, photographs, documents, etc.
The Apple Notes app takes full advantage of computer vision and ARKit to sense a document in your camera feed, crop and straighten the edges, un-skew the perspective, and remove any tilt or glare.
All that’s left for you to do is fill in the blanks and sign the scan with your finger or Apple Pencil before you share the document or send it to your favorite app for further editing. And with iCloud, your scans sync seamlessly across all your devices.
Related: How to scan documents using the Apple Files app or Google Drive on iPhone and iPad
Scan documents and items in Notes app
1) Open the Apple Notes app and go to the folder where you want to save the scan. After that, tap the compose button to create a new note.
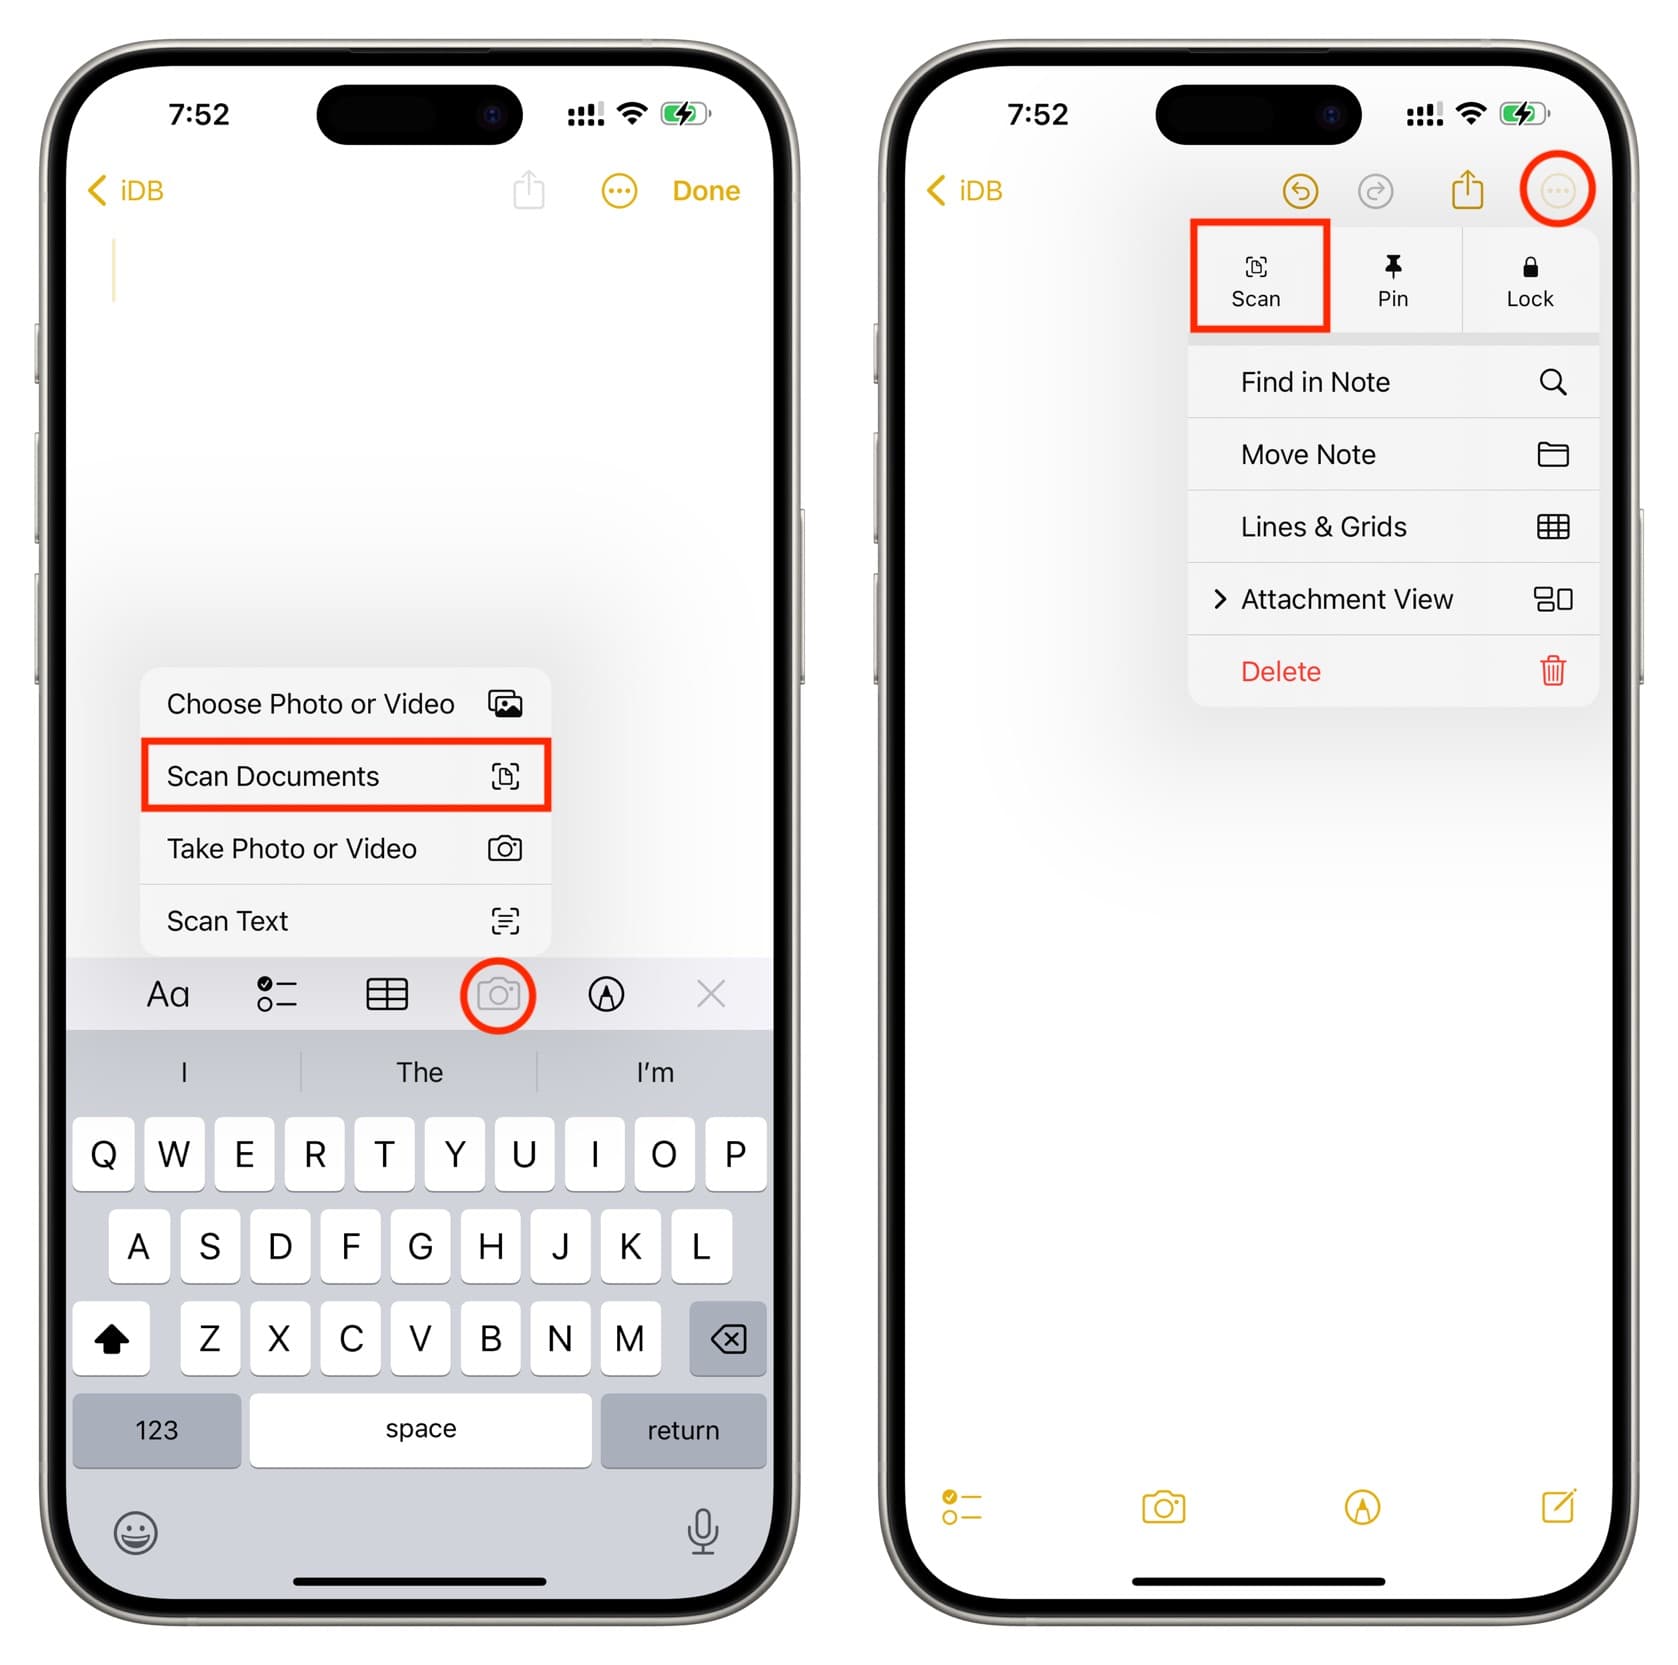
2) Tap the camera icon above the keyboard and select Scan Documents. If you don’t see the camera icon, tap the plus button first.
If you’re in the note’s body (and not the title section), you can also tap the three dots menu icon from the top and select Scan.
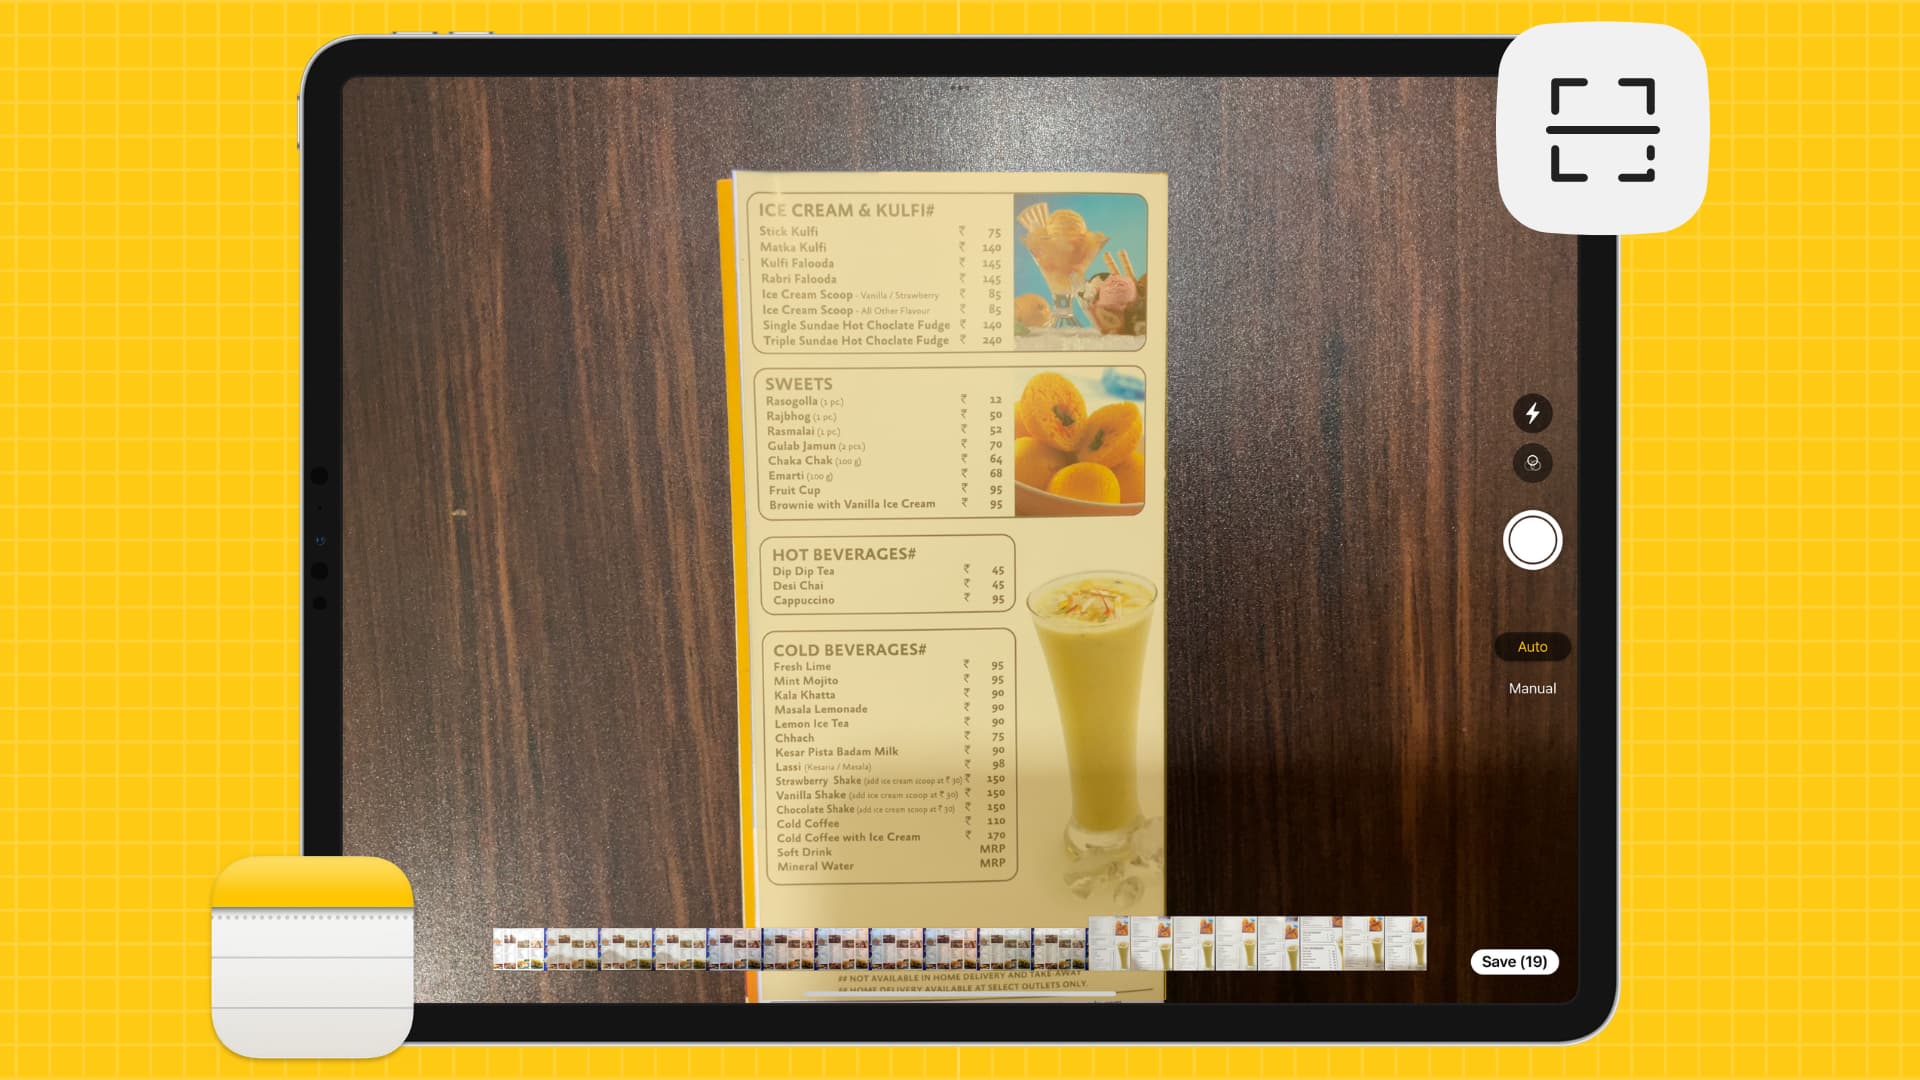
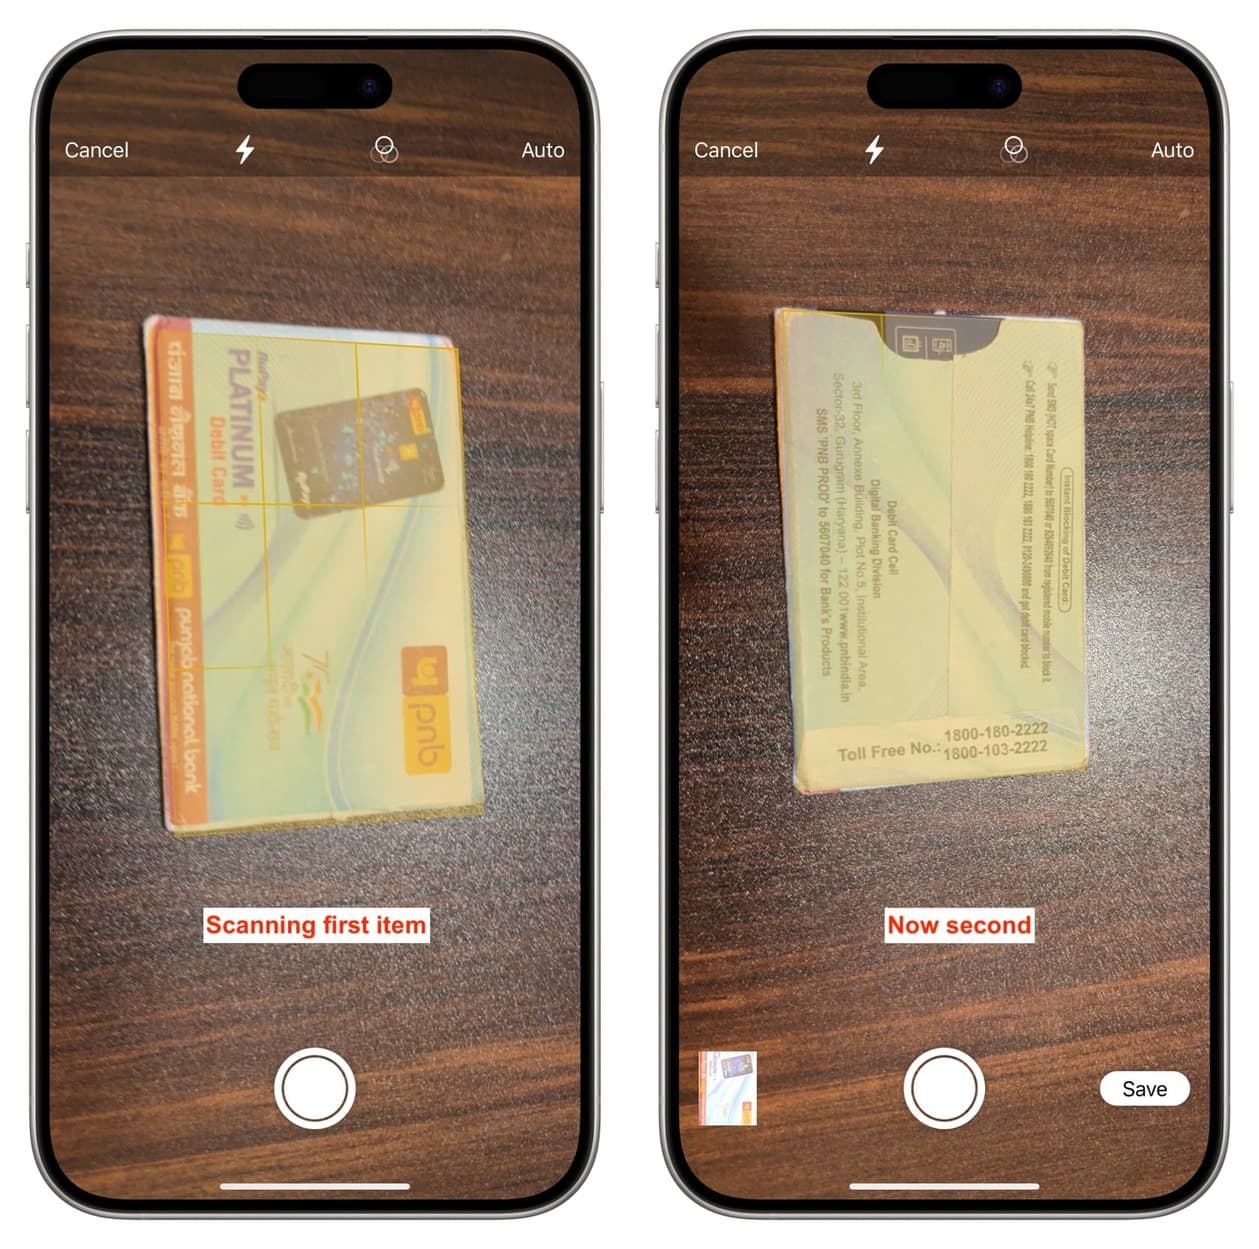
3) Position your iPhone properly over the document or item you want to scan. As soon as the scanner detects the document edges, it’ll apply a semi-translucent yellowish overlay on top of the document, grab a scan, and then get ready for the second. If you have more pages to scan, keep pointing your iPhone over them. If not, go to step 4.
Note that you can turn off the automatic scan feature by tapping Auto from the top right. Additionally, you can also use the flash and filters options.
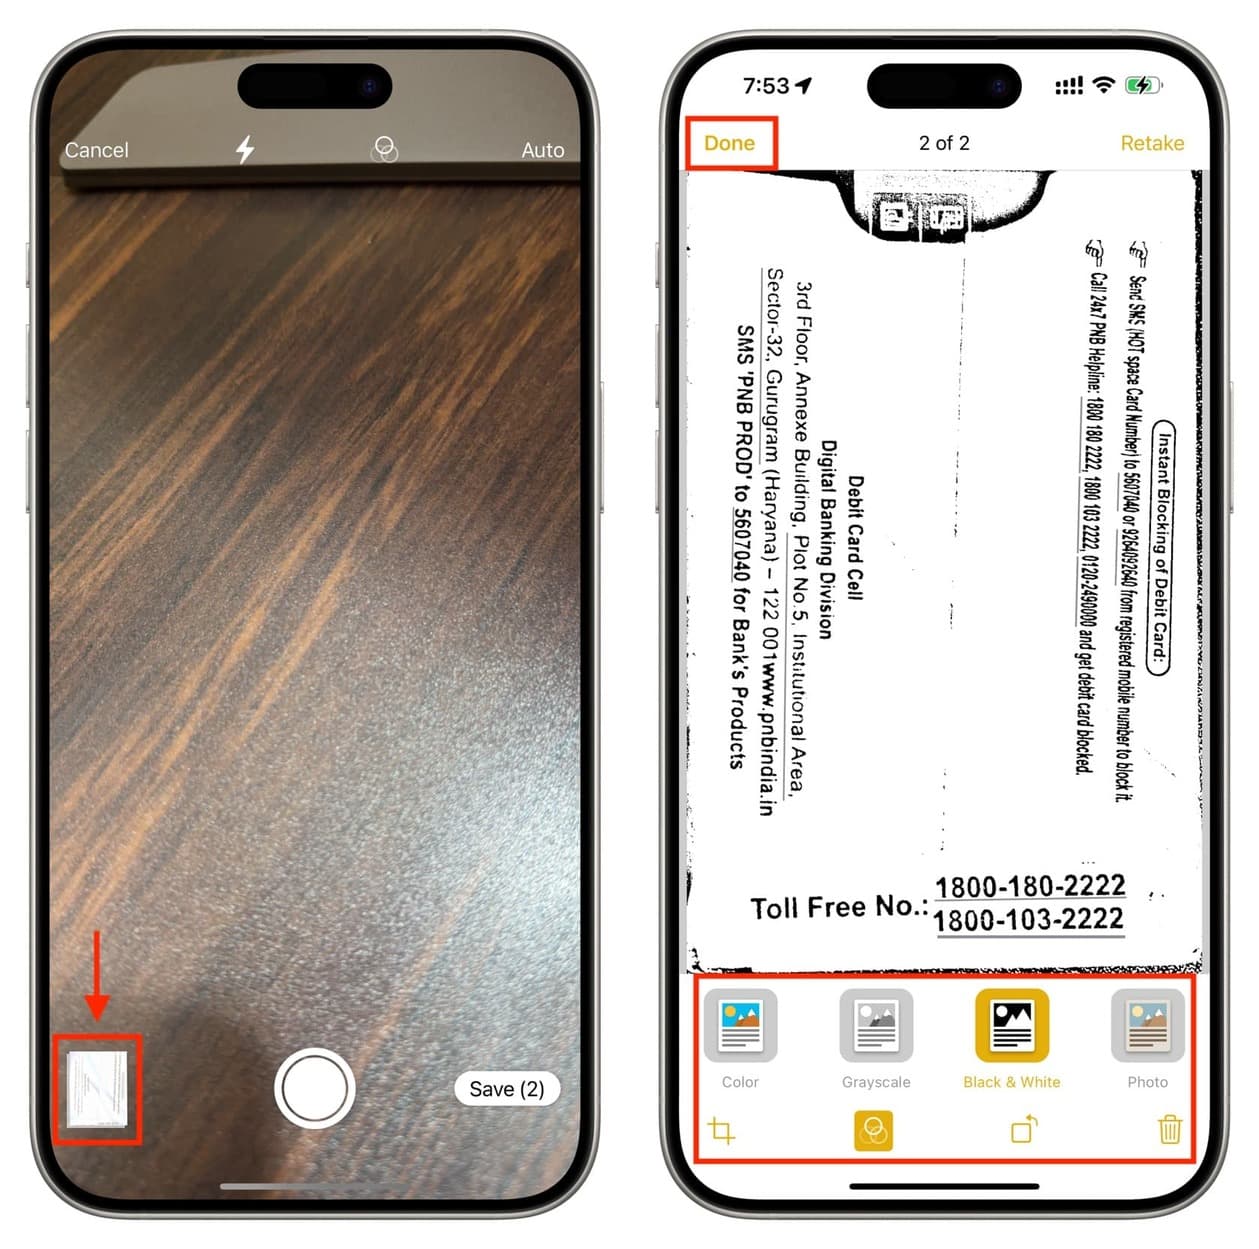
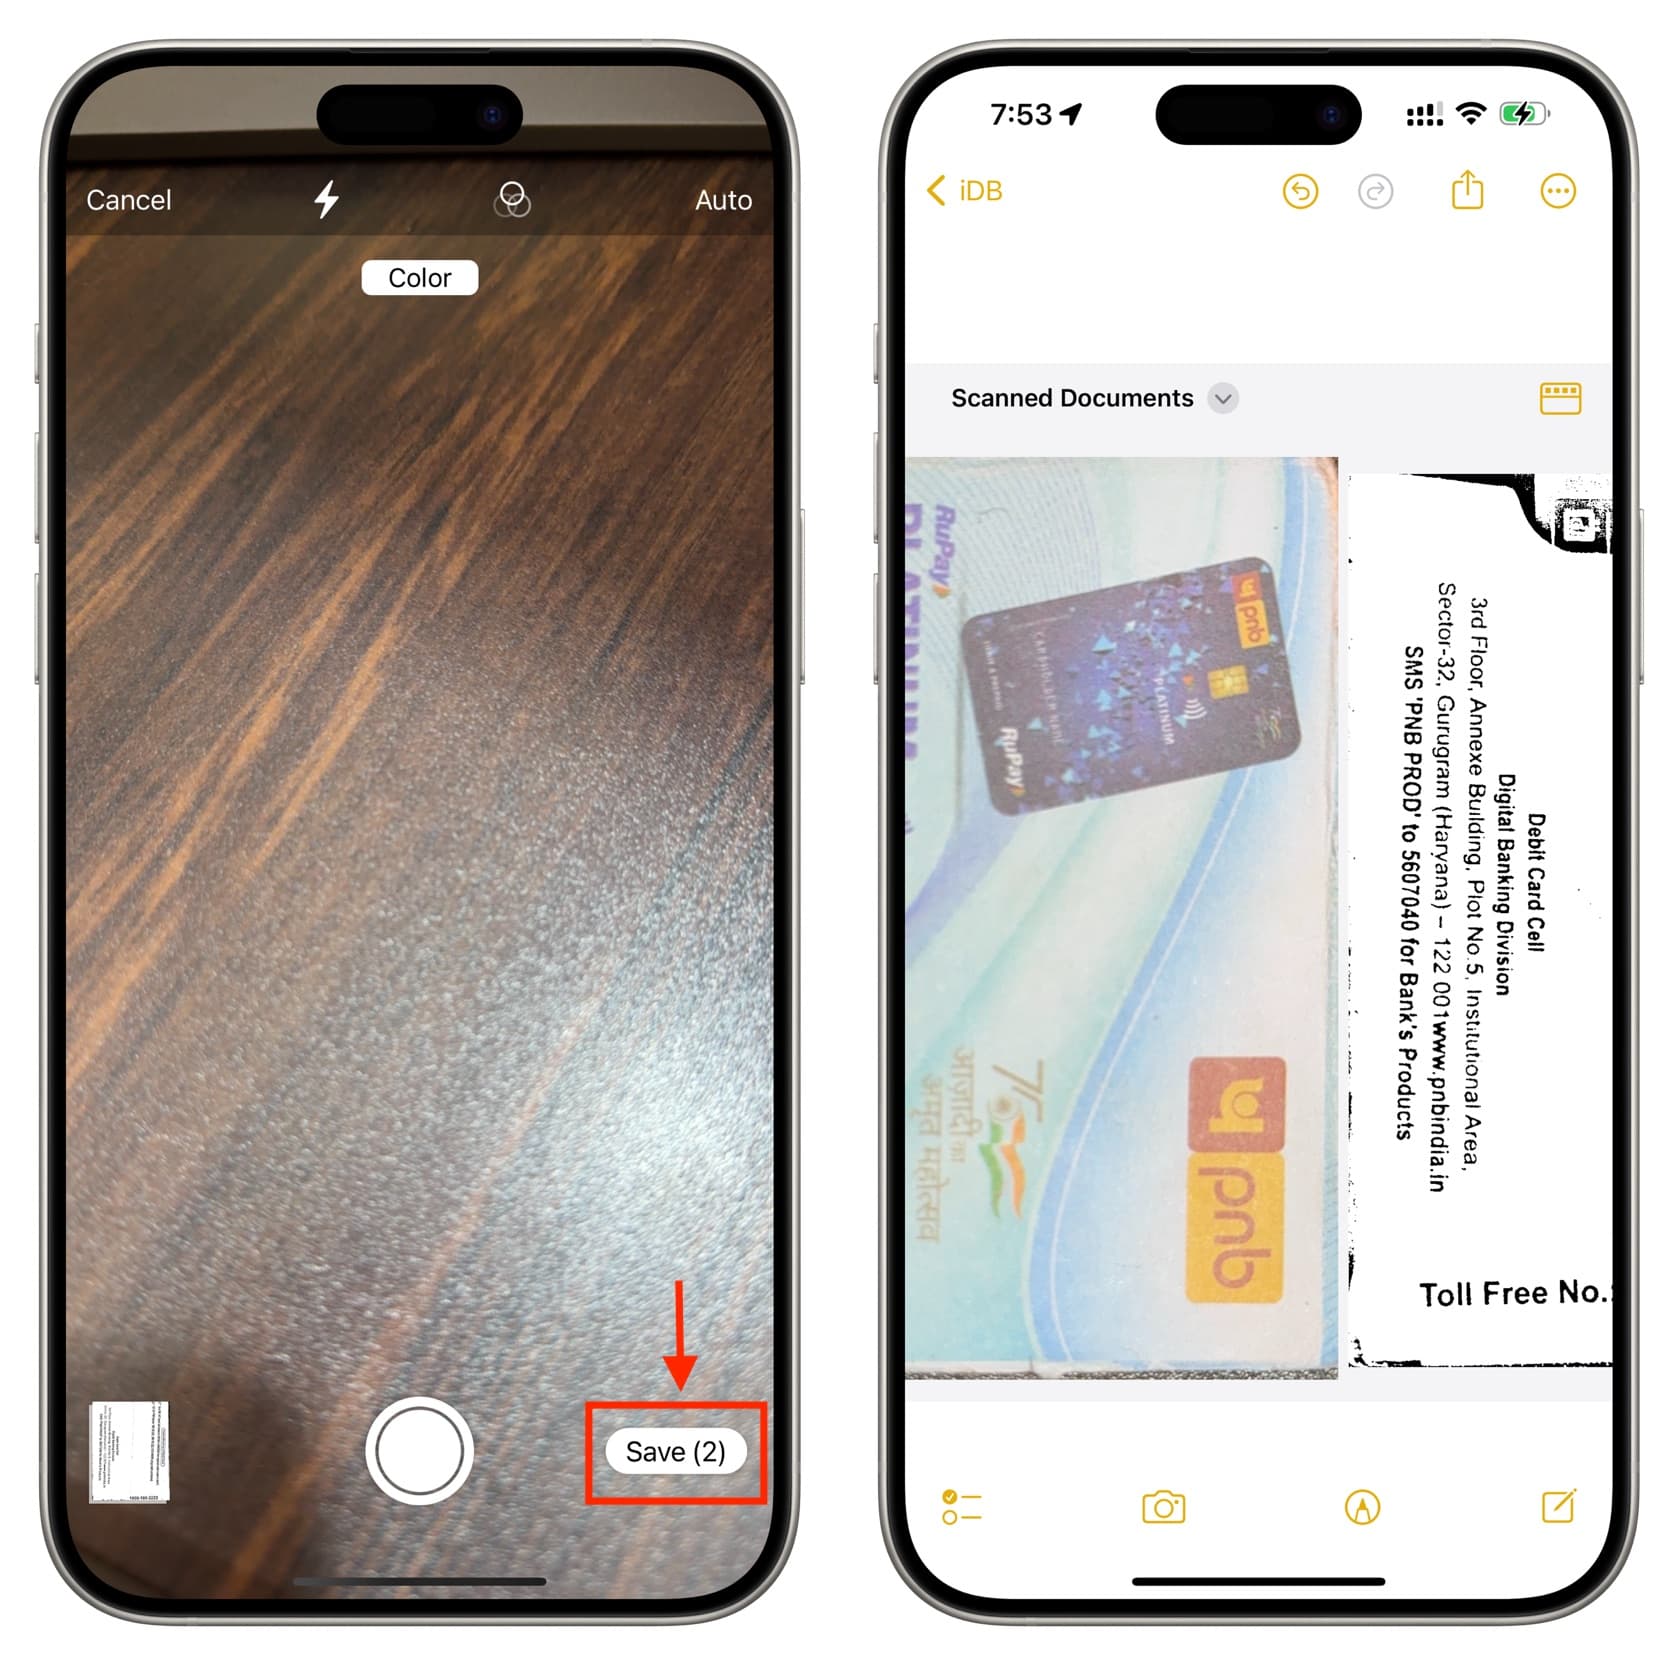
4) After you finish scanning, you can tap the thumbnail from the bottom left and make adjustments to perfect the scan. For instance, you can crop out the extra sides, add filters, rotate the pages, or delete unnecessary pages you have scanned. After that, tap Done.
5) Now, tap Save, and this scan will be added to your note. The Notes app will automatically give a name to your scan based on the content, but you can change it.
Remember that you can add text, checklist, images, and other items in that same note where you have added your scans.
Tip: You can also touch and hold the Notes app icon and select Scan Document from the quick actions menu.
Edit your scan
Once the scan is done, you will return to the note. Now, you can edit or derive more use out of it.
Work with all scanned pages
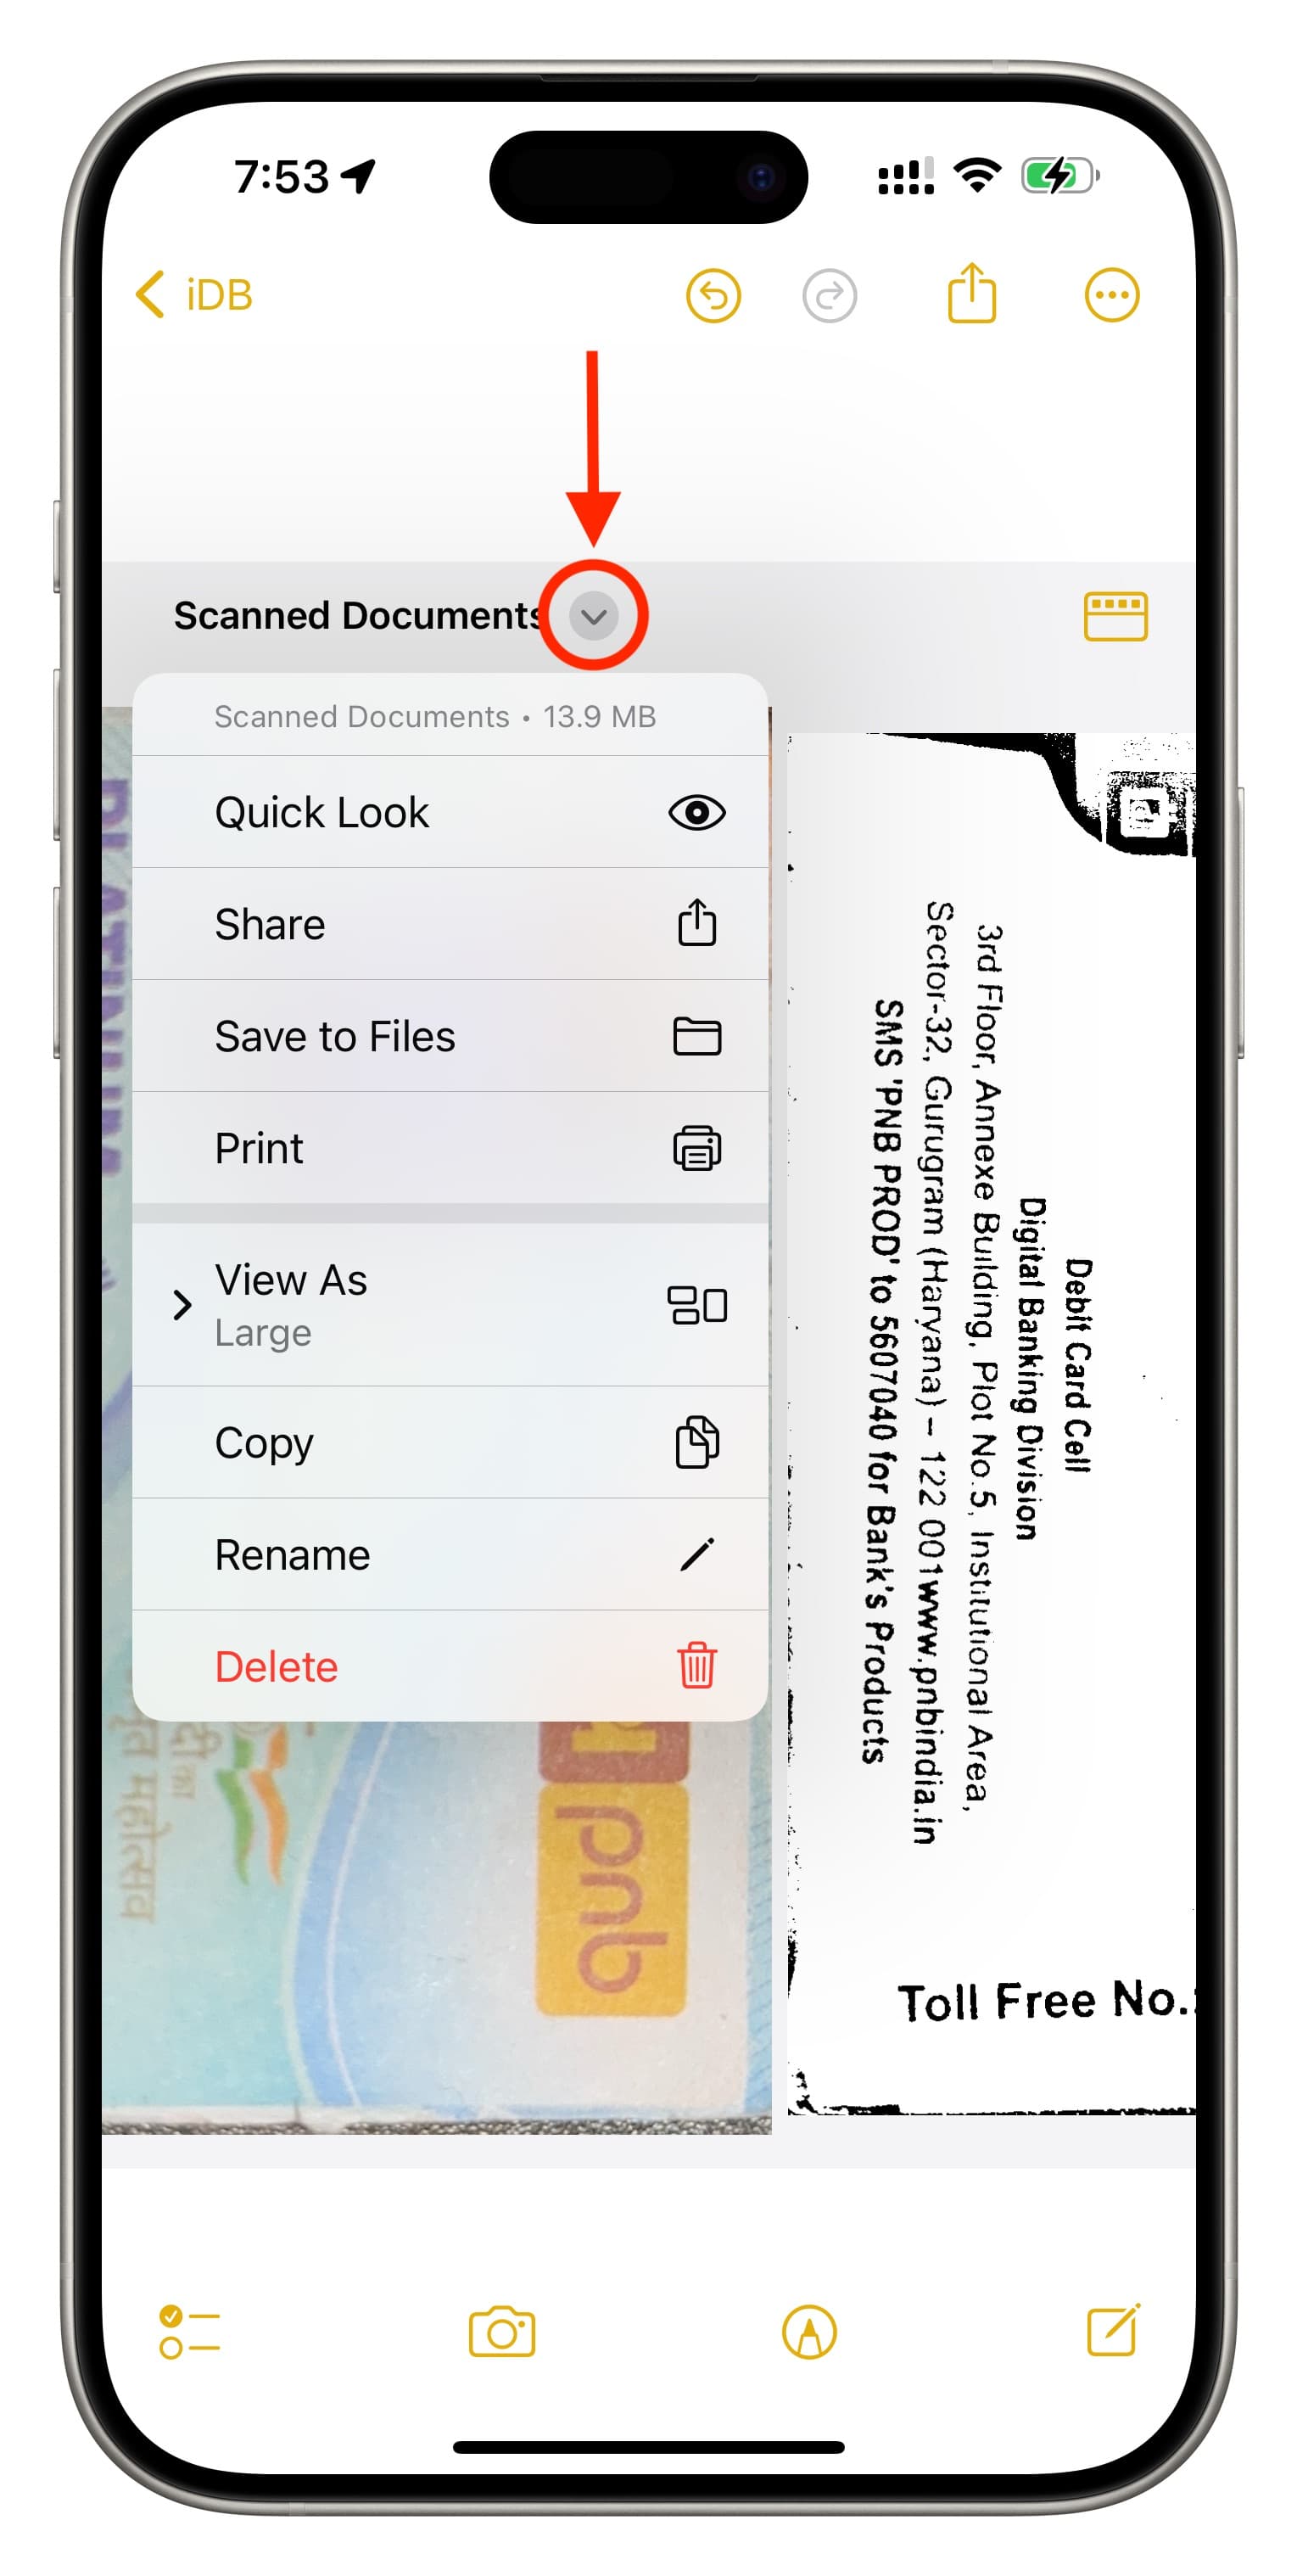
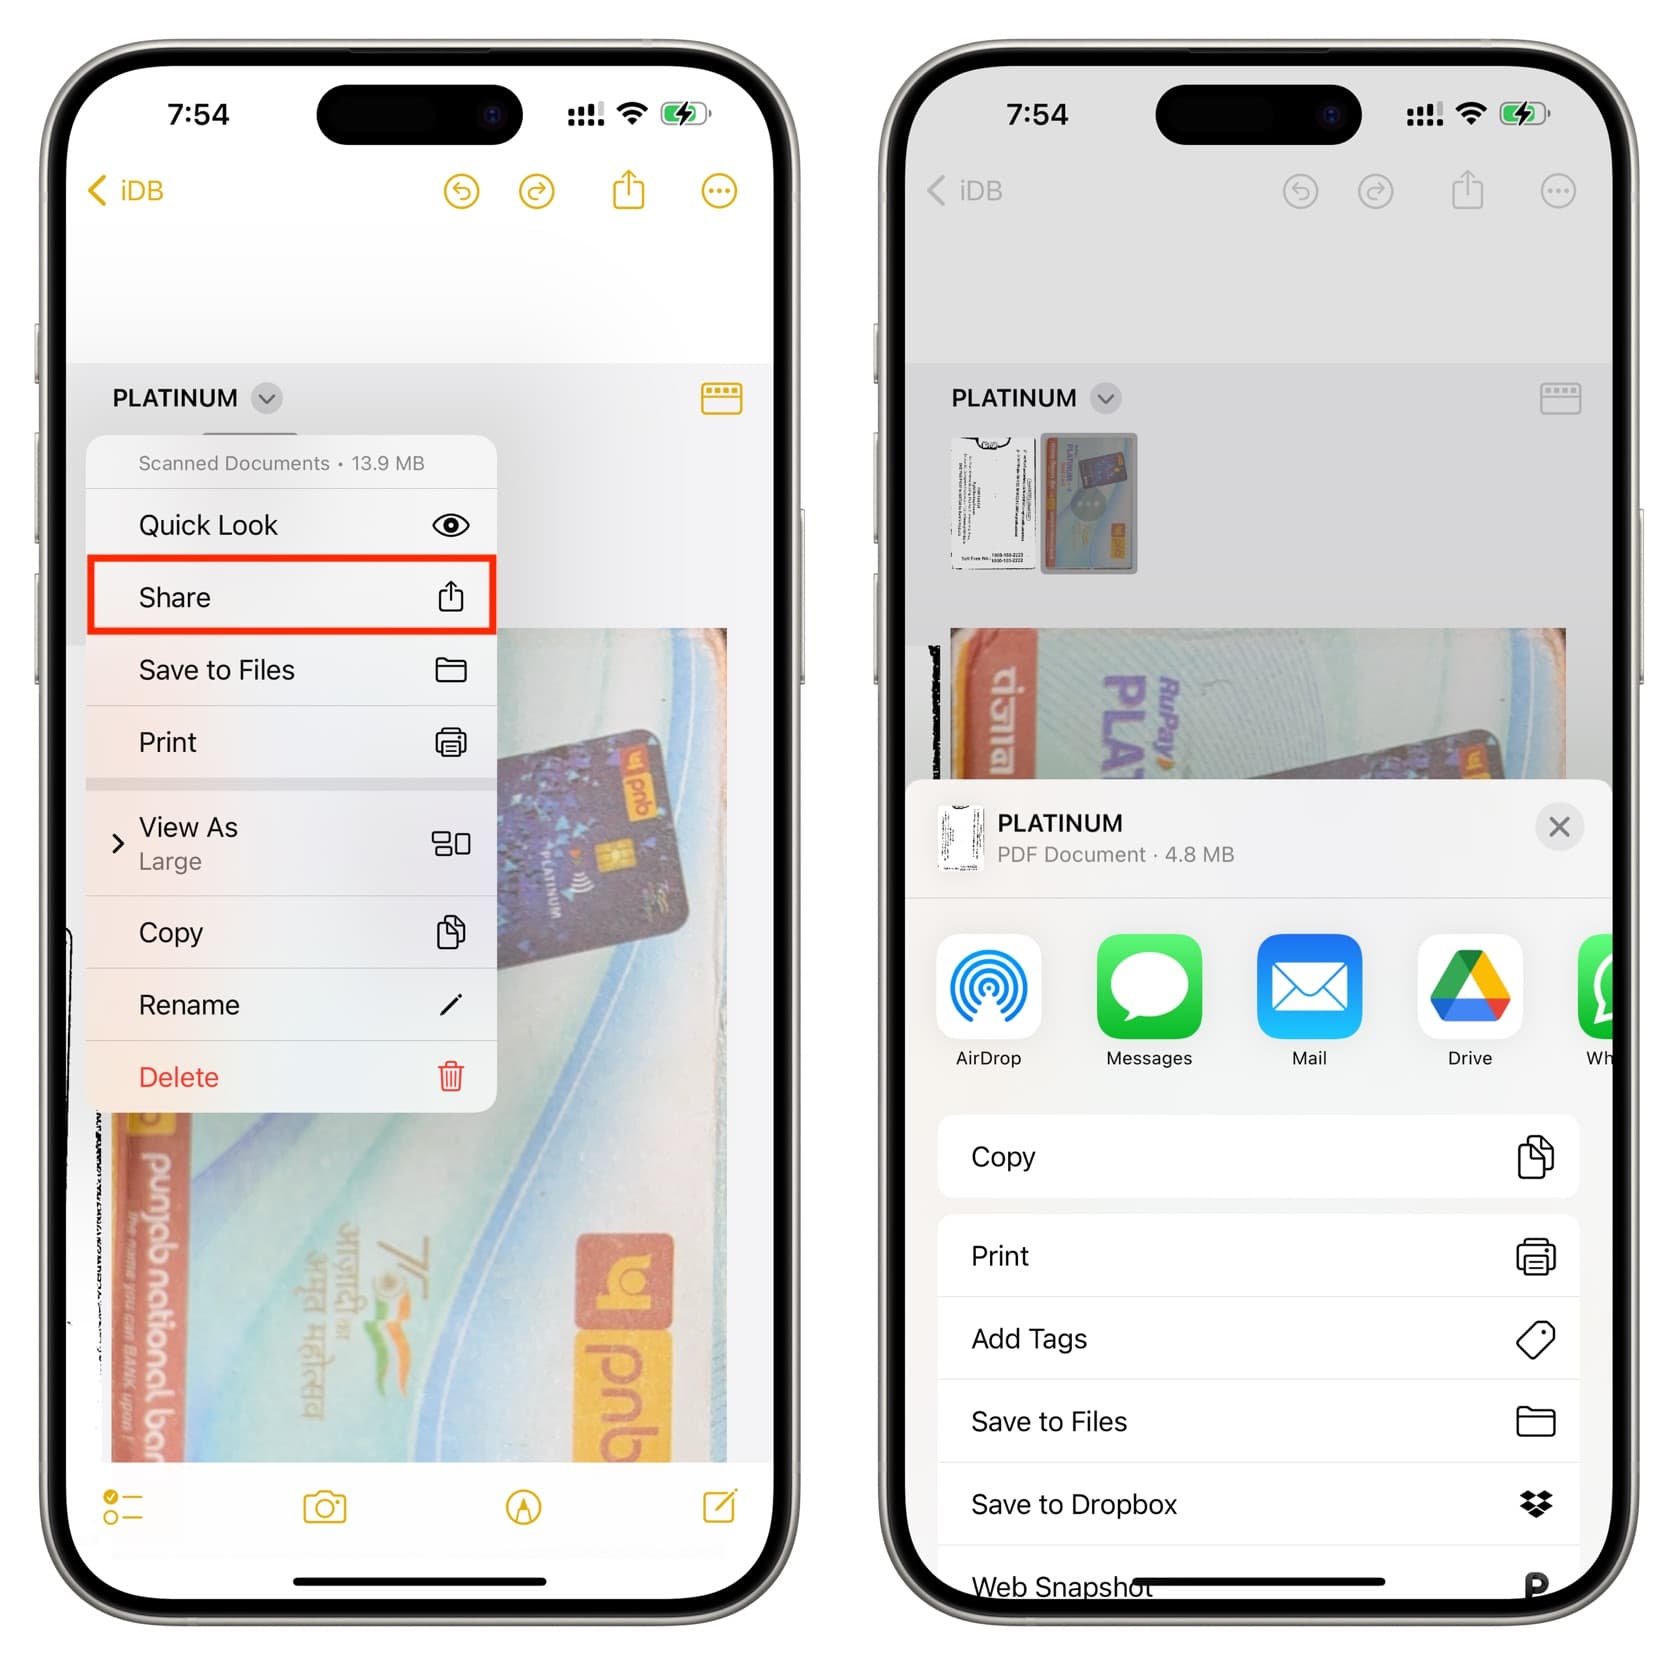
Tap the downward arrow next to the scan name, and then you can:
- Quick Look: View the scan on the full screen.
- Share: Send it via other apps from the iOS Share Sheet.
- Save to Files: Add this scan as a PDF to iCloud Drive, local iPhone or iPad storage, or the added cloud services.
- Print: Get a physical copy of this scan using your printer.
- View As: You can choose to see the embedded scan in the note in small, medium, or large view. I love the medium view.
- Copy: Get the scan into your clipboard for pasting it into another app.
- Rename: Give another name to this scanned document in place of the automatic name the Notes app has assigned to it.
- Delete: Remove this scan.
Work with one page
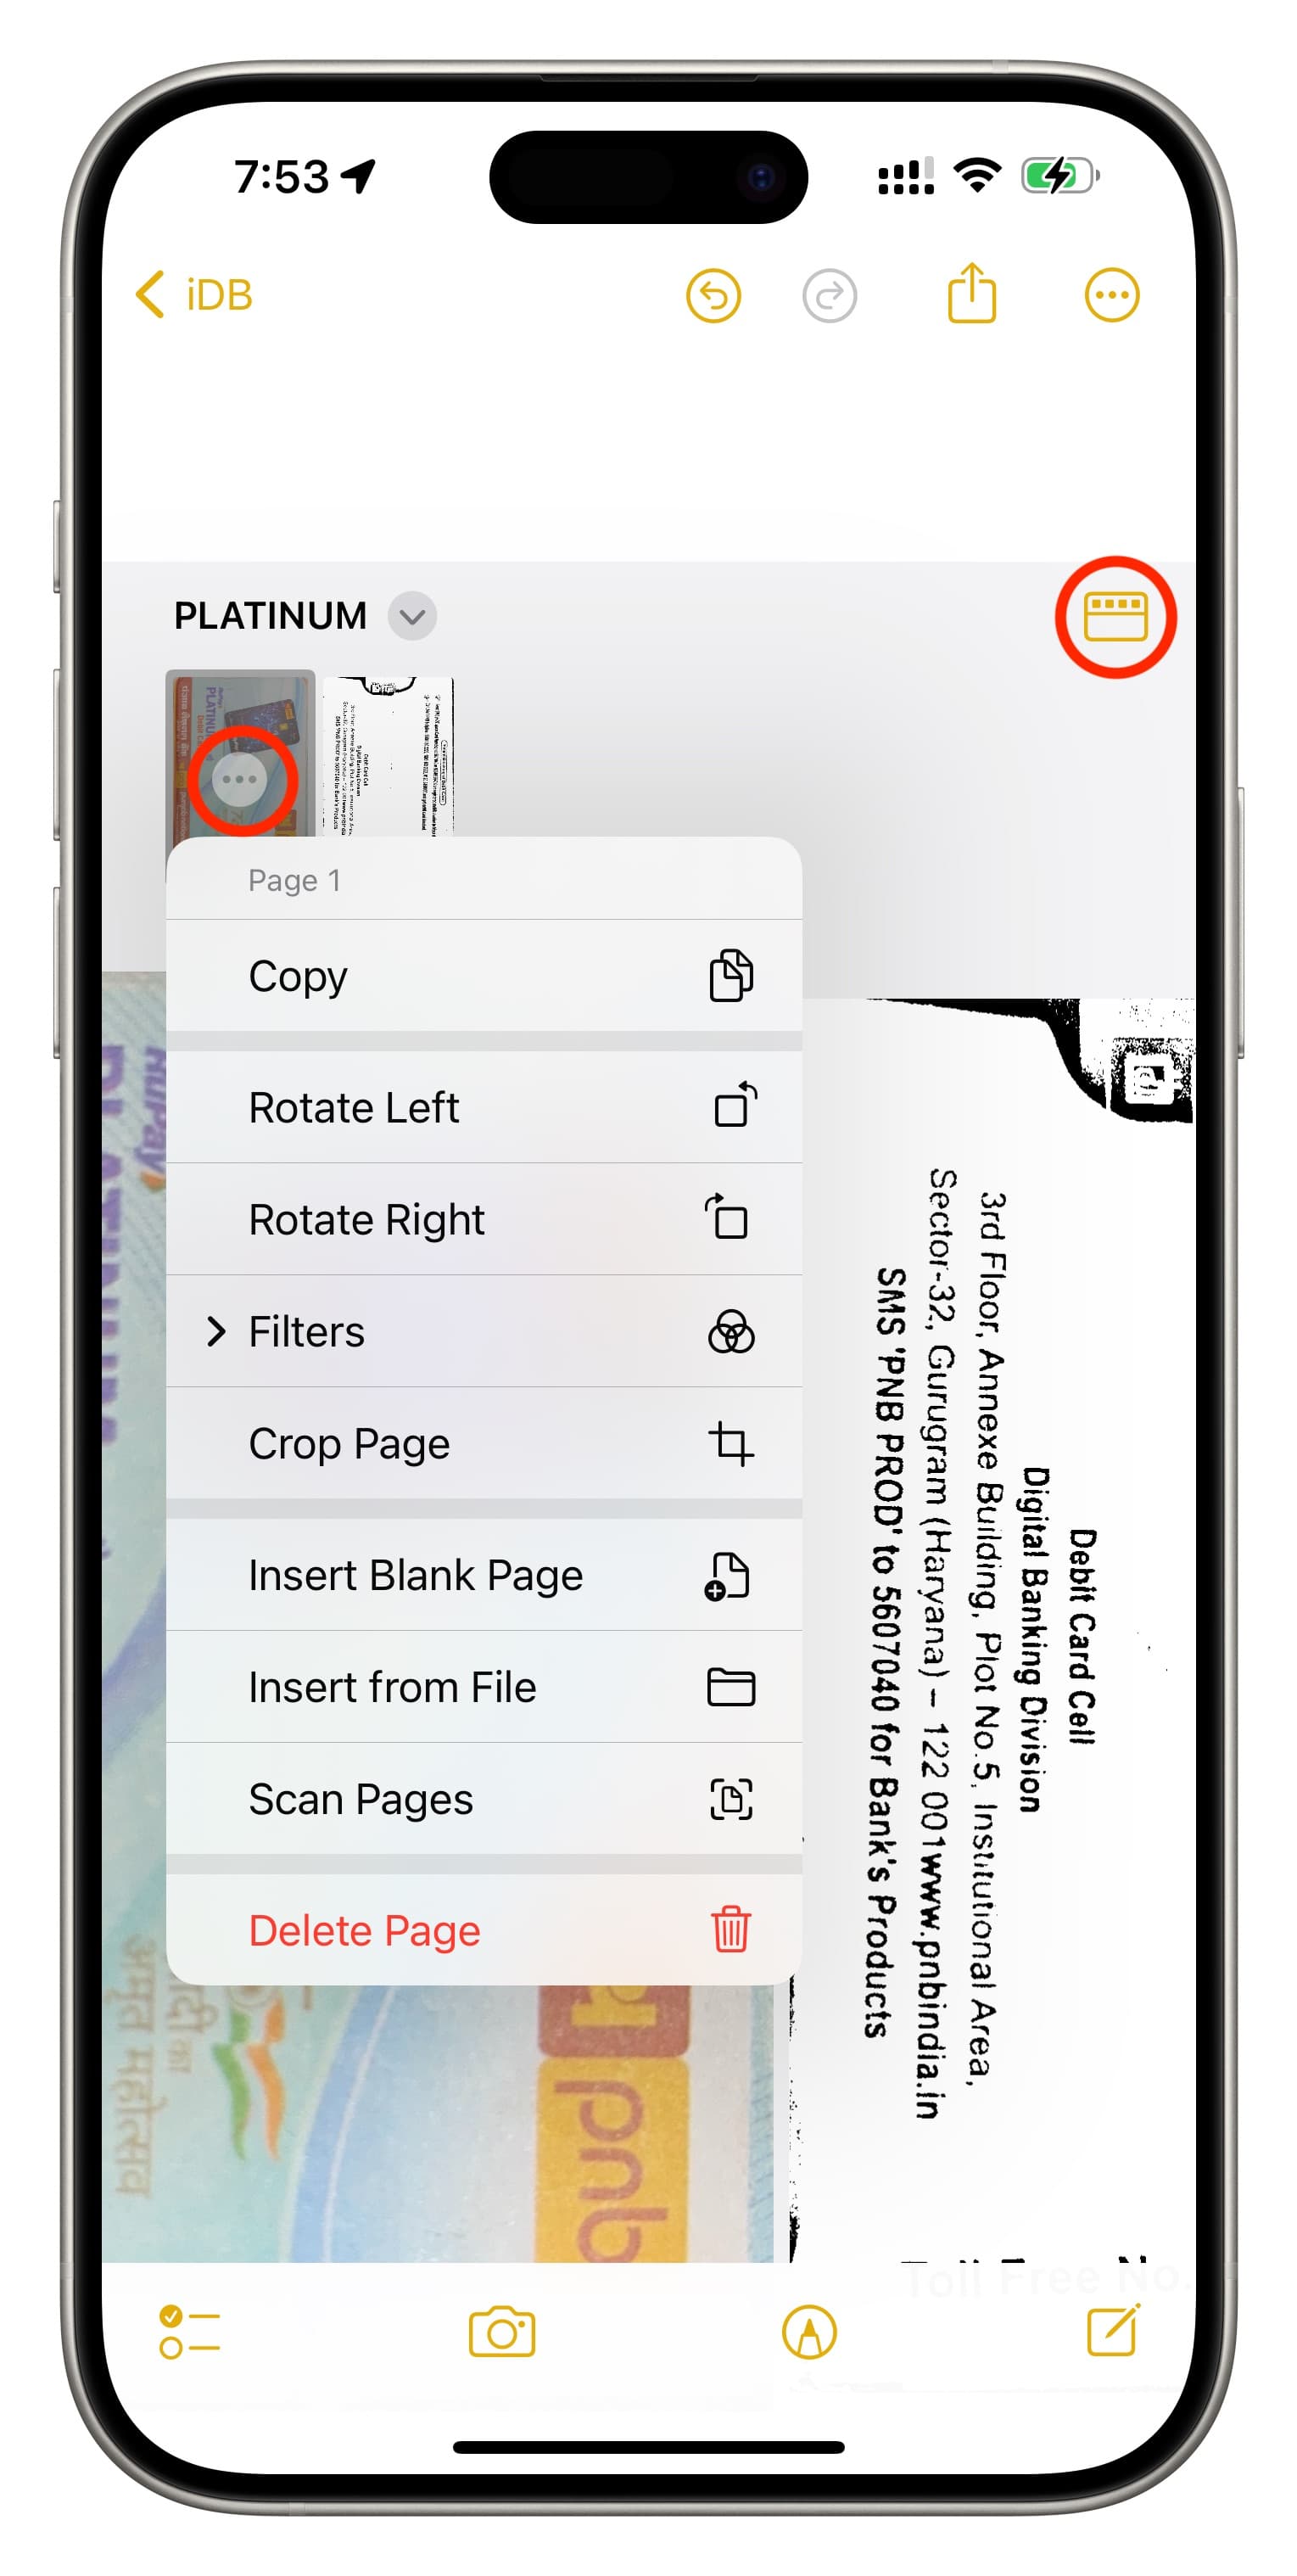
Tap the thumbnail icon. After that, tap the three dots menu icon from a scanned thumbnail to do the following:
- Copy: Get the page to your device clipboard.
- Rotate Left or Right: This lets you rotate that chosen page of the scan.
- Filters: Add another look to the scanned page. You can choose from Color (use this preset to scan magazine articles and other graphics-rich documents), Grayscale (if you’d like to turn colors into shades of gray), Black & White (for most paper scans, this preset yields best results), or Photo (for digitizing photographs).
- Crop Page: Adjust the corners and sides of the scan to crop out the unneeded background.
- Insert Blank Page: Use it to add an empty page next to this page. You can draw over this empty page or work as you please.
- Insert from File: Add a PDF or image next to this page from the Apple Files app.
- Scan Pages: Scan more documents and add them adjacent to this scan in this note.
- Delete Page: Remove this page from this note.
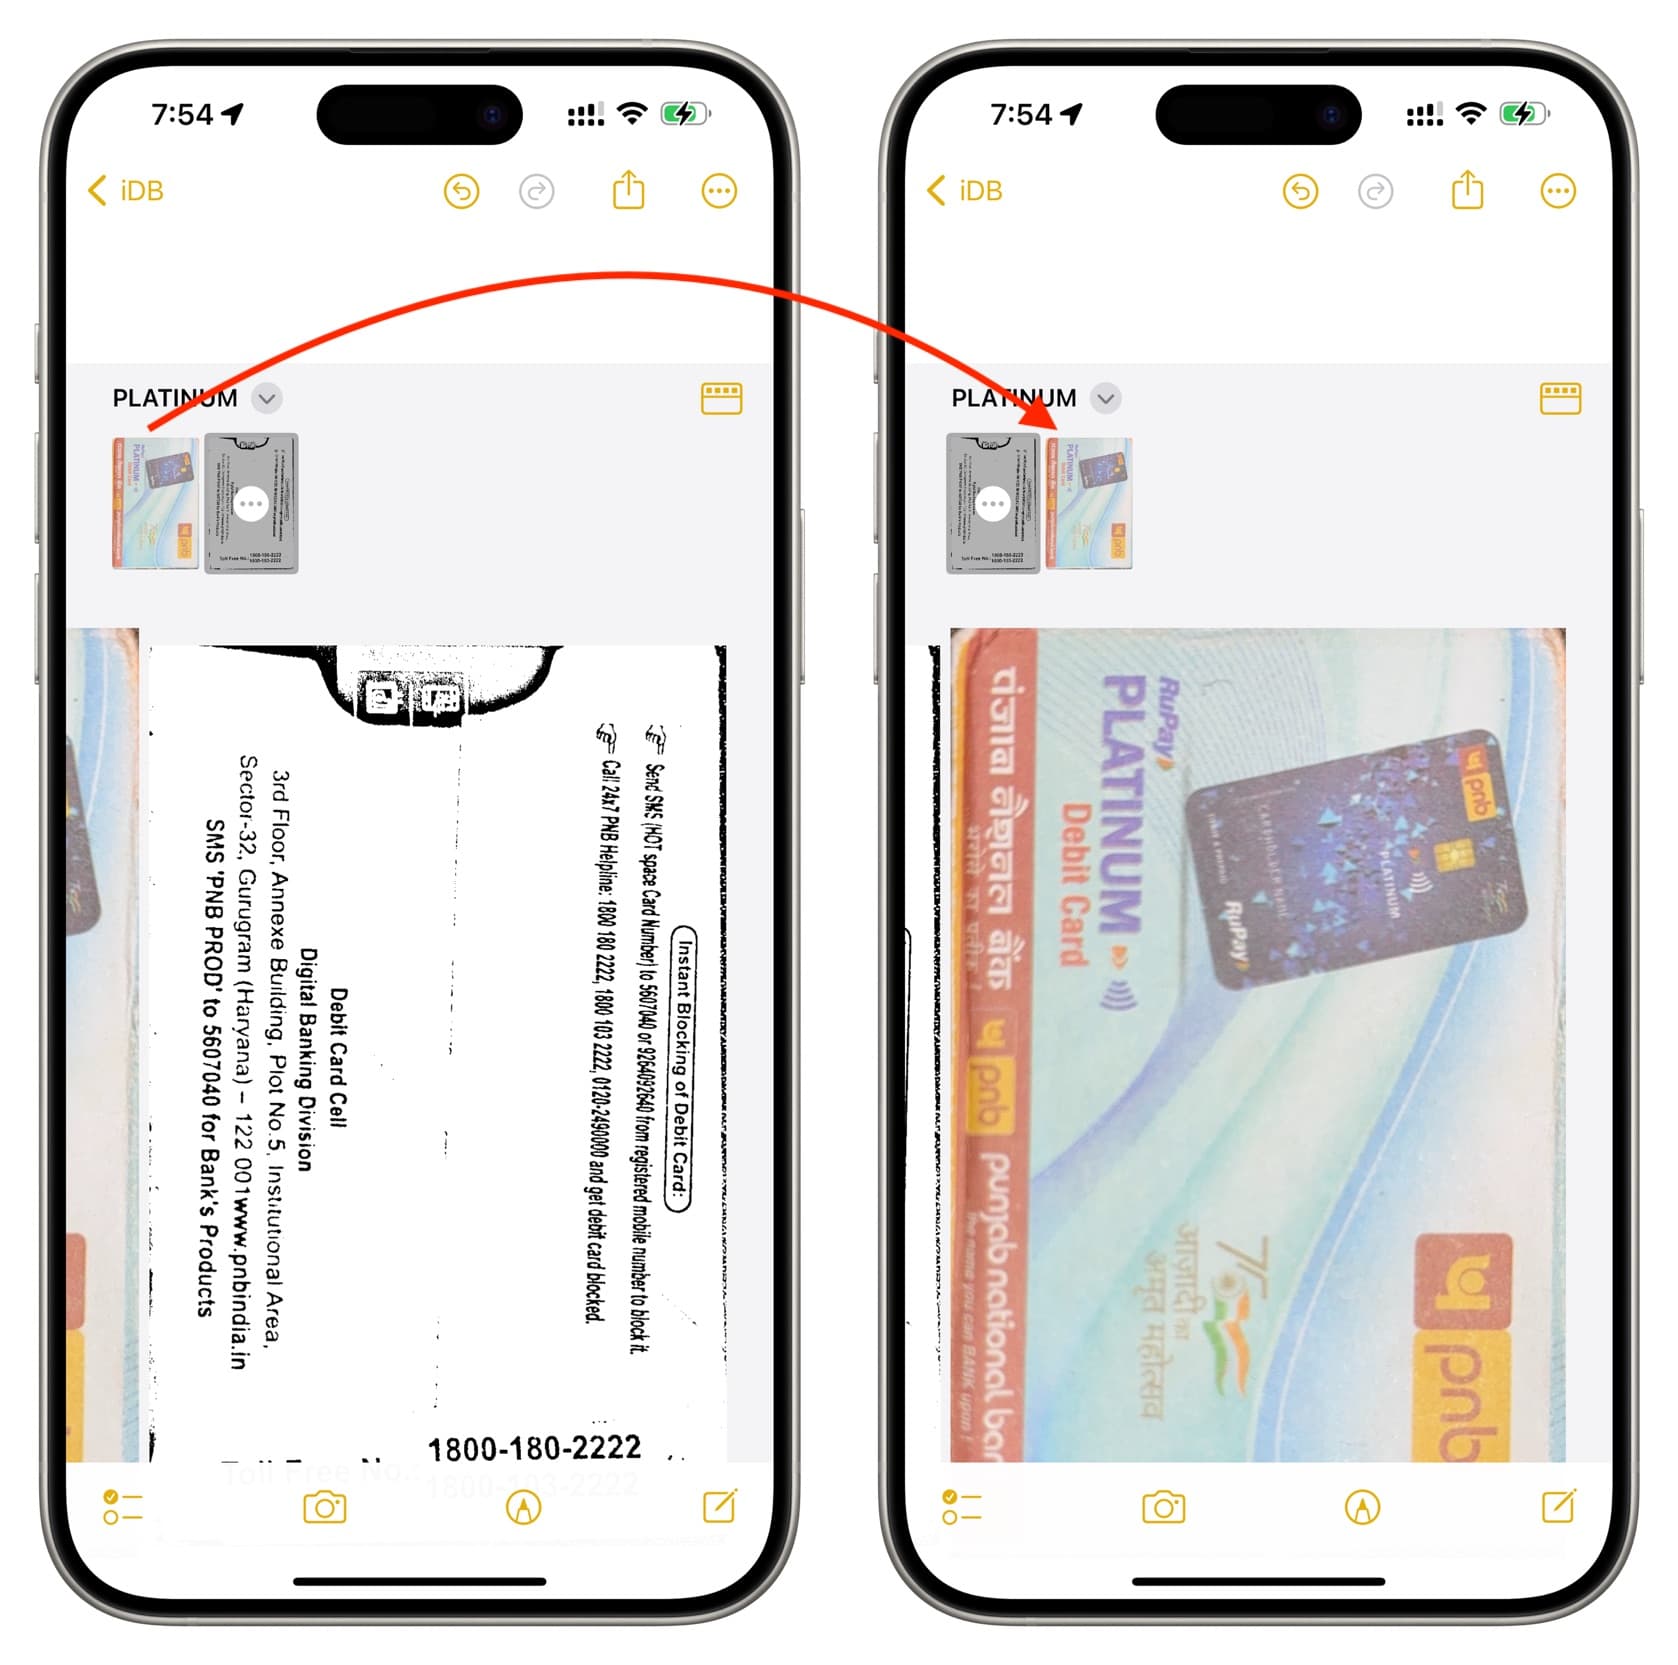
Reorder the scanned pages
Make sure you see the scanned thumbnails. Next, touch and hold one page and drag & drop it next to another page.
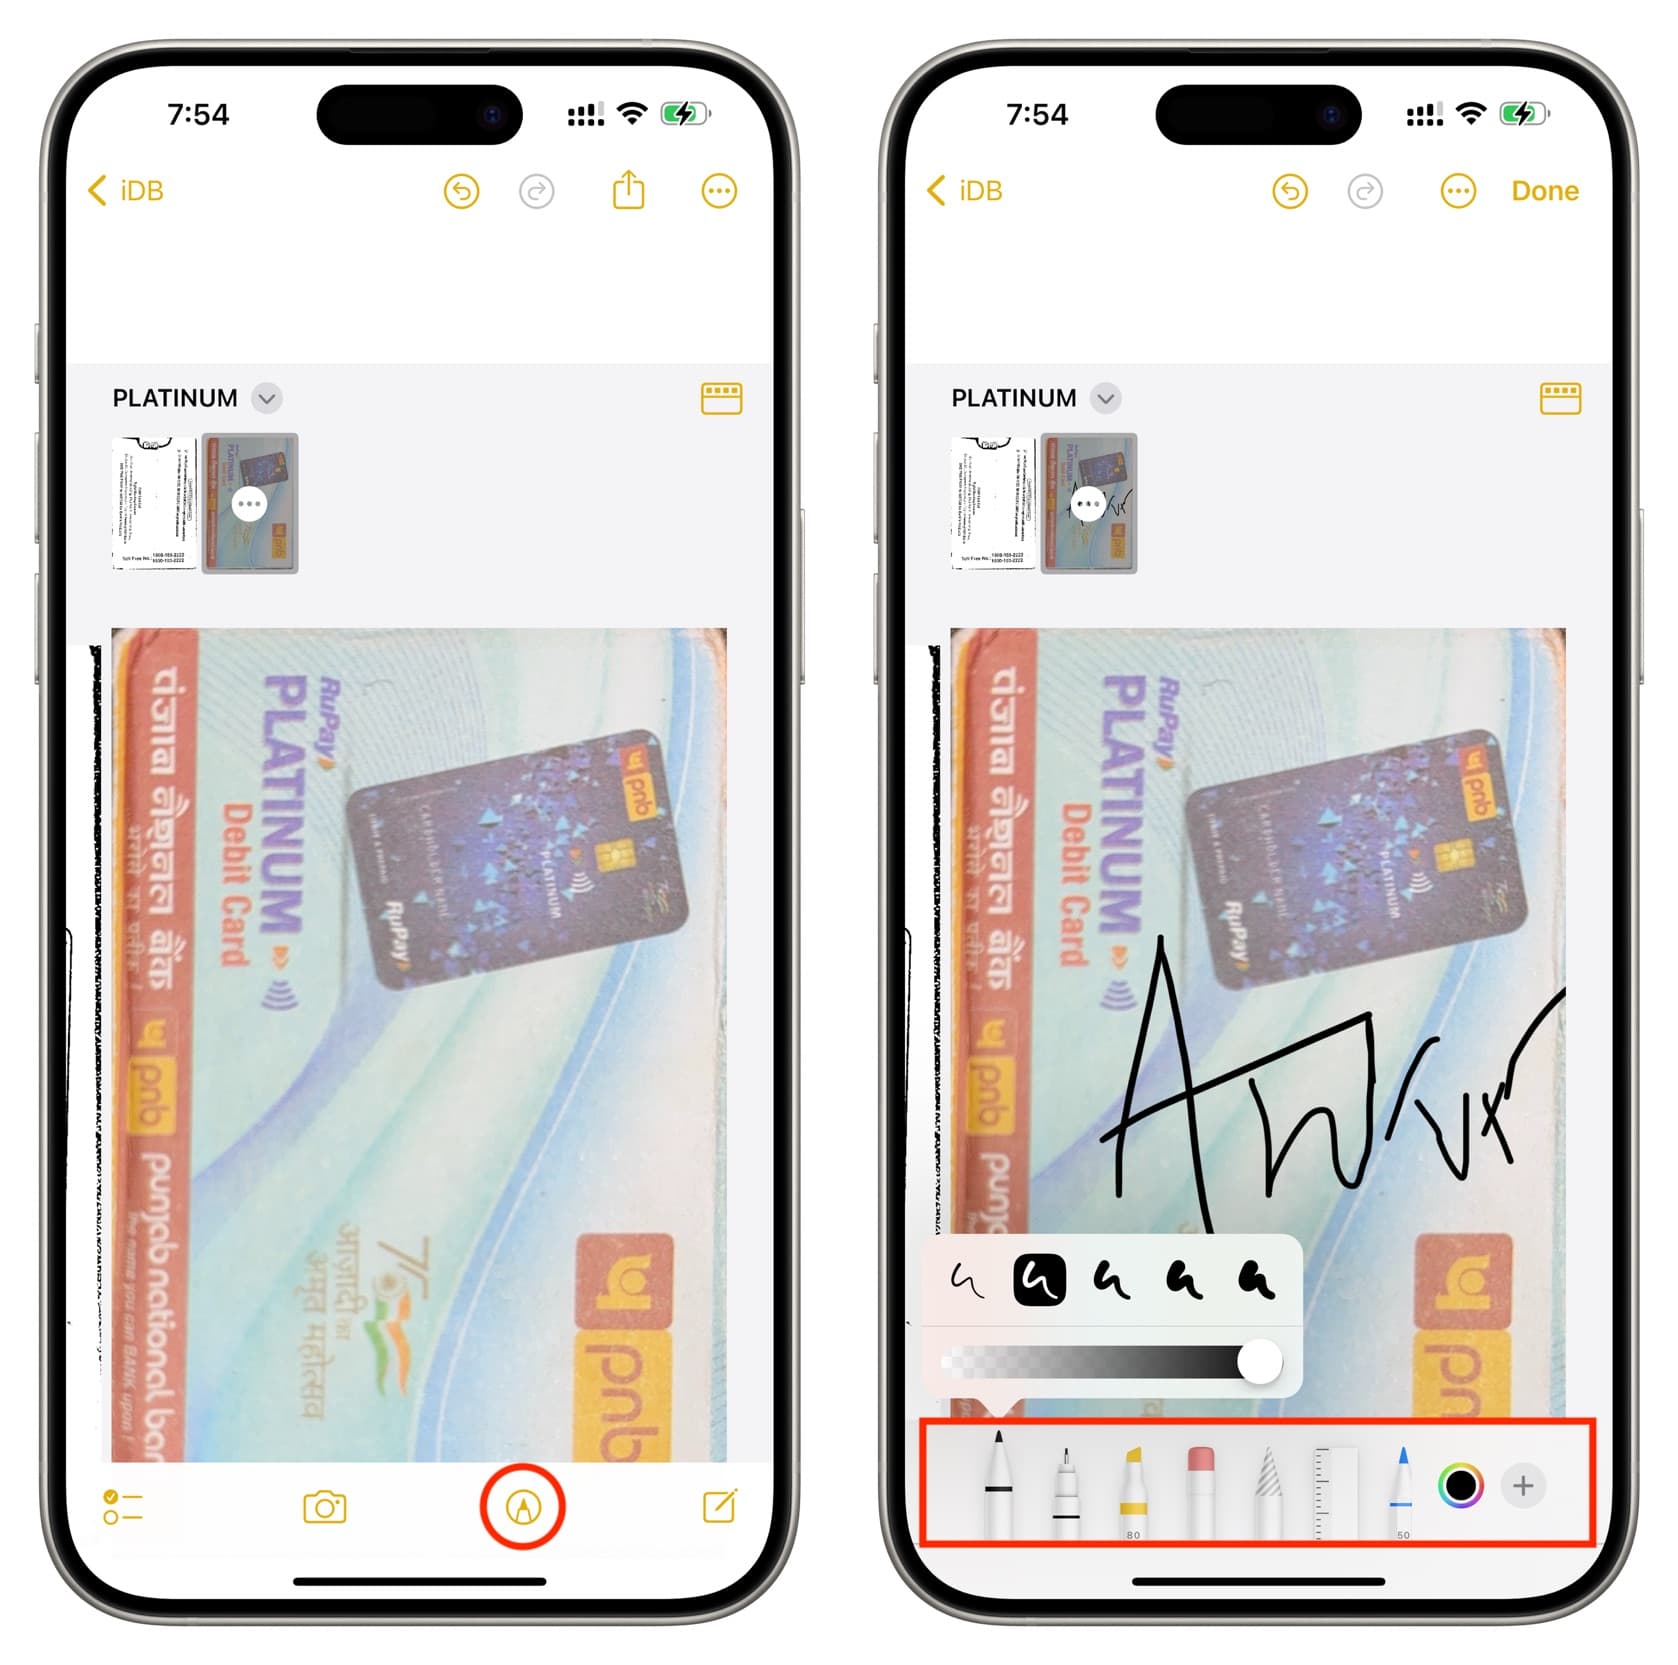
Annotate your scans
Open the note with the scanned document and tap the Markup icon. Now, use the pen, highlighter, and other tools to annotate it. You can also tap the plus icon and add stickers, custom text, signature, or shapes.
Related: How to save, sign and mark up PDFs with the Books app on iPhone and iPad
Tap the arrow icon next to the scan name and choose Share to share all scanned pages with other apps.
Additionally, you can touch and hold one of the unselected scanned pages thumbnail, swipe up with the other finger, and then go inside some other app like Photos app album, Files app, or the iWork Pages app, and drop the scan there.

Your iPhone or iPad will smartly drop the scanned file as an image in apps like Photos or Pages and as a PDF in apps like Files.
On a related note: