Need to add an extra partition to a hard drive or SSD? We’ll show you how to create a disk partition on your Mac using the built-in Disk Utility app.

Before we go any further, remember that reformatting drives is a process that goes hand in hand with wiping them. Whilst adding new partitions should not normally erase anything, check what you’re doing at each stage and have any critical data backed up first.
And if you’re just starting, we’d recommend you back up all data of the drive somewhere and start with an empty drive. Things will become less confusing when you’re creating the partition, and you will have no risk of losing existing data.
Note: While you can technically create partitions on your Mac’s internal drive, Apple strongly recommends against it. Instead, you should add volumes to the internal drive that achieve the same objective with more benefits.
Partition a hard drive or SSD on a Mac
1) Launch Disk Utility from Applications > Utilities or via Spotlight.
2) Locate the disk you want to work with in the left-hand sidebar.
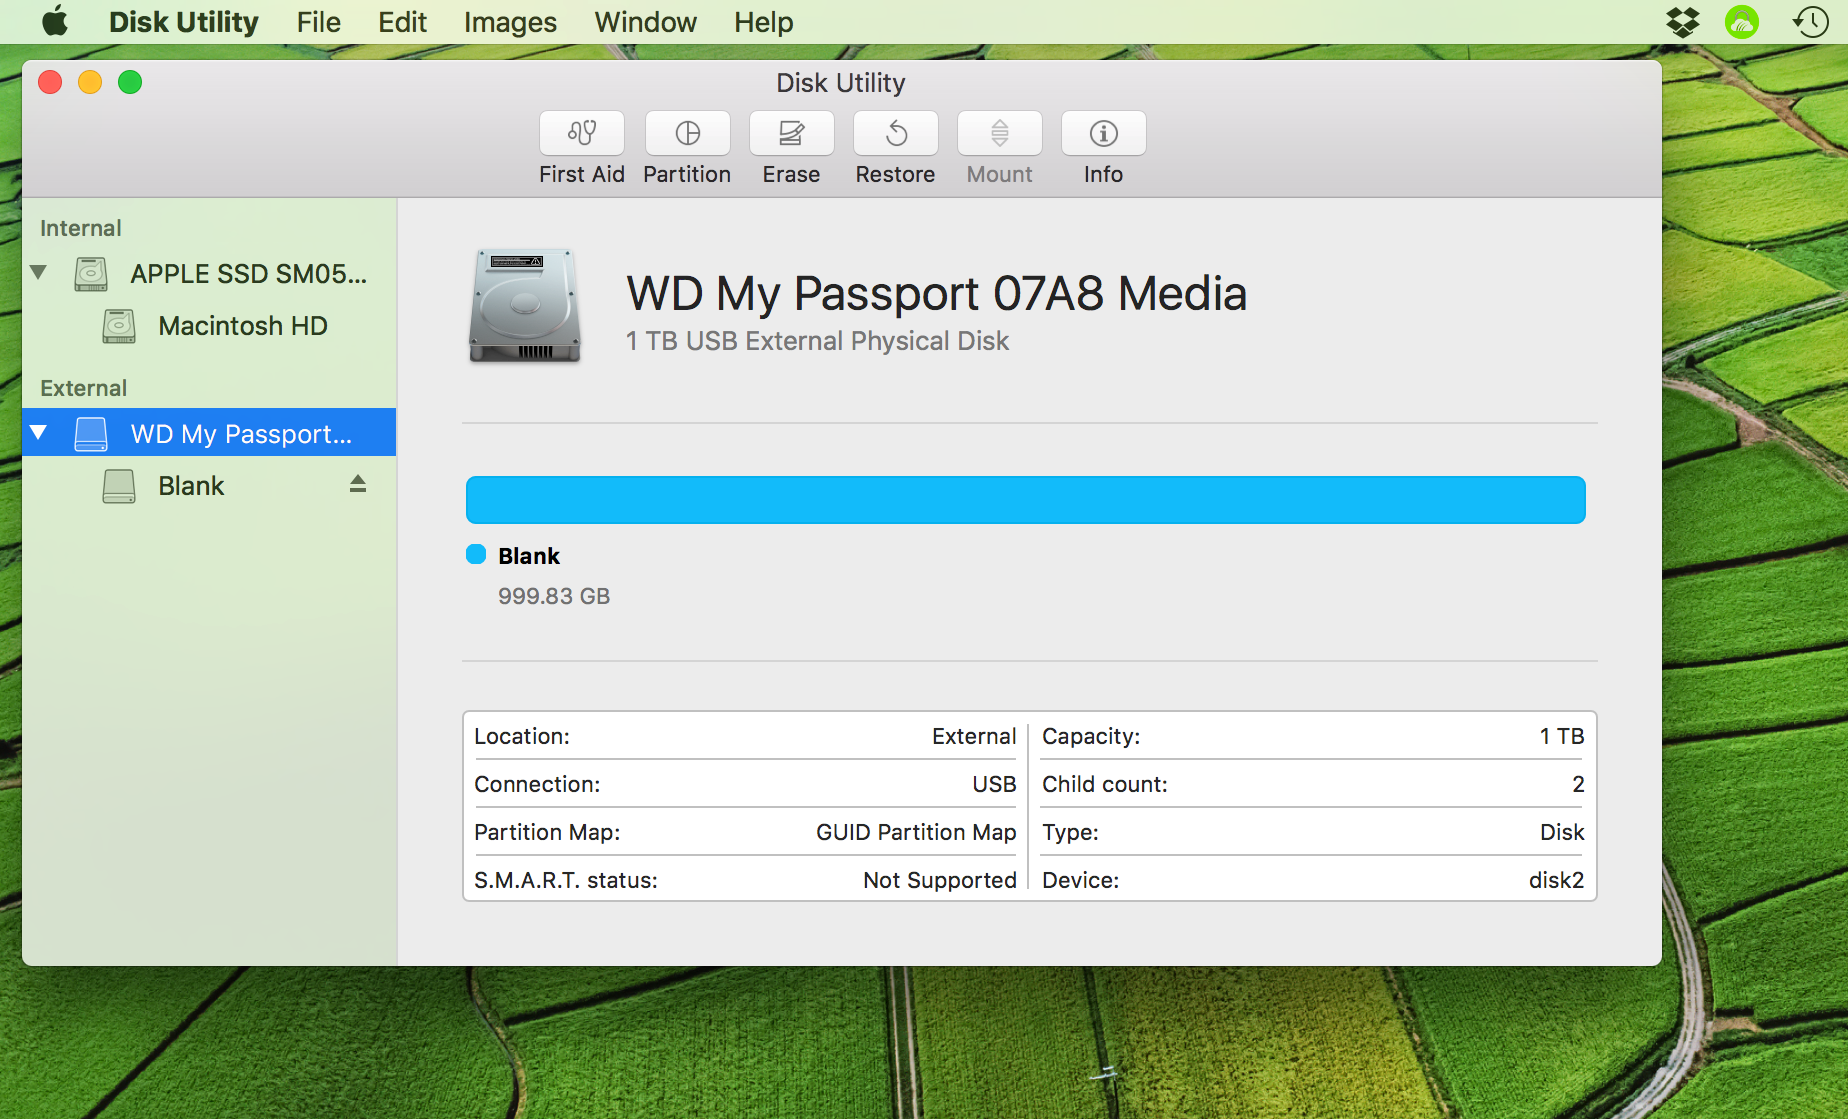
The sidebar on the left shows your connected drives, with their partitions in subheadings beneath them. The main pane to the right shows information about the drive that you currently have selected in the left-hand column.
If you can’t find it there, make sure the drive is working, connected to power (if needed), and plugged into a compatible port. Try disconnecting and reconnecting it if necessary. Any drives not appearing in the sidebar cannot be edited by Disk Utility.
3) Select the disk (not its sub-heading partitions) to be formatted in the sidebar, and make sure its information is shown in the main pane.
As you can see from the image above, I have an empty Western Digital hard drive to which I am going to add a partition. I have the drive itself (not its one partition “Blank”) selected in the sidebar.
4) Click the Partition button in the top bar. A window of options will appear, showing your current partition map.
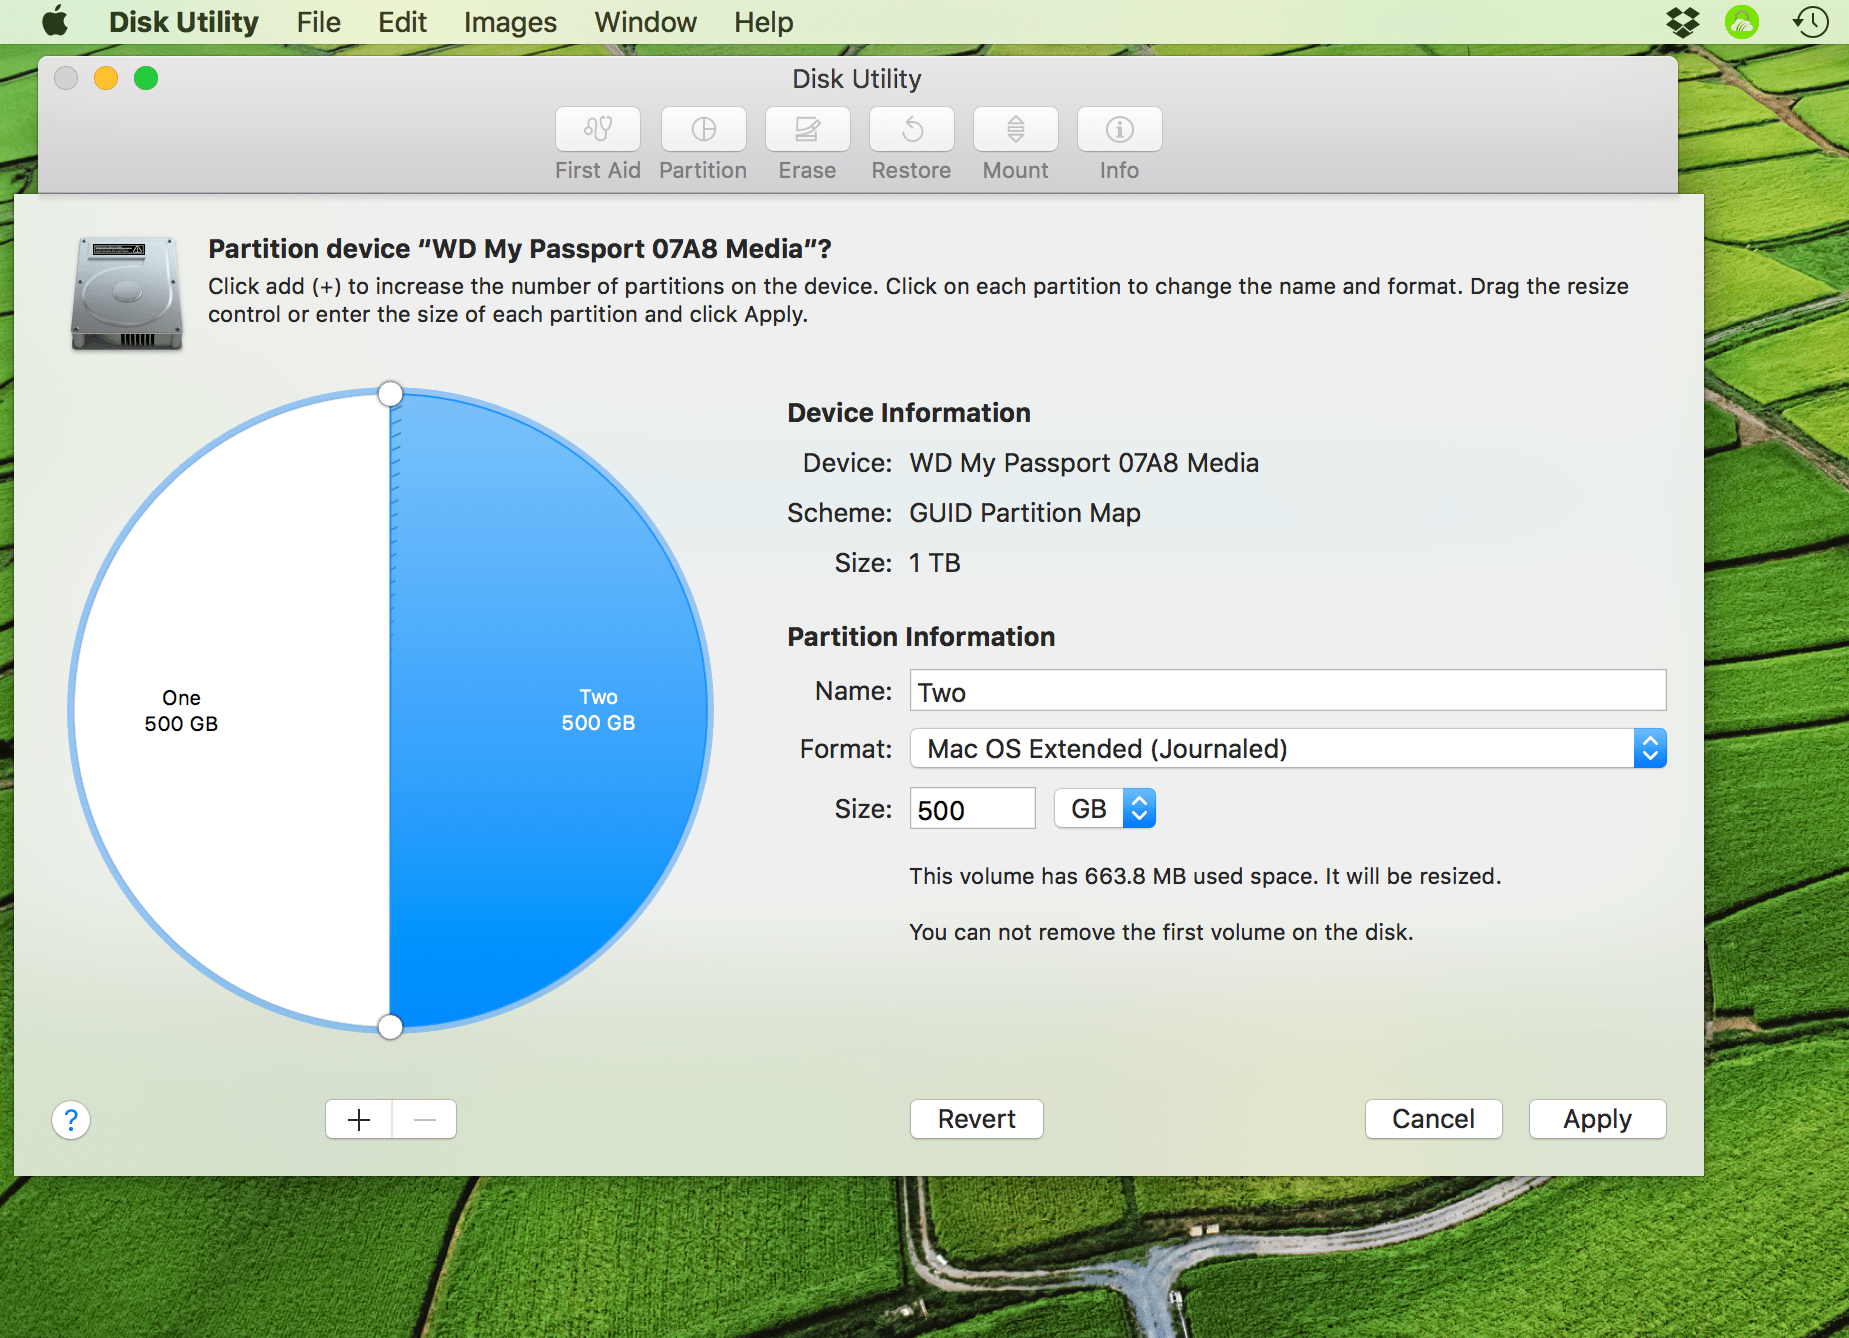
The disk’s partitions are shown in a pie chart, going clockwise in terms of physical position on the disk (confusingly, the first partition, previously called Blank, has been renamed Two). To add partitions, click the plus button (+) beneath the pie. Partitions will be added at the end of the disk. When a given partition is selected (shown in blue), its Name, Format, and Size can be altered to the right.
In my case, I hit the + button to add another partition, changed its size to 500GB, and its format to ExFat. I named it One, as you can see above.
Your choices of name, format, and size may vary, but this is a representative example. Bear in mind that you can add as many partitions as you like, though it can get unwieldy with too many and they do have a minimum size. Different partitions can have different file formats, too; they don’t all have to be Mac OS Extended (Journaled). Remember what they’re for when picking a format. You don’t have to edit all partitions; you could click a single one and change its format only if that’s all you want.
Important: Any existing partitions that you remove or change the format of will be wiped. However, adding partitions to the disk and resizing existing partitions will not wipe existing partitions, as long as you do not reformat them.
5) Once you’re happy with your extra partitions’ setup, hit the Apply button to make your changes.
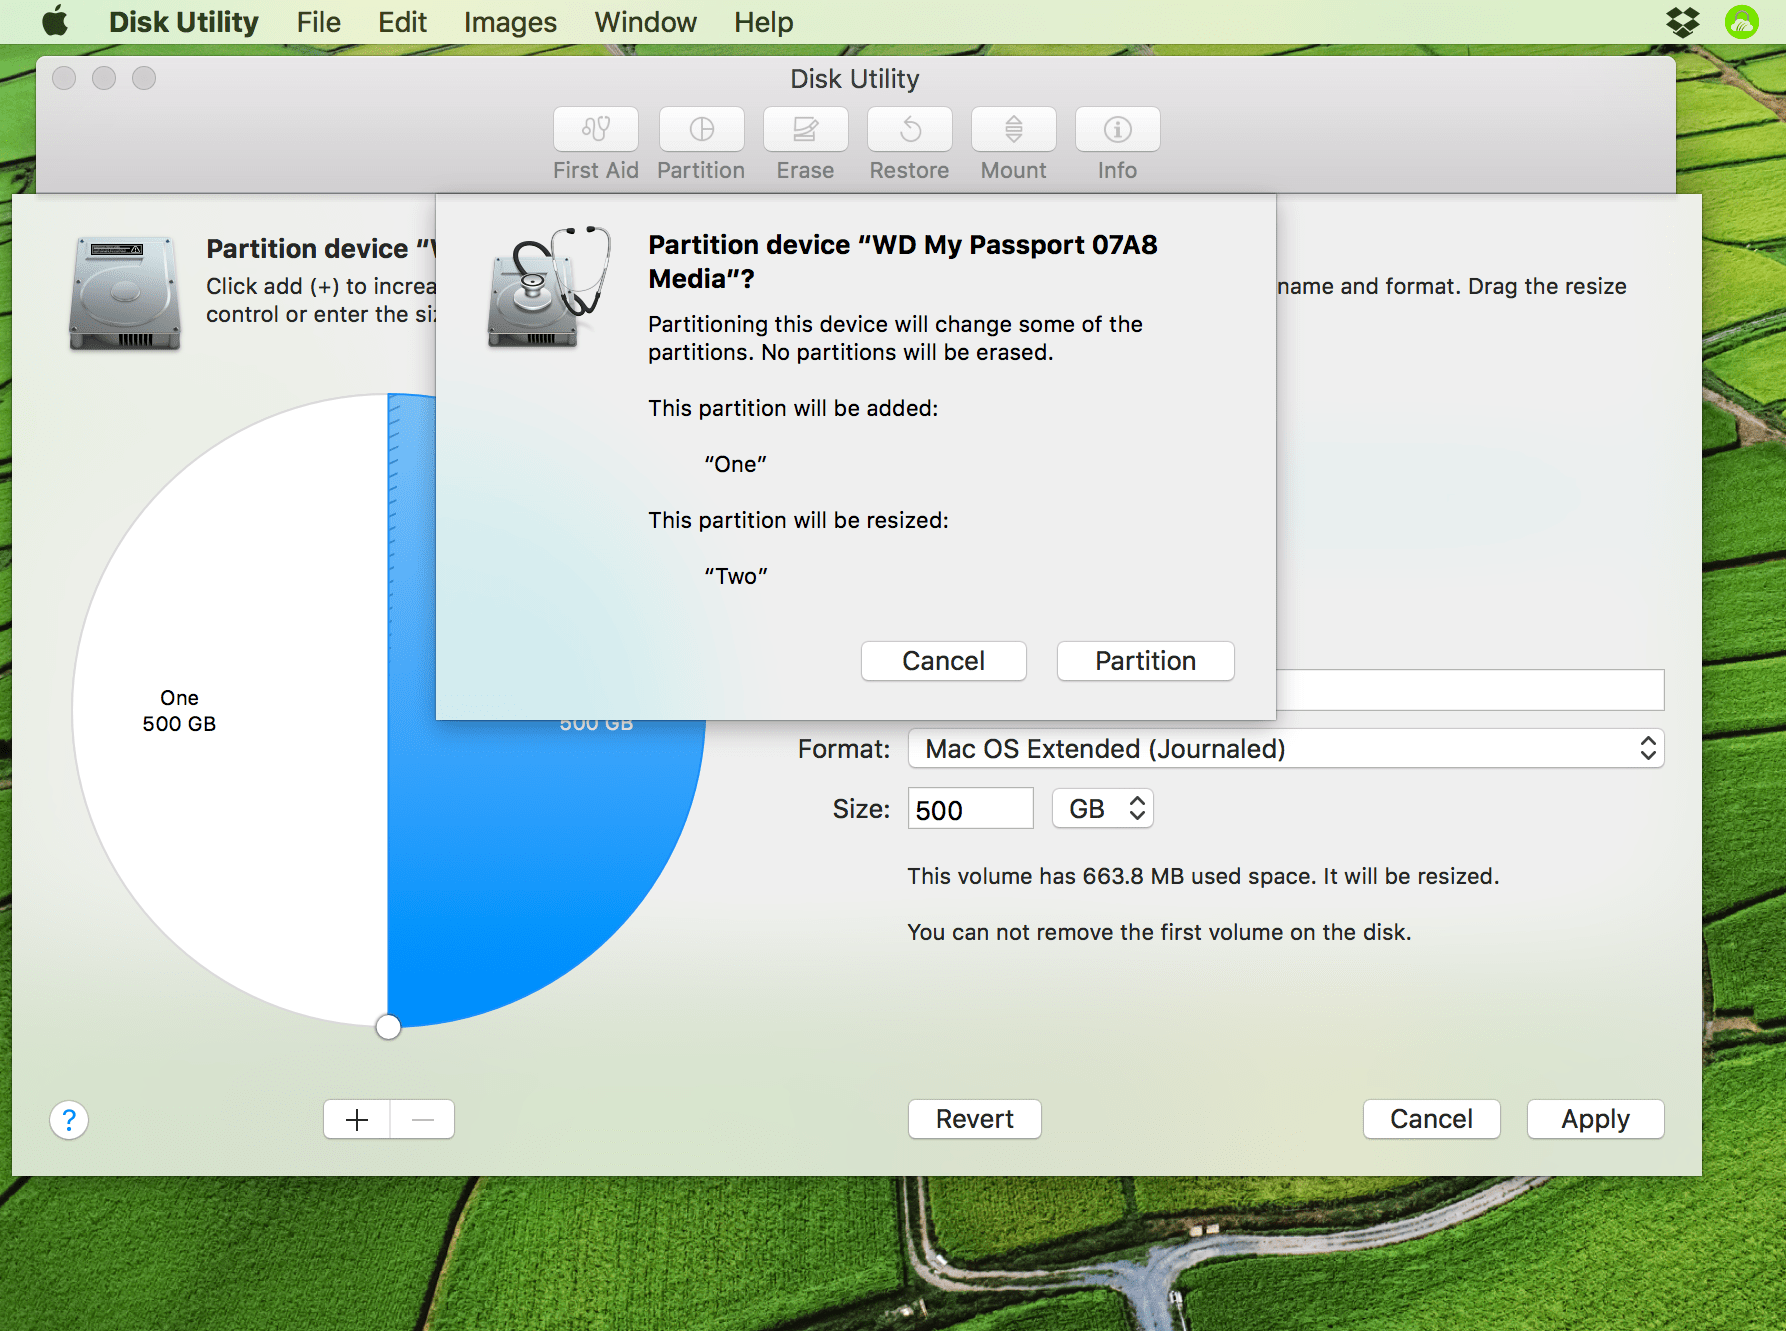
6) A confirmation will appear, summarizing the additions. Read it carefully to ensure you’re not about to delete a disk/partition you didn’t intend to by mistake. Then click Partition.
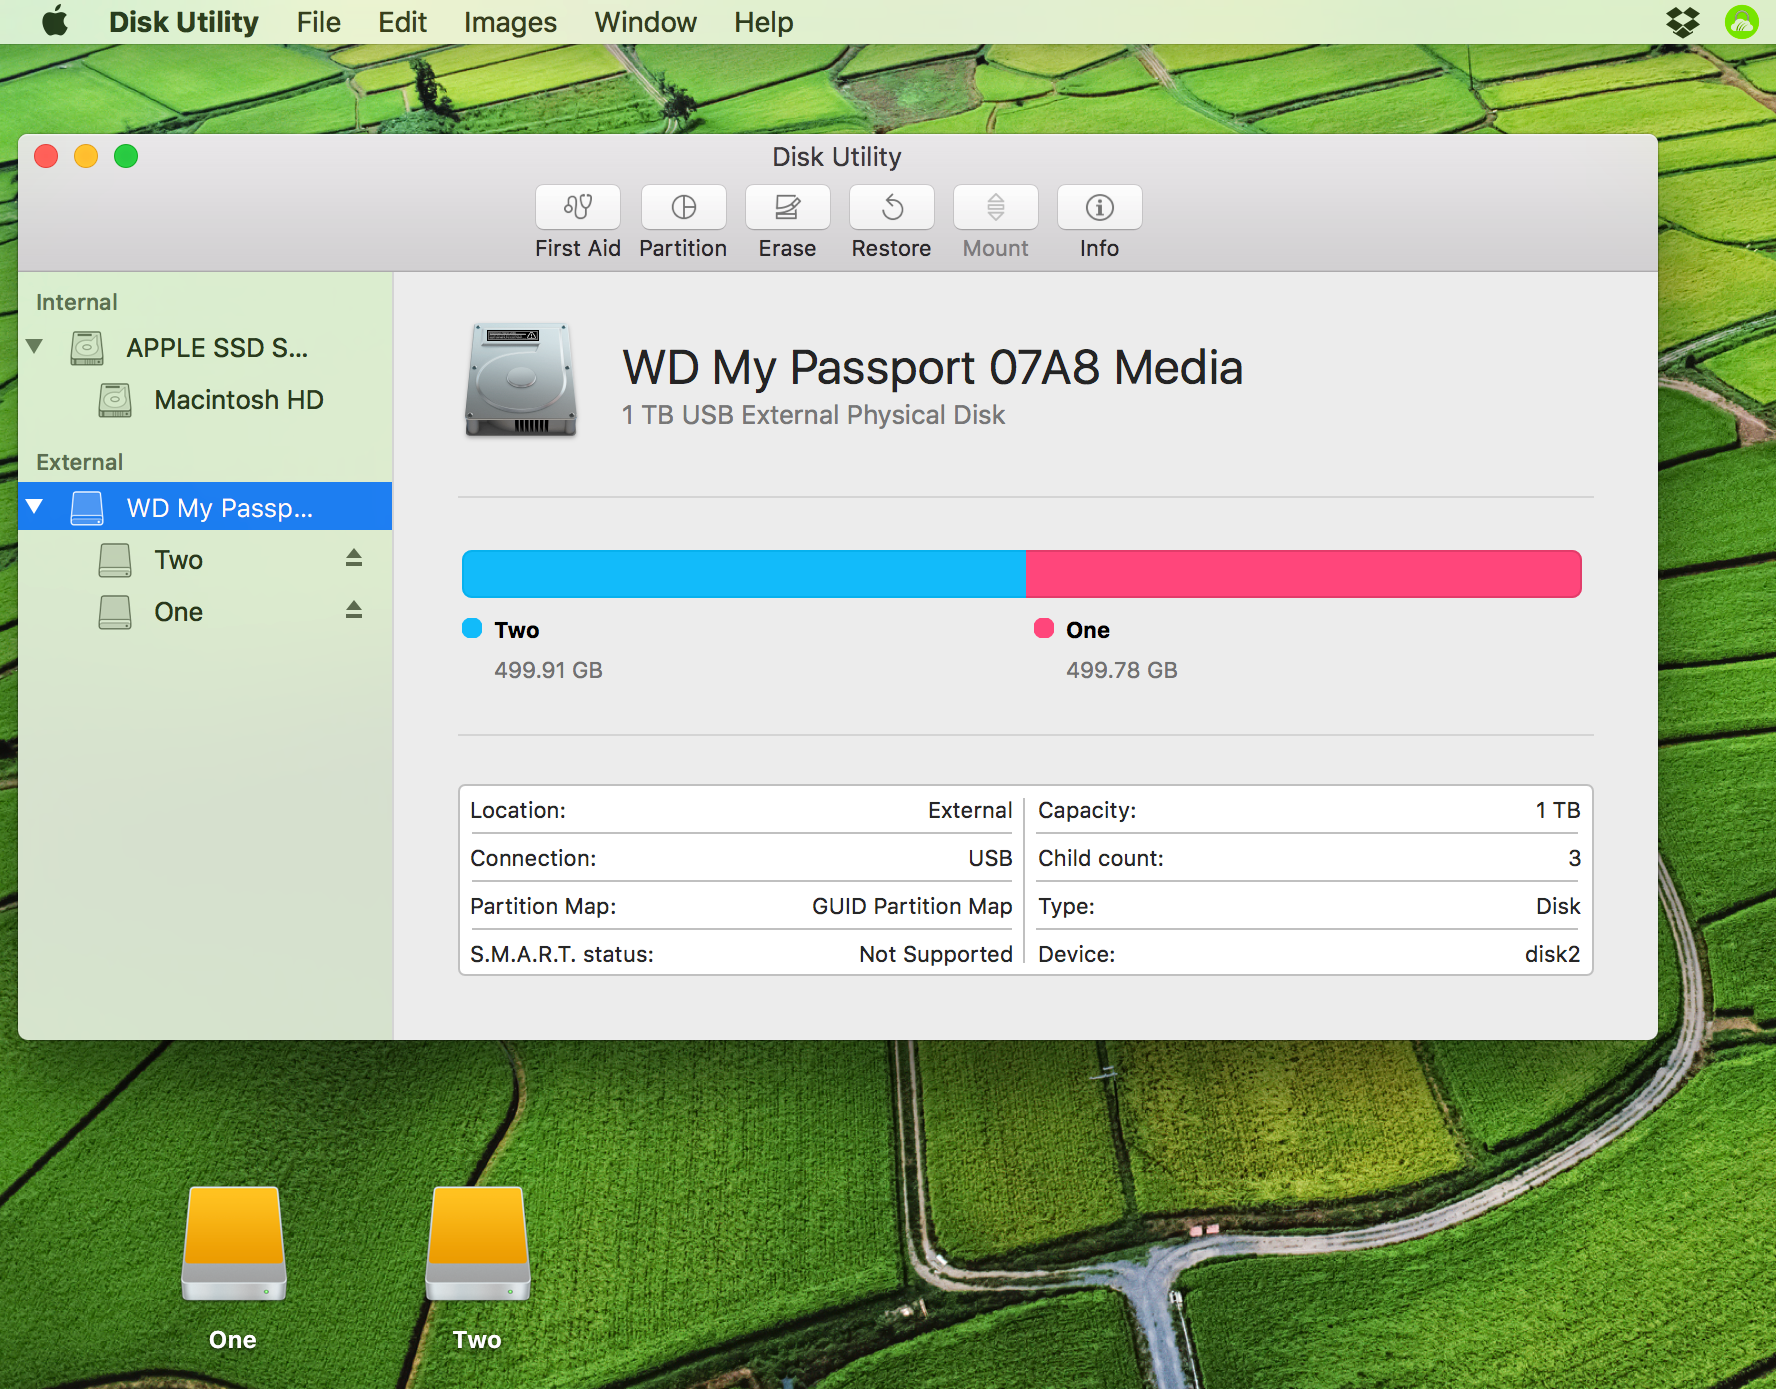
7) This ought by right to conclude the process. After a bit of unmounting and remounting, your new partitions should reappear.
As you can see from the image below, my external hard drive is now composed of two partitions of equal size but different file formats, entitled One and Two. The set-up you choose will depend on your needs.
Perhaps you have an external hard drive that is formatted Mac OS Extended (Journaled) for Time Machine, and you want to add a partition so that half is formatted ExFat to be used for moving files between Mac and Windows computers?
Perhaps you have an internal drive that is Mac OS Extended (Journaled) for your Mac boot drive, but you want to add a partition so that a quarter of it is free for use as a scratch disk for movie editing or an Ubuntu installation?
On a related note: