
Cull the Cruft from iOS by Clearing History
Let’s face it, our iPhones keep track of way more information than some of us are comfortable with. The history logs are useful pretty often, though. It’s handy to go back to a website you read earlier in the morning, return a missed call, or keep track of the kind of garbled messages you sent out at 2 o’clock in the morning, either because you were too tired (or too inebriated) to be coherent. Even so, you may want to clear this stuff out once in a while. With that in mind, here’s how you can clean up your iPhone by clearing history.
It’s a phone, so let’s start with call logs
Depending on how many phone calls you make and receive, this may be the busiest part of your phone. Even if it’s not, you probably want to clean this up once in a while. It’s pretty easy to do, and you can even remove individual numbers from the records. Just open the Phone app and go to the Recents tab. Swipe left on an individual call record to delete that one. If you’d rather go full-bore and delete them all, tap Edit in the top right corner, and then Clear, then Clear All Recents. If all you want to get rid of are your FaceTime logs, launch that app and follow these same steps there.
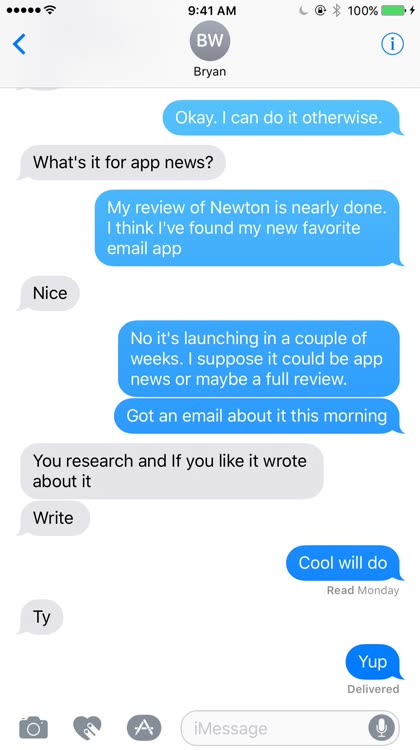
Next up, messages

For most of you, the Messages app is going to have the most history in it. Luckily, it’s just as easy to clear out text and iMessages as it is phone records. Just launch the Messages app, swipe left on a conversation, and use Delete to clear out all of the messages with that contact. If you want, you can even delete multiple message threads by tapping Edit, selecting the conversations you want to get rid of, and then tapping Delete.
Let’s say you’re in a particular conversation, and just want to delete individual messages there. If you tap and hold on the message, a menu will appear. Tap More and then choose which messages you want to delete. When you’re done, you can tap either Delete All in the top left corner, or the trash can icon in the bottom left. If you want to delete images and attachments from a conversation, tap the i button in the top right of the conversation, then scroll down until you see them. Tap and hold on an attachment, then hit More and choose the ones you want to trash. Once again, the trash can icon on the bottom right will be your friend. I won’t even ask why.
Cleaning out your browser history

If you’re like most iPhone users, you browse the web extensively in Safari for iOS. Once in a while, you’ll probably want to clean out your Safari history, to make things run more quickly (and maybe hide your tracks.) You can do this one web page at a time, or all at once. To get rid of individual entries, go into the Bookmarks option, choose the book icon, and then History. Swipe left on the history item you want to erase, then tap Delete. If you tap Clear from the bottom right corner of the History tab, you can delete all cookies and website data from the last hour, the last 24 hours, the last 48 hours, or all of the history. Cookies and website data will be deleted from the device, while history is cleared from all iCloud devices, including your Mac.

You can also clear Safari's history from the Settings app.
If you want to erase your entire Safari history, you’ll do that from within the Settings app. Go to Settings, then Safari > Clear History and Website Data. Bear in mind that if you have multiple iOS devices and/or use Safari on your Mac, this option will clear everything for those browsers, too. From this same pane, you can also set several other privacy and security toggles, like Do Not Track, allowing cookies, checking for fraudulent websites, and checking for Apple Pay.
Nuke and pave everything

There are quite a few options for resetting your iPhone, from just putting your Home Screen layout back to default to nuking and paving your entire iOS device.
Of course, you can also decide to start fresh for everything. If you want to completely delete everything from your iPhone, that’s easy enough. Just go to Settings > General > Reset and choose from one of these options:
- Reset All Settings – This will return your device to factory settings, but leave your data and applications in place.
- Erase All Content and Settings – Choose this for a full factory reset, removing all of your apps, data, and settings. You’ll have to set up your iPhone as a new device after this, or restore it from a backup.
- Reset Network Settings – If you’re having networking problems, this might be your friend. It deletes saved Wi-Fi networks, custom cellular settings, as well as APN and VPN settings. All of your apps and data remain in place, but you’ll have to reconnect to your wireless networks.
- Reset Home Screen Layout – Want your Home screen to go back to its original layout? Just choose this option, and it will be done.
- Reset Location & Privacy – This last option resets all of your Location and Privacy settings to the factory defaults. Apps that need access to your camera, contacts, or location information will have to ask for those pemissions all over again.
A fresh, clean iOS device
Those are some of the best ways you can cull the cruft from your iOS device. You’ll have a faster-responding iPhone in some cases, or just the peace of mind of knowing you’ve gotten rid of the evidence (on your iPhone, at least) of that last party that went all wrong. For more tips and tricks for Safari and other iPhone apps, check out these our collection of iMessage apps, as well as these articles.

