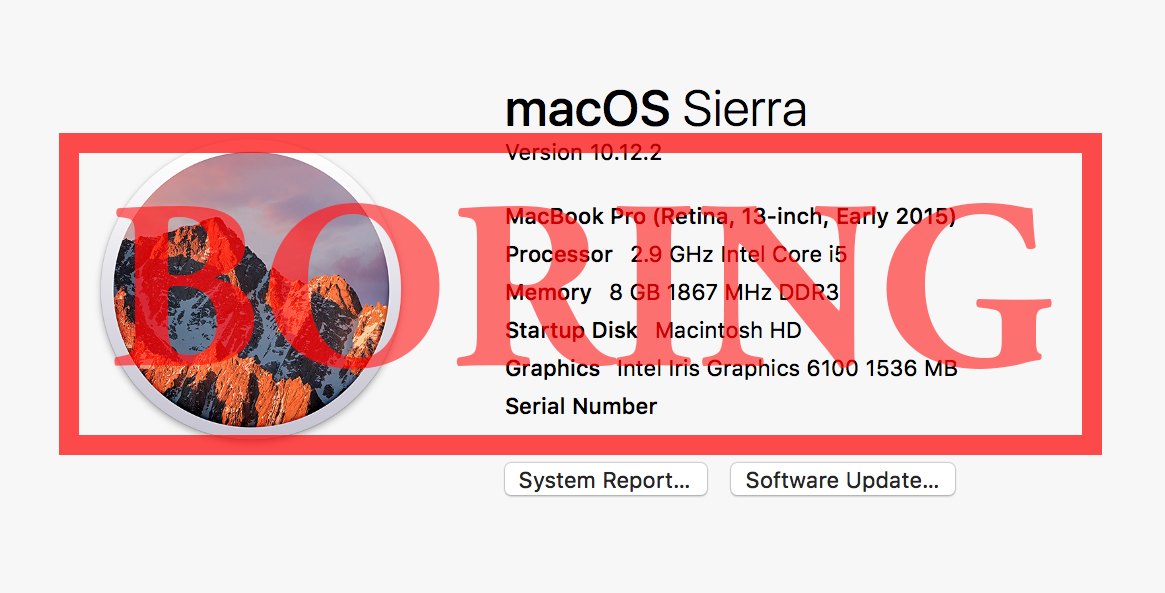
The “About This Mac” window contains information relating to your computer specifications and OS version, and is useful for quickly checking any of those details. However, it’s a little impersonal, and often (on a Hackintosh), incorrect. If, like me, you enjoy customising your machine to your own personal taste then this guide should help somewhat, by jazzing up the “About This Mac” section.If you own a Hackintosh then this guide may be of especial utility, as their non-Apple components and varied range of specifications can mean that “About This Mac” contains errors, or fails to provide any information at all. For these users the guide may be of functional use. If you’re on a real Mac, it’ll be for more aesthetic purposes.
These edits will work on macOS versions from Yosemite (10.10) to Sierra (10.12). Prior to that the file locations were different, but can still be modified with a little research. Let me know if you need any other file locations, and on which OS, and I’ll try to oblige.
Changes do not always survive a system update, though often do.
For all of these examples, BACK UP the original file to a safe location on your computer before modifying it, in case of a mistake or wanting to revert to stock later.
Changing the System Logo
This section will modify the circular image of your OS version on the main “About This Mac” page. On older OS versions, this used to be an image of your computer hardware, and I still prefer that.
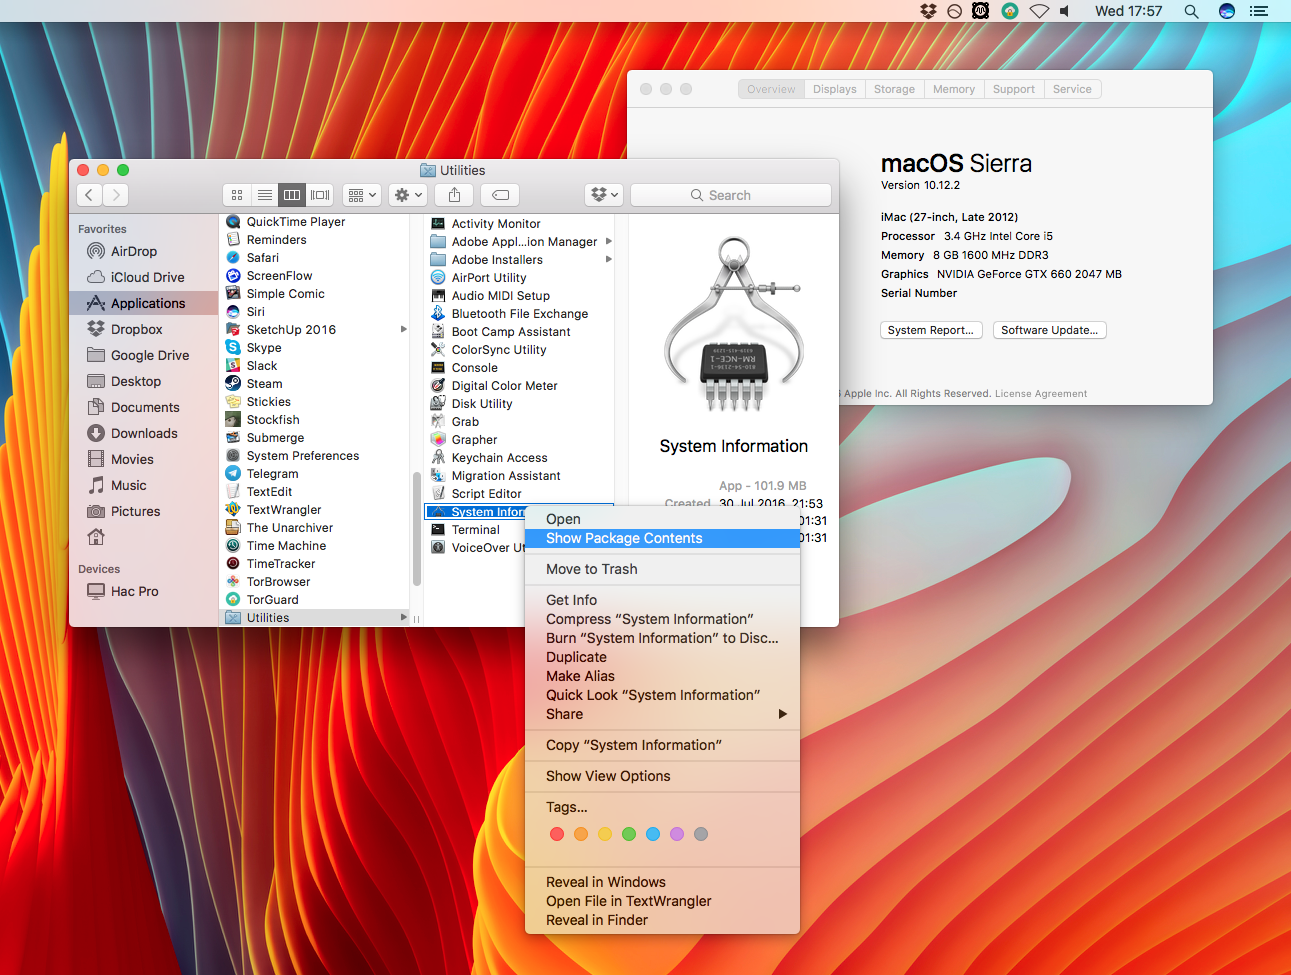
1) Open a Finder window, and navigate to your /Applications folder. Find the /Utilities folder inside, and inside that, the System Information application.
2) Right-click the application and select Show Package Contents.
3) Once inside the application, look inside Contents/Resources. Find the file entitled SystemLogo.tiff.
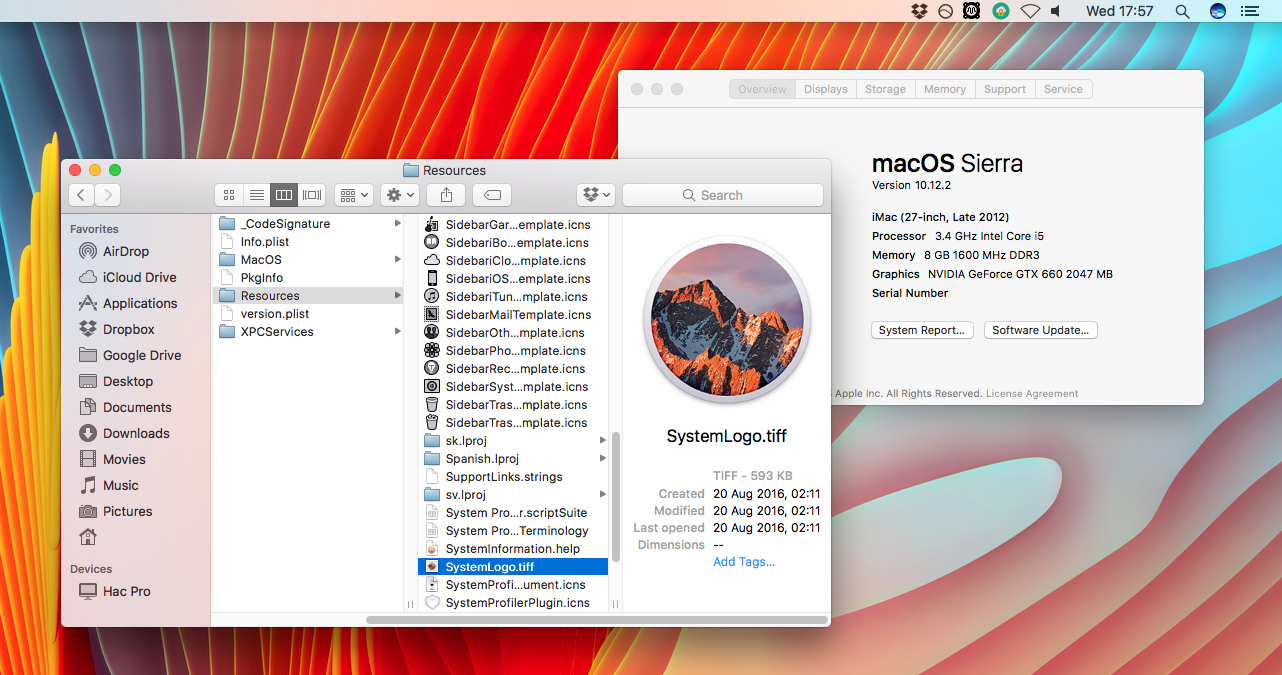
4) Backup the original file, and then replace it with the image you want to use. It must be renamed to SystemLogo.tiff, SystemLogo.png, SystemLogo.jpg, etc.
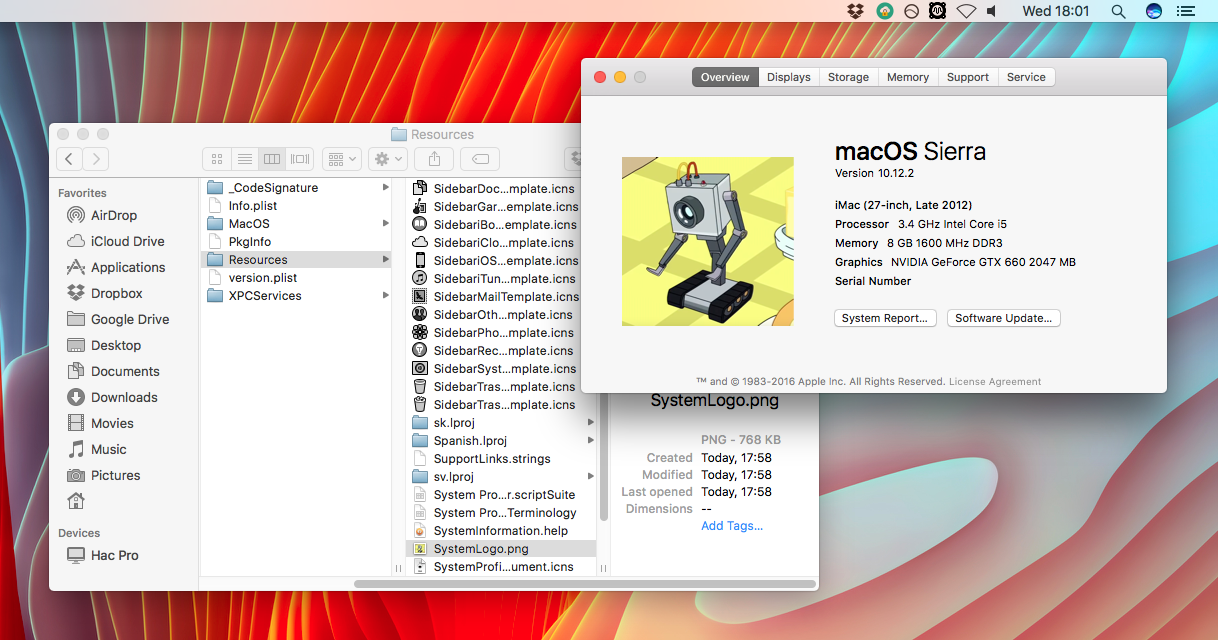
5) After a logout/login or reboot the new image should appear in place of the pedestrian Sierra logo. For illustrative purposes I chose an image of the most pathetic piece of hardware known to Rick-kind.
For future reference, the full file path for this image is:
/Applications/Utilities/System Information.app/Contents/Resources/SystemLogo.tiff
To revert, simply replace your backup of the original file, overwriting your edited image.
Changing the Model Name and Year
This section will change the reported hardware model and production year on the main “About This Mac” page. On a Hackintosh this page will usually report the Model you have selected in your SMBIOS settings, but you might want it to say something different. For example, for best performance on my hack, I have an iMac model set in my SMBIOS. However, the case I made for it is from an old G5, so I want that model to be reported instead in “About This Mac”. If you are on a real Mac this will likely be just, as they apparently say, “for funsies”.
1) Open a Finder window and navigate to your home User folder (the one containing your Documents, Pictures, Movies, etc.)
2) Inside that, open the Library folder. If you cannot see it, it may be hidden. You can find it with our guide. Do not confuse it with /Library by mistake, it must be /Users/YOUR_USERNAME/Library.
3) Inside the folder, open Preferences and look for the file entitled com.apple.SystemProfiler.plist.
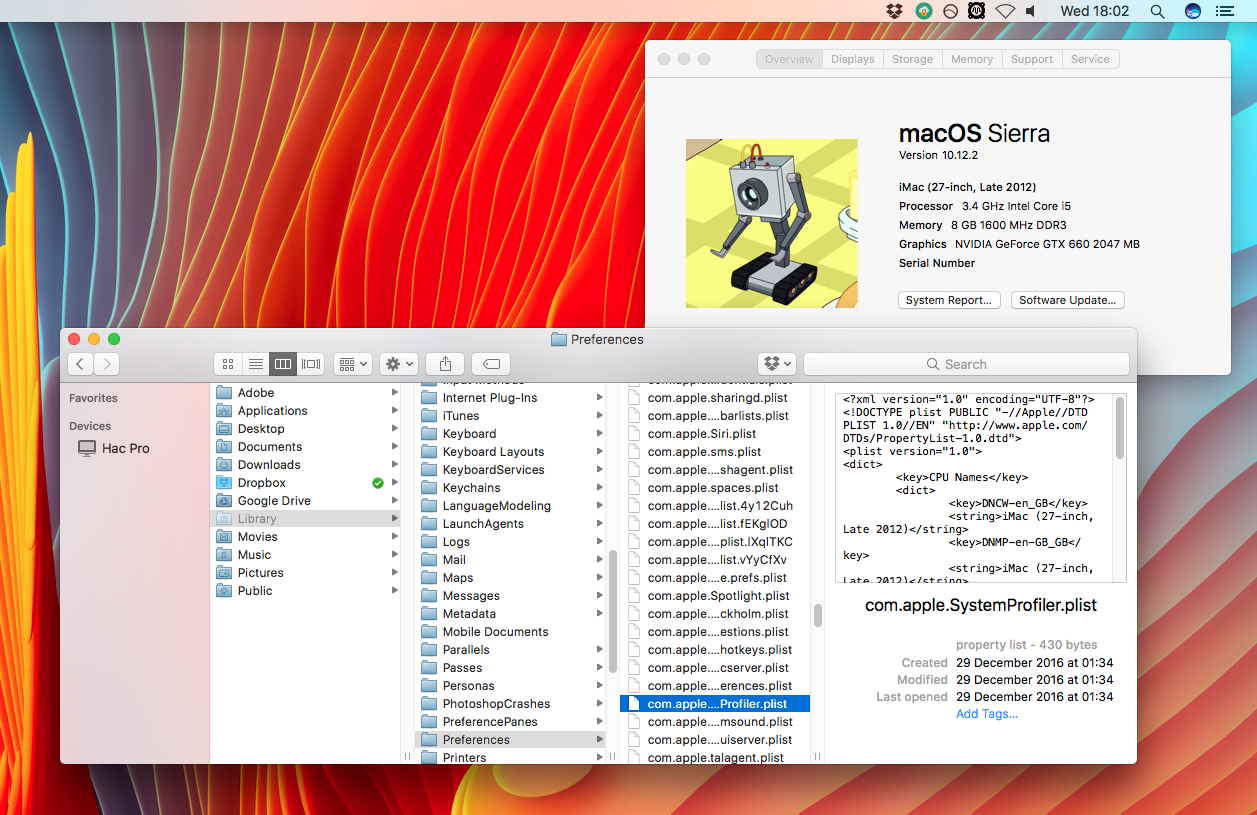
4) Copy the file, and paste one somewhere as a backup. Then paste another copy to your Desktop to edit. Do not try to edit the file in place, it will not work.
5) Right-click the copy on your Desktop and open it with your .plist editor of choice. I use TextWrangler, which is free on the App Store.
6) In the editor, look through the file for the CPU Names entry which describes the current Model and Year of your computer. Mine originally said “iMac 27-inch, Late 2012”.
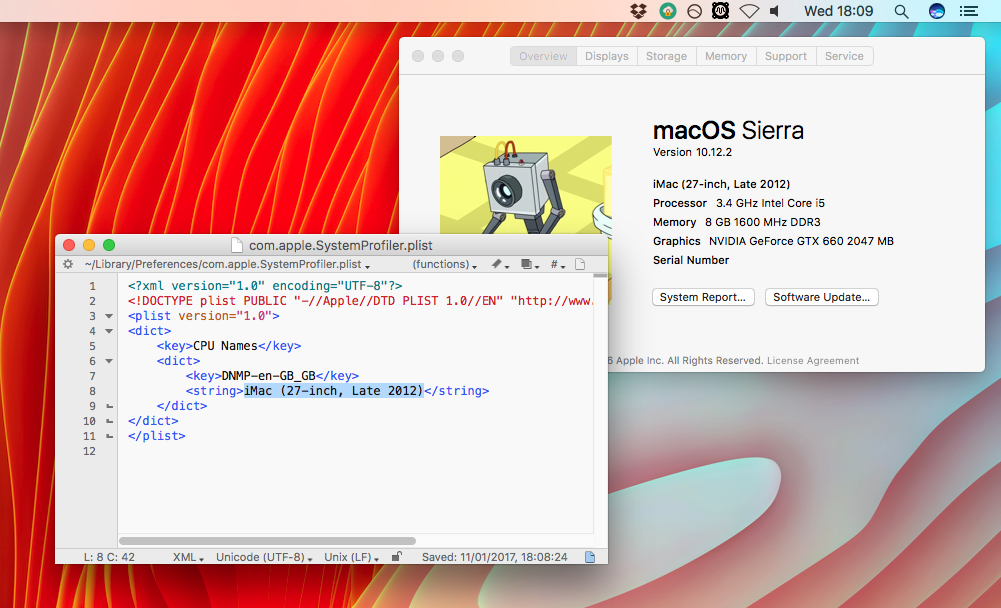
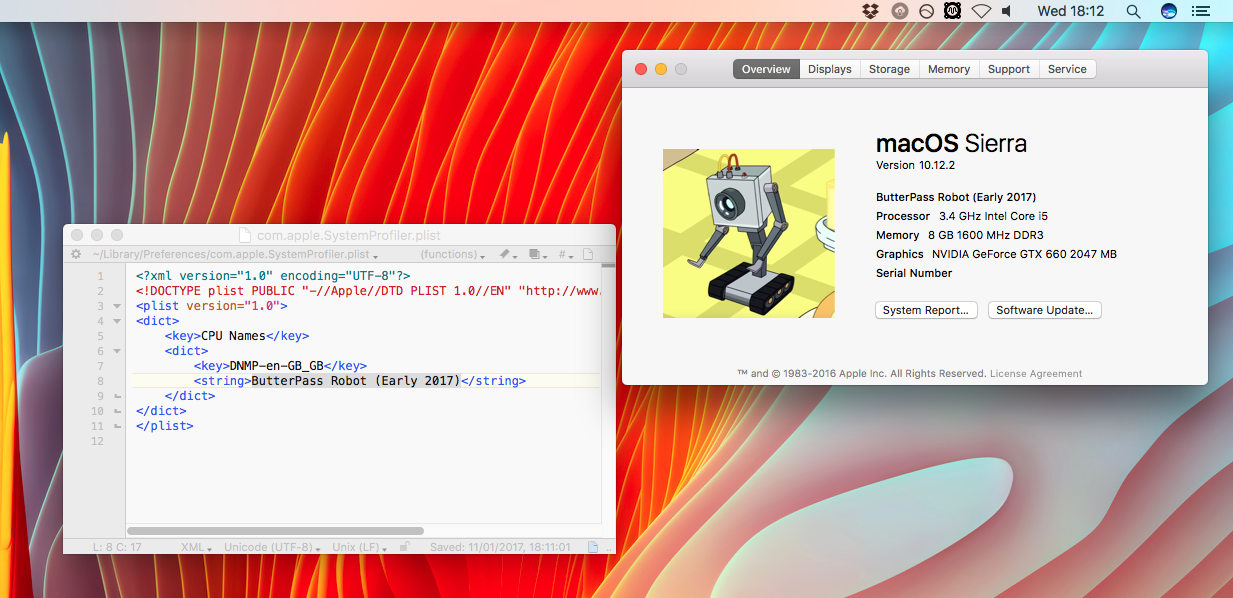
7) Edit the text in that line to report your preferred hardware name and year, or whatever text you like. Save the document and exit.
8) Drag the edited file from your Desktop back into the ~/Library/Preferences folder we got it from to overwrite the original. Authenticate with your user password if required.
9) After a reboot the changes should be visible in the “About This Mac” window.
For future reference, the full file path for the document to edit is:
/Users/YOUR_USERNAME/Library/Preferences/com.apple.SystemProfiler.plist
To revert, simply replace your backup of the original file, overwriting your edited .plist.
Changing the processor name
This setting may allow you to change the processor name, but I have had mixed results. It worked on my Hackintosh, but not on my MacBook Pro, so your mileage may vary.
1) Open a Finder window, navigate to the System folder, and then to the Library folder inside. (Not the “Library” folder we visited in the Model name section).
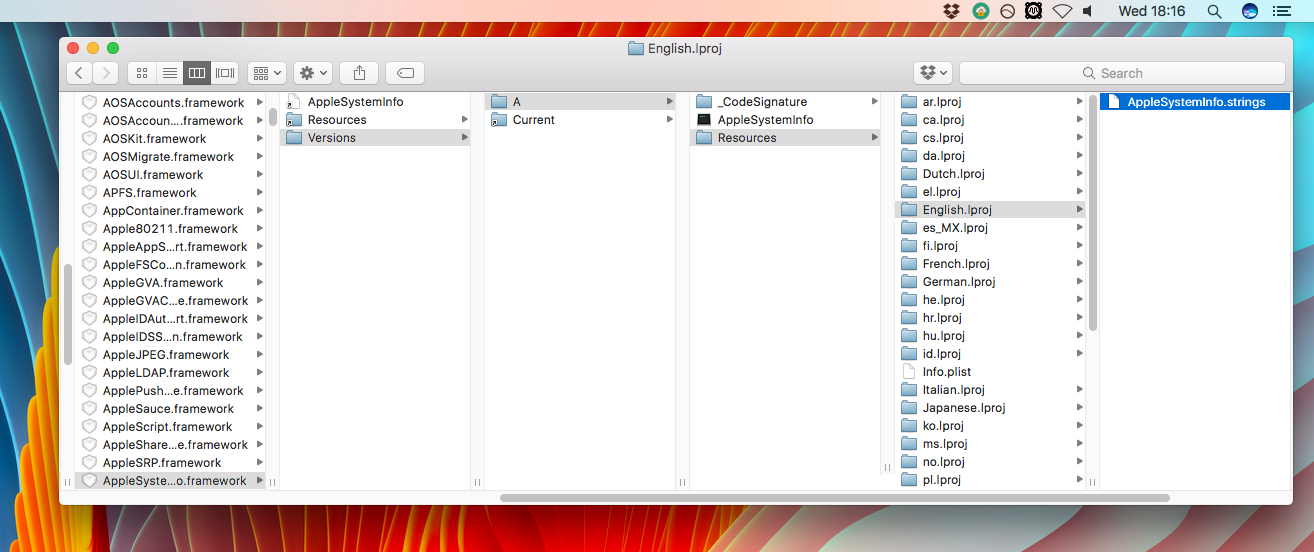
2) Inside Library, go to PrivateFrameworks, and find AppleSystemInfo.framework.
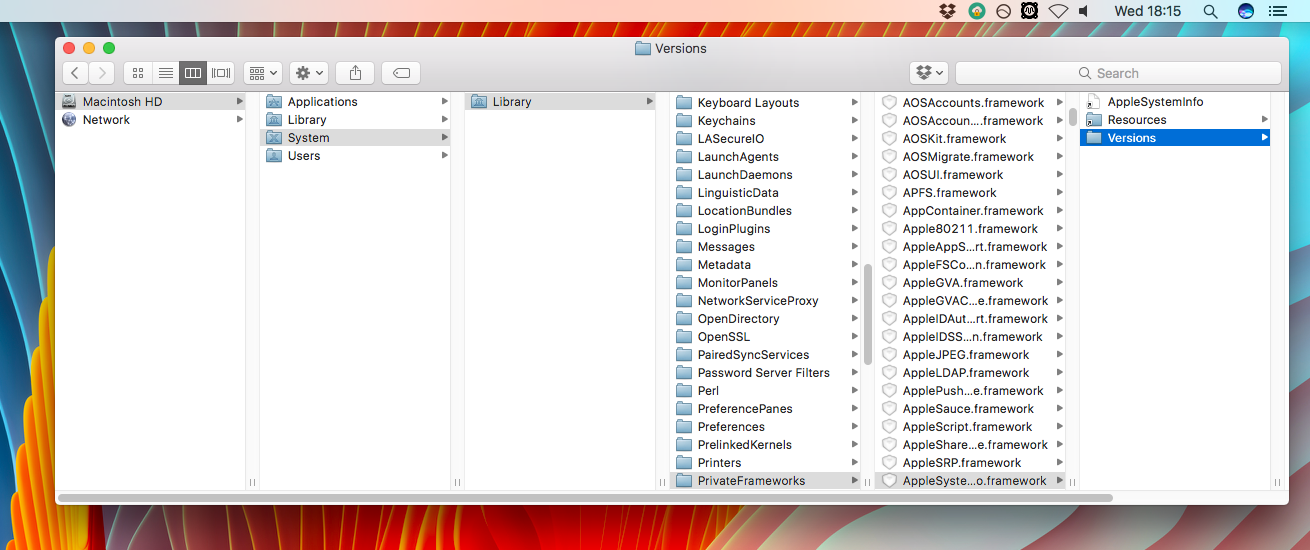
3) Inside this framework, navigate to /Versions/A/Resources/. Then find the folder for your system language. If yours is English, go to English.lproj.
4) Inside that folder, find the file AppleSystemInfo.strings. Copy the file, and paste one somewhere as a backup. Then paste another copy to your Desktop to edit. Do not try to edit the file in place, it will not work.
5) Right-click the copy on your Desktop and open it with your editor of choice.
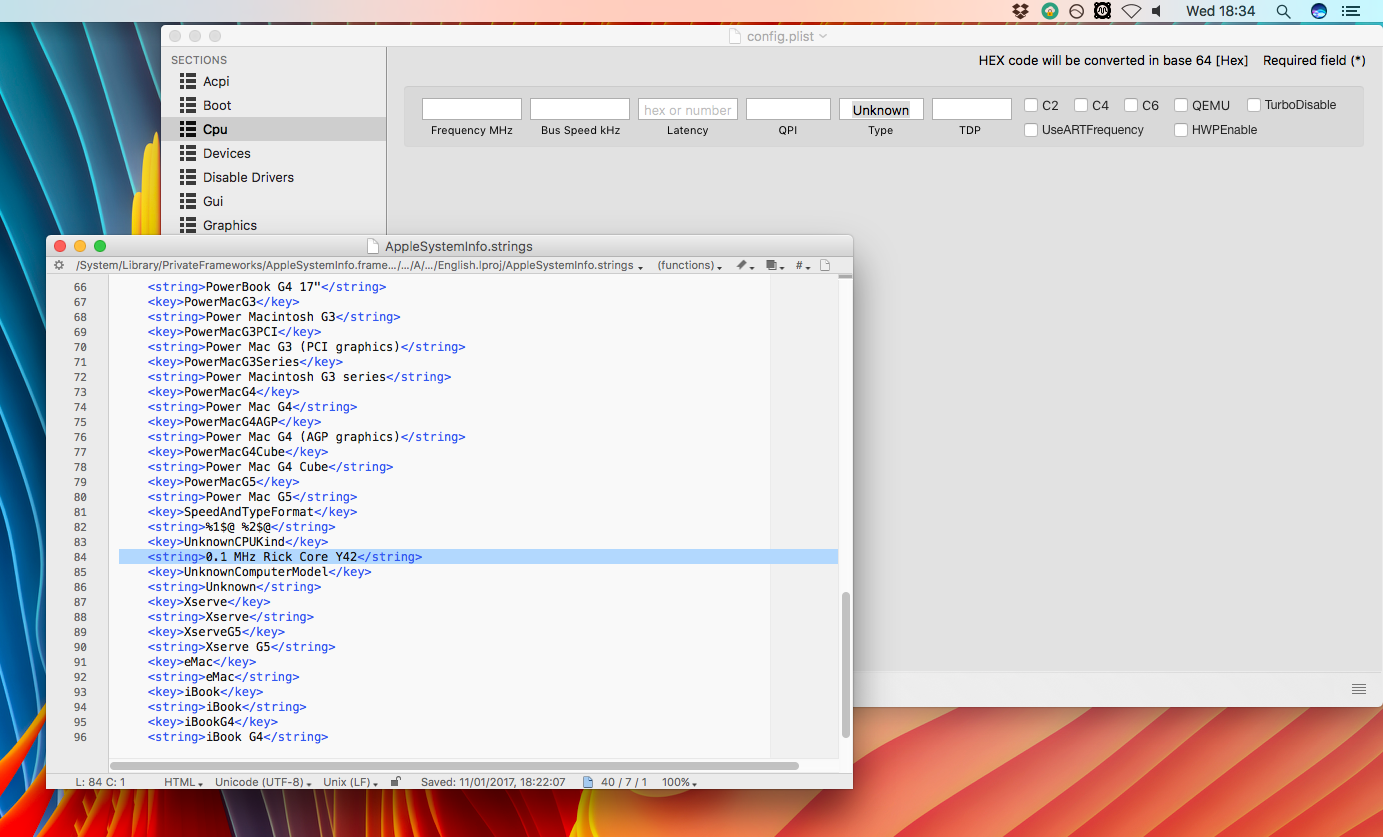
6) In the editor, look through the file for the UnknownCPUKind entry which describes non-standard CPU models. Mine originally said “Unknown”.
7) Edit the text in that line to report your preferred CPU model and speed, or whatever text you like. Save the document and exit.
8) Hackintosh only, Mac users skip to Step 9.
Open up your Clover config.plist, and under the CPU section set the Type to Unknown. I used Clover Configurator for this step but it can be done manually too.
9) Drag the edited file from your Desktop back into the folder we got it from to overwrite the original. Authenticate with your user password if required.
10) After a reboot the changes should be visible in the “About This Mac” window.
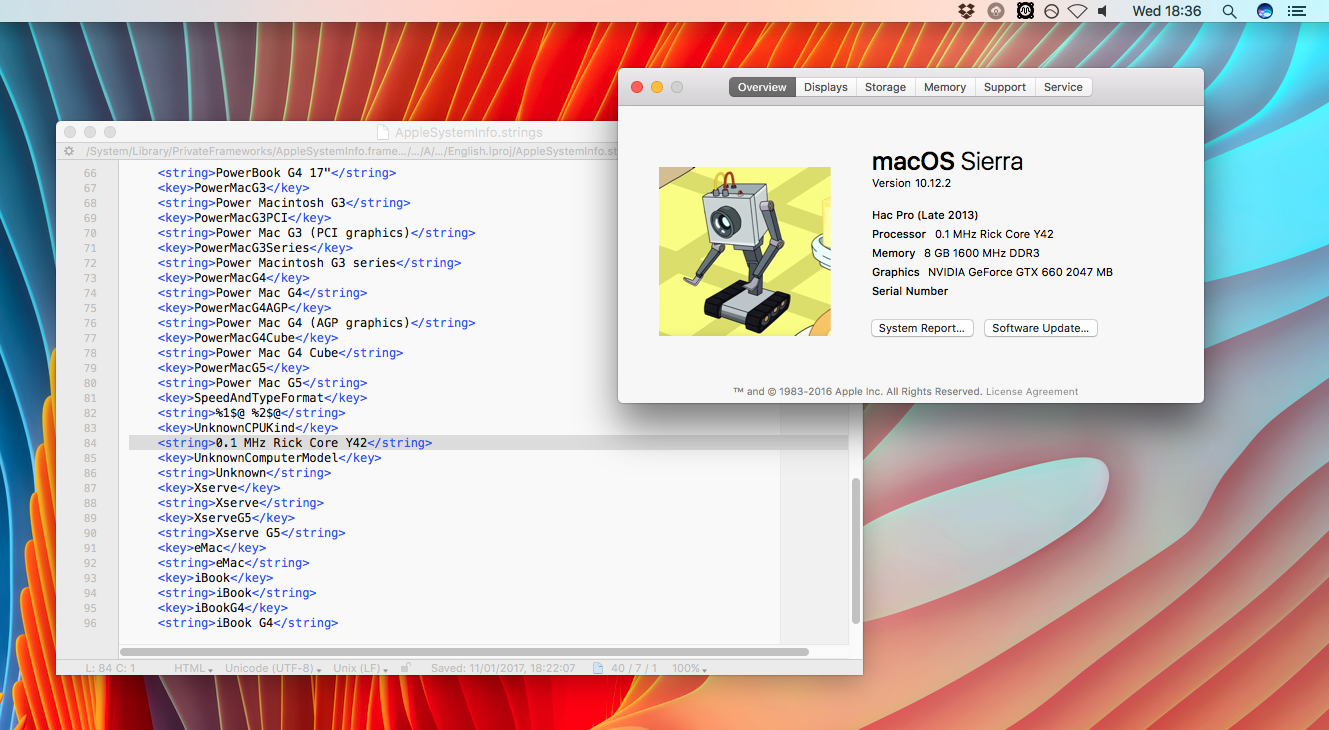
And there you have it! My under-powered robot’s CPU is now correctly reported. Remember this section may not work for you, especially on a real Mac, as it will probably not default to the “Unknown CPU” field. Setting the CPU type to “Unknown” in Clover on a Hackintosh forces it to use the field, and therefore work.
For future reference, the full file path for the document to edit is:
/System/Library/PrivateFrameworks/AppleSystemInfo.framework/Versions/A/Resources/YOUR_SYSTEM_LANGUAGE.lproj/AppleSystemInfo.strings
To revert, simply replace your backup of the original file, overwriting your edited .strings file.
Changing the Displays image
This edit is one of the most useful, as many people use external displays, and they come from many third-parties. Consequently, a generic icon is used by Apple in the “Displays” section of “About This Mac”, and in the “Displays” section of “System Preferences”. Many people will wish to change this to an image of their specific external display model.
1) Open a Finder window, and navigate to the System folder. From there, open Library, then CoreServices, and locate the file CoreTypes.bundle.

2) Right-click CoreTypes.bundle and select Show Package Contents. From there, go to /Contents/Resources, and find the file called public.generic-lcd.icns.
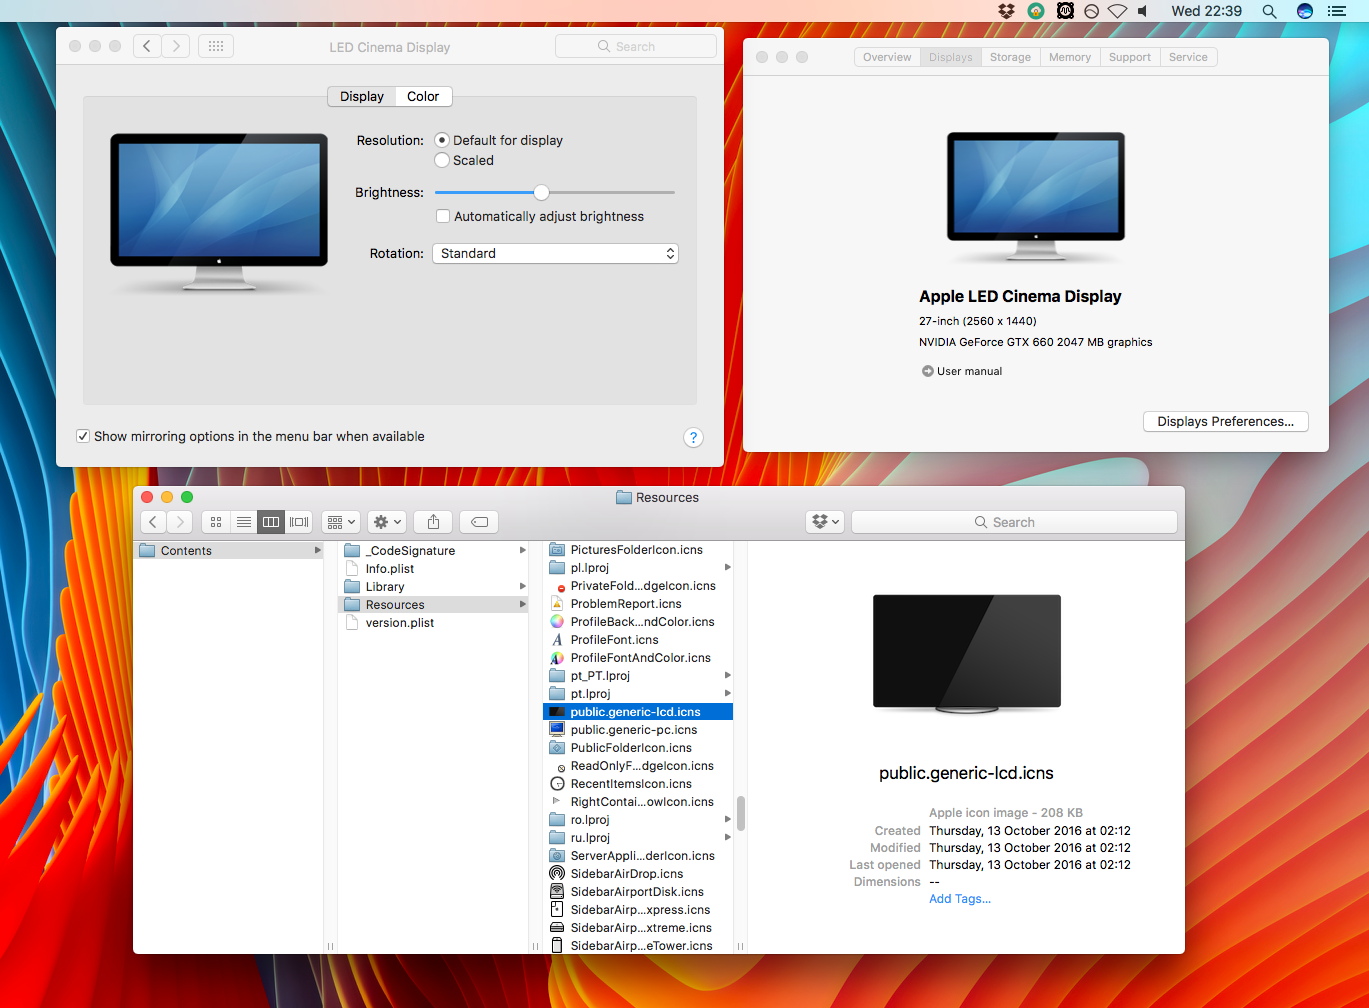
3) Make a backup of this file somewhere safe, and then place an image of your own display, or whatever image you like, into that folder. It will replace the generic display image. Make sure the file you place there is called public.generic-lcd.icns. The file must be in .icns format. I use Image2Icon for this; it is available on the App Store for free.
4) After a logout/login or reboot, your changes should be visible.
For future reference, the full file path for the document to edit is:
/System/Library/CoreServices/CoreTypes.bundle/Contents/Resources/public.generic-lcd.icns
To revert, simply replace your backup of the original file, overwriting your edited .icns file.
Done!
As you can see by browsing through, many other basic system images and pieces of text are contained in the files and folders we have been editing in this article. With a bit of digging you can find many other useful things to change in the locations we have been looking.
Just make sure to always make a backup of any files before changing them, and preferably to have a clone of your whole system too. That way if you delete a truly crucial file you can boot from the clone and replace it.
Was this guide helpful to you? Did you customize “About This Mac” on a Mac or a Hackintosh? Do you know of any other similar customisations which I missed off the list? Let me know if you do!